How to Install LEMP Stack on Debian 12
LEMP is a combination of free, open source software. The acronym LEMP refers to the first letters of Linux (Operating system), Nginx Server, MySQL (database software), and PHP, PERL or Python, principal components to build a viable general purpose web server.
Installing Nginx Web Server
To install the Nginx package, run the below command,
apt update

apt install nginx
Output:
root@server:~# apt install nginx
Reading package lists... Done
Building dependency tree... Done
Reading state information... Done
The following additional packages will be installed:
nginx-common
Suggested packages:
fcgiwrap nginx-doc ssl-cert
The following NEW packages will be installed:
nginx nginx-common
0 upgraded, 2 newly installed, 0 to remove and 0 not upgraded.
Once the Nginx installation is complete, check the status of Nginx using the following systemctl command.
systemctl status nginxOutput:
root@server:~# systemctl status nginx
● nginx.service - A high performance web server and a reverse proxy server
     Loaded: loaded (/lib/systemd/system/nginx.service; enabled; preset: enable>
     Active: active (running) since Tue 2023-06-13 12:29:19 EDT; 11s ago
       Docs: man:nginx(8)
    Process: 1055 ExecStartPre=/usr/sbin/nginx -t -q -g daemon on; master_proce>
    Process: 1059 ExecStart=/usr/sbin/nginx -g daemon on; master_process on; (c>
   Main PID: 1105 (nginx)
      Tasks: 5 (limit: 2306)
     Memory: 4.2M
        CPU: 101ms
     CGroup: /system.slice/nginx.service
             ├─1105 "nginx: master process /usr/sbin/nginx -g daemon on; master>
             ├─1107 "nginx: worker process"
             ├─1108 "nginx: worker process"
             ├─1109 "nginx: worker process"
             └─1110 "nginx: worker process"

Jun 13 12:29:19 server systemd[1]: Starting nginx.service - A high performance >
Jun 13 12:29:19 server systemd[1]: Started nginx.service - A high performance w>
Check if Nginx is properly installed by opening a browser and navigating to URL http://SERVER_IP/
http://SERVER_IP/Replace Server_IP with actual IP address of the server.
If nginx has been installed and is running successfully, you will see the following message on your browser.
Installing MariaDB
We need to install a database system to be able to store and manage data for your website.
To install MariaDB, use the following command,
apt install mariadb-serverOutput:
rroot@server:~# apt install mariadb-server
Reading package lists... Done
Building dependency tree... Done
Reading state information... Done
The following additional packages will be installed:
  galera-4 gawk libcgi-fast-perl libcgi-pm-perl libclone-perl
  libconfig-inifiles-perl libdaxctl1 libdbd-mariadb-perl libdbi-perl
  libencode-locale-perl libfcgi-bin libfcgi-perl libfcgi0ldbl libgpm2
  libhtml-parser-perl libhtml-tagset-perl libhtml-template-perl
  libhttp-date-perl libhttp-message-perl libio-html-perl
  liblwp-mediatypes-perl liblzo2-2 libmariadb3 libmpfr6 libncurses6 libndctl6
  libpmem1 libregexp-ipv6-perl libsigsegv2 libsnappy1v5 libterm-readkey-perl
  libtimedate-perl liburi-perl mariadb-client mariadb-client-core
  mariadb-common mariadb-plugin-provider-bzip2 mariadb-plugin-provider-lz4
  mariadb-plugin-provider-lzma mariadb-plugin-provider-lzo
  mariadb-plugin-provider-snappy mariadb-server-core mysql-common psmisc pv
  rsync socat
Suggested packages:
  gawk-doc libmldbm-perl libnet-daemon-perl libsql-statement-perl gpm
  libdata-dump-perl libipc-sharedcache-perl libbusiness-isbn-perl libwww-perl
  mailx mariadb-test netcat-openbsd doc-base python3-braceexpand
The following NEW packages will be installed:
  galera-4 gawk libcgi-fast-perl libcgi-pm-perl libclone-perl
  libconfig-inifiles-perl libdaxctl1 libdbd-mariadb-perl libdbi-perl
  libencode-locale-perl libfcgi-bin libfcgi-perl libfcgi0ldbl libgpm2
  libhtml-parser-perl libhtml-tagset-perl libhtml-template-perl
  libhttp-date-perl libhttp-message-perl libio-html-perl
  liblwp-mediatypes-perl liblzo2-2 libmariadb3 libmpfr6 libncurses6 libndctl6
  libpmem1 libregexp-ipv6-perl libsigsegv2 libsnappy1v5 libterm-readkey-perl
  libtimedate-perl liburi-perl mariadb-client mariadb-client-core
  mariadb-common mariadb-plugin-provider-bzip2 mariadb-plugin-provider-lz4
  mariadb-plugin-provider-lzma mariadb-plugin-provider-lzo
  mariadb-plugin-provider-snappy mariadb-server mariadb-server-core
  mysql-common psmisc pv rsync socat
0 upgraded, 48 newly installed, 0 to remove and 0 not upgraded.
Need to get 20.4 MB of archives.
After this operation, 197 MB of additional disk space will be used.
Do you want to continue? [Y/n] Y
Get:1 http://deb.debian.org/debian bookworm/main amd64 libmpfr6 amd64 4.2.0-1 [7                                                                                                                               01 kB]
Once the Mariadb-server installation is complete, check the status of mariadb using the following systemctl command.
systemctl status mariadbOutput:
root@server:~# systemctl status mariadb
● mariadb.service - MariaDB 10.11.3 database server
         Loaded: loaded (/lib/systemd/system/mariadb.service; enabled; preset: enab>
         Active: active (running) since Tue 2023-06-13 15:50:56 EDT; 30s ago
           Docs: man:mariadbd(8)
                 https://mariadb.com/kb/en/library/systemd/
       Main PID: 1774 (mariadbd)
         Status: "Taking your SQL requests now..."
          Tasks: 17 (limit: 2306)
         Memory: 165.8M
            CPU: 1.296s
         CGroup: /system.slice/mariadb.service
                 └─1774 /usr/sbin/mariadbd

Jun 13 15:50:56 server mariadbd[1774]: 2023-06-13 15:50:56 0 [Note] InnoDB: log>
Jun 13 15:50:56 server mariadbd[1774]: 2023-06-13 15:50:56 0 [Note] InnoDB: Loa>
To modify the default settings of the MariaDB installation, run the below command. This will prompt you with several options regarding the installation.
mysql_secure_installationOutput:
root@server:~# mysql_secure_installation

NOTE: RUNNING ALL PARTS OF THIS SCRIPT IS RECOMMENDED FOR ALL MariaDB
      SERVERS IN PRODUCTION USE!  PLEASE READ EACH STEP CAREFULLY!

In order to log into MariaDB to secure it, we'll need the current
password for the root user. If you've just installed MariaDB, and
haven't set the root password yet, you should just press enter here.

Enter current password for root (enter for none):
OK, successfully used password, moving on...

Setting the root password or using the unix_socket ensures that nobody
can log into the MariaDB root user without the proper authorisation.

You already have your root account protected, so you can safely answer 'n'.

Switch to unix_socket authentication [Y/n] y
Enabled successfully!
Reloading privilege tables..
 ... Success!

You already have your root account protected, so you can safely answer 'n'.

Change the root password? [Y/n] n
 ... skipping.

By default, a MariaDB installation has an anonymous user, allowing anyone
to log into MariaDB without having to have a user account created for
them.  This is intended only for testing, and to make the installation
go a bit smoother.  You should remove them before moving into a
production environment.

Remove anonymous users? [Y/n] y
 ... Success!

Normally, root should only be allowed to connect from 'localhost'.  This
ensures that someone cannot guess at the root password from the network.

Disallow root login remotely? [Y/n] y
 ... Success!

By default, MariaDB comes with a database named 'test' that anyone can
access.  This is also intended only for testing, and should be removed
before moving into a production environment.

Remove test database and access to it? [Y/n] y
 - Dropping test database...
 ... Success!
 - Removing privileges on test database...
 ... Success!

Reloading the privilege tables will ensure that all changes made so far
will take effect immediately.

Reload privilege tables now? [Y/n] y
 ... Success!

Cleaning up...

All done!  If you've completed all of the above steps, your MariaDB
installation should now be secure.

Thanks for using MariaDB!
Installing PHP-FPM (Fast Process Manager)
To install PHP-FPM version 7.4 and a PHP module to communicate with a MariaDB/MySQL database system.
apt install php-fpm php-mysqliOutput:
root@server:~# apt install php-fpm php-mysqli
Reading package lists... Done
Building dependency tree... Done
Reading state information... Done
Note, selecting 'php8.2-mysql' instead of 'php-mysqli'
The following additional packages will be installed:
  libsodium23 php-common php8.2-cli php8.2-common php8.2-fpm php8.2-opcache php8.2-readline
Suggested packages:
  php-pear
The following NEW packages will be installed:
  libsodium23 php-common php-fpm php8.2-cli php8.2-common php8.2-fpm php8.2-mysql php8.2-opcache php8.2-readline
0 upgraded, 9 newly installed, 0 to remove and 0 not upgraded.
Need to get 4,791 kB of archives.
After this operation, 22.2 MB of additional disk space will be used.
Do you want to continue? [Y/n] Y
Get:1 http://deb.debian.org/debian bookworm/main amd64 libsodium23 amd64 1.0.18-1 [161 kB]
Once the PHP-FPM installation is complete,Check the status of PHP-FPM using the following systemctl command.
systemctl status php8.2-fpmOutput:
root@server:~# systemctl status php8.2-fpm
● php8.2-fpm.service - The PHP 8.2 FastCGI Process Manager
     Loaded: loaded (/lib/systemd/system/php8.2-fpm.service; enabled; preset: enabled)
     Active: active (running) since Tue 2023-06-13 16:17:34 EDT; 13min ago
       Docs: man:php-fpm8.2(8)
    Process: 9384 ExecStartPost=/usr/lib/php/php-fpm-socket-helper install /run/php/php-fpm.sock /etc/php/8.2/fpm/pool.d/www.conf 8>
   Main PID: 9380 (php-fpm8.2)
     Status: "Processes active: 0, idle: 2, Requests: 1, slow: 0, Traffic: 0req/sec"
      Tasks: 3 (limit: 2306)
     Memory: 10.0M
        CPU: 330ms
     CGroup: /system.slice/php8.2-fpm.service
             ├─9380 "php-fpm: master process (/etc/php/8.2/fpm/php-fpm.conf)"
             ├─9382 "php-fpm: pool www"
             └─9383 "php-fpm: pool www"

Jun 13 16:17:34 server systemd[1]: Starting php8.2-fpm.service - The PHP 8.2 FastCGI Process Manager...
Jun 13 16:17:34 server systemd[1]: Started php8.2-fpm.service - The PHP 8.2 FastCGI Process Manager.
Next,We need to secure PHP-FPM by making some changes in the configuration file /etc/php/7.4/fpm/php.ini.
vi /etc/php/8.2/fpm/php.iniLook for the ;cgi.fix_pathinfo=1 uncomment it by removing the ; and set its value to 0. This prevents Nginx from allowing non-PHP files to be executed as PHP.
cgi.fix_pathinfo=0Nginx default server block configuration file /etc/nginx/sites-available/default to test it.
vi /etc/nginx/sites-available/default Uncomment the following section(by removing # symbol) to pass PHP scripts to FastCGI server.
location ~ \.php$ {
include snippets/fastcgi-php.conf;
fastcgi_pass unix:/run/php/php8.2-fpm.sock;
}
Test if the Nginx configuration structure is OK, using the following command.
nginx -tOutput:
root@server:~# nginx -t
nginx: the configuration file /etc/nginx/nginx.conf syntax is ok
nginx: configuration file /etc/nginx/nginx.conf test is successful
root@server:~#
If the Nginx configuration is OK, to apply the recently made changes by restart the php7.4-fpm and nginx services.
systemctl restart php8.2-fpm

systemctl restart nginx
Testing PHP-FPM Processing on Nginx
After configuring PHP-FPM and Nginx to work together, Need to test if two services can process and serve PHP pages to clients. To do that, create a simple PHP script in your web DocumentRoot as follows.
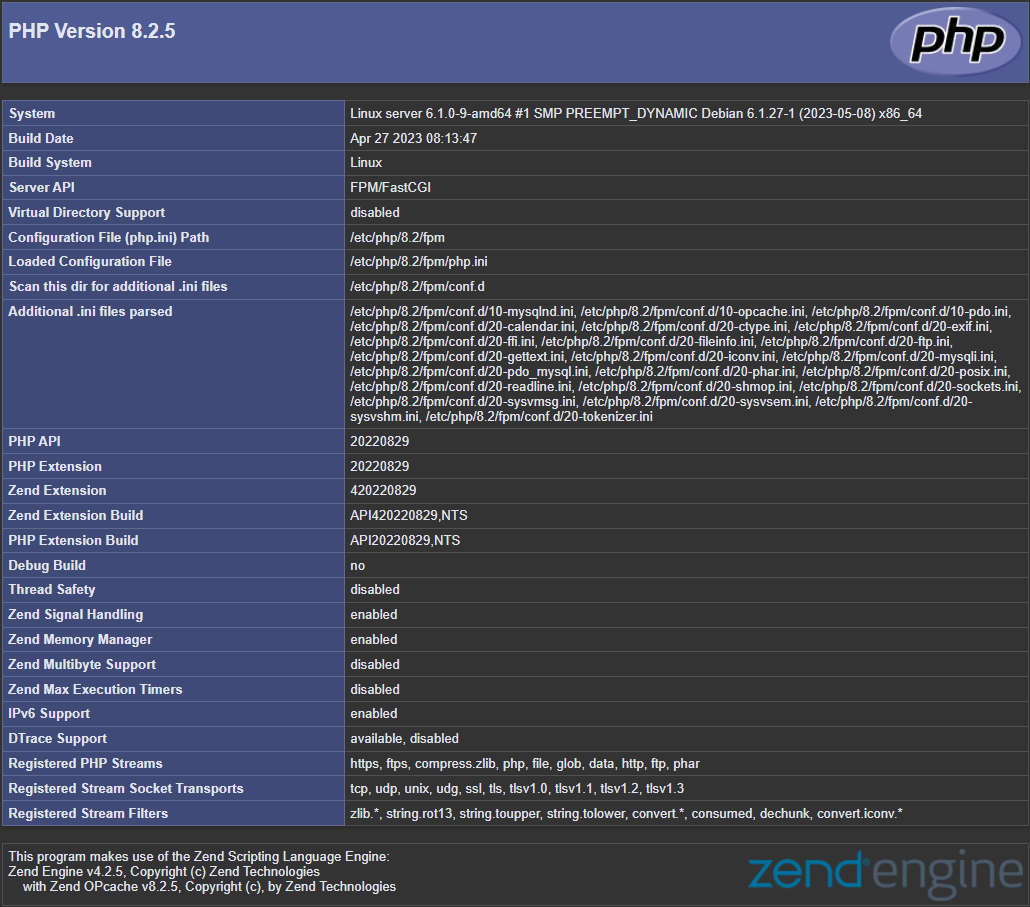
echo "<?php phpinfo(); ?>" | tee /var/www/html/info.phpFinally, open a browser and type the following address to see the PHP configurations on the system as generated by the phpinfo() function.
http://SERVER_IP/info.phpNow again, access http://localhost/info.php or http://yourserver-ip-address/info.php. You should see a page similar to below one.
Done!