How to Install Drupal on Rocky Linux 9
Drupal is a Content Management System (CMS) to maintain and publish an internet website. It's an open-source content management system (CMS) with a large, supportive community. It's used by millions of people and organizations around the globe to build and maintain their websites.
Update the system.
First, we will update the system to the latest with the following commands,
dnf update -y Install the MariaDB Server
Install the MariaDB Server by running the following command,
dnf -y install mariadbOutput:
[root@vps ~]# dnf -y install mariadb
Last metadata expiration check: 0:11:41 ago on Wednesday 24 November 2021 02:16:41 PM EST.
Dependencies resolved.
===================================================================
 Package                 Arch   Version            Repo       Size
===================================================================
Installing group/module packages:
 mariadb-server          x86_64 3:10.3.28-1.module_el8.3.0+757+d382997d
                                                   appstream  16 M
Installing dependencies:
 libaio                  x86_64 0.3.112-1.el8      baseos     33 k
 mariadb                 x86_64 3:10.3.28-1.module_el8.3.0+757+d382997d
                                                   appstream 6.0 M
 mariadb-common          x86_64 3:10.3.28-1.module_el8.3.0+757+d382997d
                                                   appstream  64 k
 mariadb-connector-c     x86_64 3.1.11-2.el8_3     appstream 200 k
 mariadb-connector-c-config
                         noarch 3.1.11-2.el8_3     appstream  15 k
 mariadb-errmsg          x86_64 3:10.3.28-1.module_el8.3.0+757+d382997d
                                                   appstream 234 k
Enable MariaDB using the below command,
systemctl enable --now mariadbVerify the status of MariaDB using the below command.
systemctl status mariadb Output:
[root@vps ~]# systemctl status mariadb
● mariadb.service - MariaDB 10.3 database server
   Loaded: loaded (/usr/lib/systemd/system/mariadb.service; enable>
   Active: active (running) since Wed 2021-11-24 14:30:10 EST; 4s >
     Docs: man:mysqld(8)
           https://mariadb.com/kb/en/library/systemd/
  Process: 62687 ExecStartPost=/usr/libexec/mysql-check-upgrade (c>
  Process: 62552 ExecStartPre=/usr/libexec/mysql-prepare-db-dir ma>
  Process: 62528 ExecStartPre=/usr/libexec/mysql-check-socket (cod>
 Main PID: 62656 (mysqld)
   Status: "Taking your SQL requests now..."
    Tasks: 30 (limit: 17401)
   Memory: 82.7M
   CGroup: /system.slice/mariadb.service
           └─62656 /usr/libexec/mysqld --basedir=/usr
Secure your database server by setting the root password, disabling root remote logins, and removing test databases.
mysql_secure_installation Output:
[root@vps ~]# mysql_secure_installation

NOTE: RUNNING ALL PARTS OF THIS SCRIPT IS RECOMMENDED FOR ALL MariaDB
      SERVERS IN PRODUCTION USE!  PLEASE READ EACH STEP CAREFULLY!

In order to log into MariaDB to secure it, we'll need the current
password for the root user.  If you've just installed MariaDB, and
you haven't set the root password yet, the password will be blank,
so you should just press enter here.

Enter current password for root (enter for none):
OK, successfully used password, moving on...

Setting the root password ensures that nobody can log into the MariaDB
root user without the proper authorisation.

Set root password? [Y/n]
New password:
Re-enter new password:
Password updated successfully!
Reloading privilege tables..
 ... Success!

By default, a MariaDB installation has an anonymous user, allowing anyone
to log into MariaDB without having to have a user account created for
them.  This is intended only for testing, and to make the installation
go a bit smoother.  You should remove them before moving into a
production environment.

Remove anonymous users? [Y/n] Y
 ... Success!

Normally, root should only be allowed to connect from 'localhost'.  This
ensures that someone cannot guess at the root password from the network.

Disallow root login remotely? [Y/n] Y
 ... Success!

By default, MariaDB comes with a database named 'test' that anyone can
access.  This is also intended only for testing, and should be removed
before moving into a production environment.

Remove test database and access to it? [Y/n] Y
 - Dropping test database...
 ... Success!
 - Removing privileges on test database...
 ... Success!

Reloading the privilege tables will ensure that all changes made so far
will take effect immediately.

Reload privilege tables now? [Y/n] Y
 ... Success!

Cleaning up...

All done!  If you've completed all of the above steps, your MariaDB
installation should now be secure.

Thanks for using MariaDB!
Create Database for Drupal
Create a database for Drupal and grant all privileges to the Drupal user.
mysql -u root -p

CREATE DATABASE drupal;

GRANT ALL PRIVILEGES ON drupal.* TO drupal@'localhost' IDENTIFIED BY "StrongPassword";

FLUSH PRIVILEGES;

exit
Note: Replace StrongPassword with a strong and secure password.
Output:
[root@vps ~]# mysql -u root -p
Enter password:
Welcome to the MariaDB monitor.  Commands end with ; or \g.
Your MariaDB connection id is 16
Server version: 10.3.28-MariaDB MariaDB Server

Copyright (c) 2000, 2018, Oracle, MariaDB Corporation Ab and others.

Type 'help;' or '\h' for help. Type '\c' to clear the current input statement.

MariaDB [(none)]> CREATE DATABASE drupal;
Query OK, 1 row affected (0.001 sec)

MariaDB [(none)]> GRANT ALL PRIVILEGES ON drupal.* TO drupal@'localhost' IDENTIFIED BY "StrongPassword";
Query OK, 0 rows affected (0.001 sec)

MariaDB [(none)]>FLUSH PRIVILEGES;
Query OK, 0 rows affected (0.001 sec)

MariaDB [(none)]>exit
Bye
Install PHP and Extensions
By default, Rocky Linux 9 ships with PHP version 8.0, this version of PHP is not supported by Drupal and requires version 8.1 or higher.
For installing a later version of the PHP, Kindly refer to the following link on installing PHP 8.2.
After the PHP has been installed, verify the version of PHP with,
php -v Output:
root@vps ~]# php -v
PHP 8.2.0 (cli) (built: Dec  6 2022 14:26:47) (NTS gcc x86_64)
Copyright (c) The PHP Group
Zend Engine v4.2.0, Copyright (c) Zend Technologies
with Zend OPcache v8.2.0, Copyright (c), by Zend Technologies
Install Apache Webserver
Install the Apache Webserver by running the following command,
dnf -y install httpdOutput:
[root@server ~]# dnf -y install httpd
Last metadata expiration check: 2:00:25 ago on Thu 21 Jul 2022 09:21:04 PM CEST.
Package httpd-2.4.51-7.el9_0.x86_64 is already installed.
Dependencies resolved.
Nothing to do.
Complete!
Increase the PHP Memory limit, edit the PHP Configuration file
vi /etc/php.iniand then find and replace the memory_limit variable with the following value,
memory_limit = 256MStart PHP and httpd services,
systemctl enable --now httpd If firewalld service running open port for 80,
firewall-cmd --add-service={http,https} --permanent

firewall-cmd --reload
Download and Install Drupal
Download and install Drupal by running the following command,
dnf install -y wget

wget https://www.drupal.org/download-latest/tar.gz -O drupal.tar.gz
Extract the downloaded file,
dnf install tar

tar xvf drupal.tar.gz

mv drupal-*/  /var/www/html/drupal
Modify the file permissions to allow Apache to access the files inside /var/www/html/drupal directory,
chown -R apache:apache /var/www/html/drupal

chmod -R 755 /var/www/html/
Create additional files for a drupal installer,
mkdir /var/www/html/drupal/sites/default/files

cp /var/www/html/drupal/sites/default/default.settings.php /var/www/html/drupal/sites/default/settings.php
If SELinux is Enabled then Fix SELinux labels,
dnf install policycoreutils-python-utils

semanage fcontext -a -t httpd_sys_rw_content_t "/var/www/html/drupal(/.*)?"

semanage fcontext -a -t httpd_sys_rw_content_t '/var/www/html/drupal/sites/default/settings.php'

semanage fcontext -a -t httpd_sys_rw_content_t '/var/www/html/drupal/sites/default/files'

restorecon -Rv /var/www/html/drupal

restorecon -v /var/www/html/drupal/sites/default/settings.php

restorecon -Rv /var/www/html/drupal/sites/default/files

chown -R apache:apache  /var/www/html/drupal
Configure Apache Web Server for Drupal.
Configure Drupal VirtualHost file /etc/httpd/conf.d/drupal.conf
vi /etc/httpd/conf.d/drupal.confCopy the below content and save it into the file.
Replace example.com with your actual domain name or the server's IP address.
<VirtualHost *:80>
     ServerName example.com
     ServerAdmin admin@example.com
     DocumentRoot /var/www/html/drupal/

     <Directory /var/www/html/drupal>
            Options Indexes FollowSymLinks
            AllowOverride All
            Require all granted
            RewriteEngine on
            RewriteBase /
            RewriteCond %{REQUEST_FILENAME} !-f
            RewriteCond %{REQUEST_FILENAME} !-d
            RewriteRule ^(.*)$ index.php?q=$1 [L,QSA]
    </Directory>
</VirtualHost>
Restart Apache web server,
systemctl restart httpdCheck and Install Drupal on Rocky Linux 9 from the browser.
Access the Drupal configuration page by using http://example.com
Replace example.com with your actual domain.
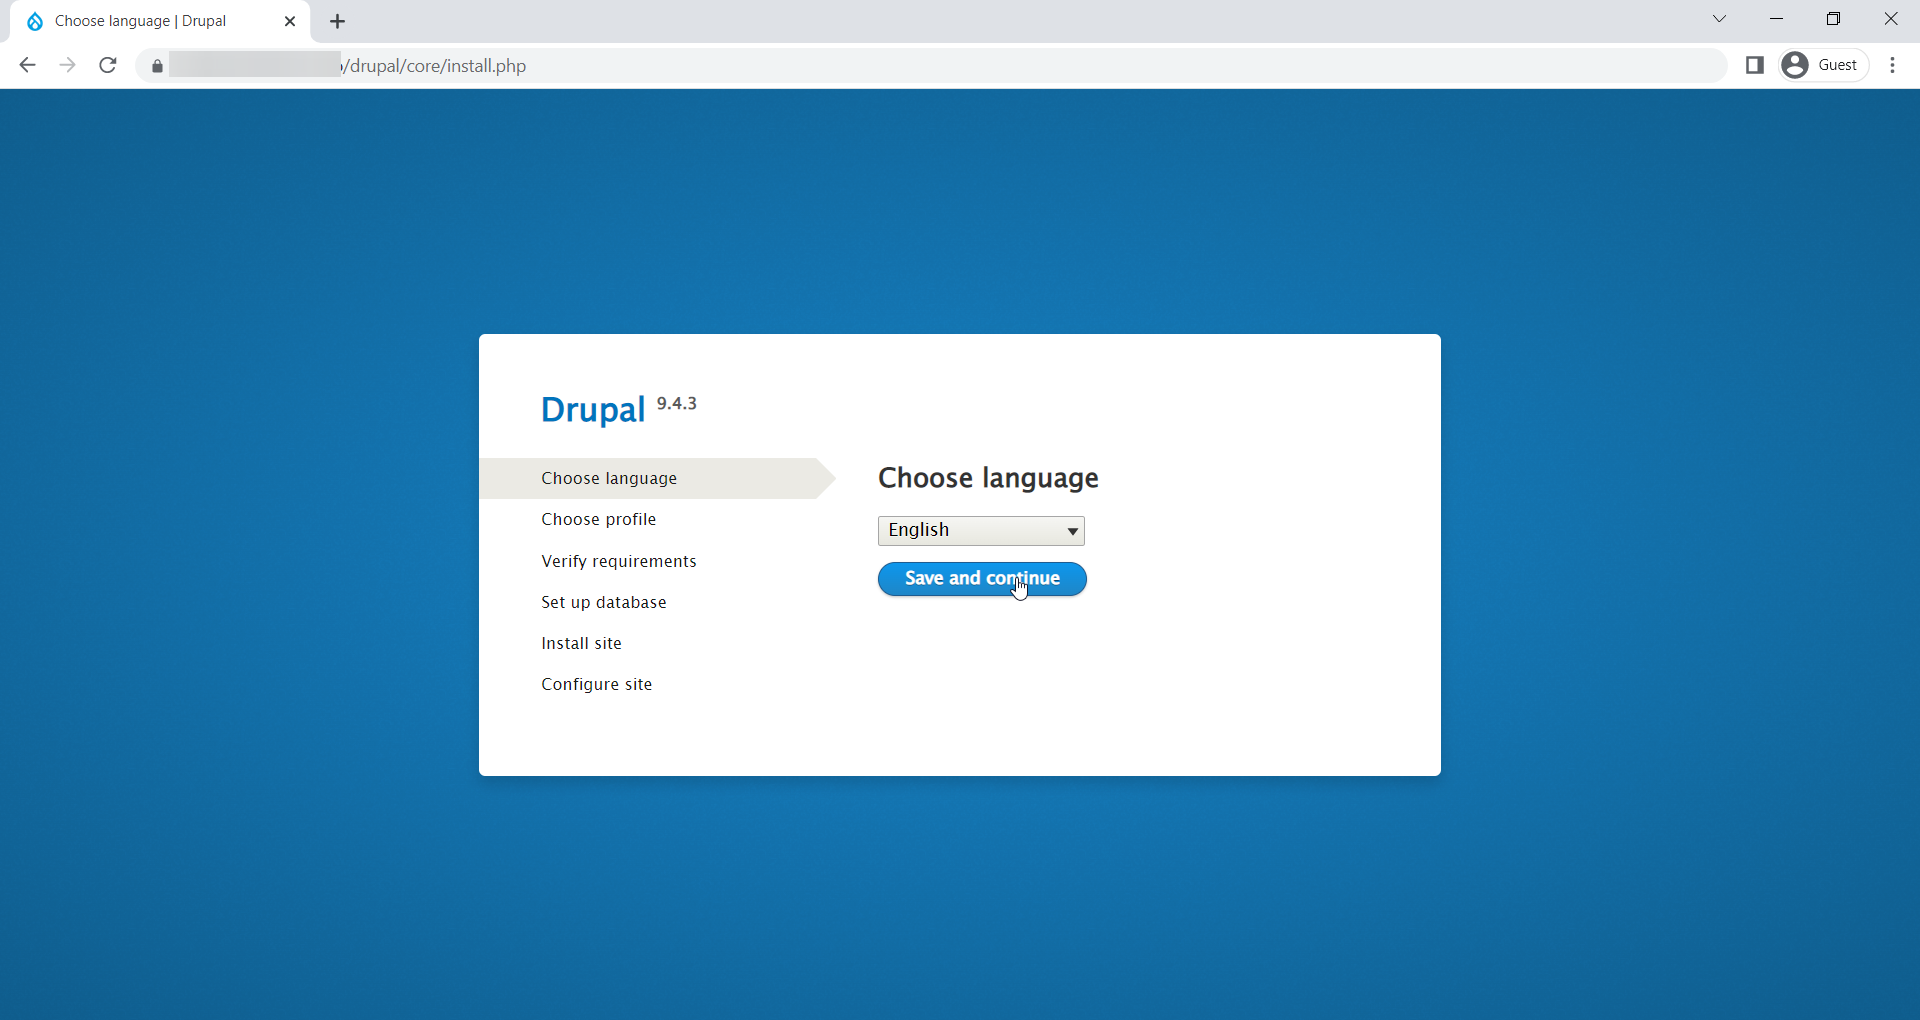
Select an installation profile.

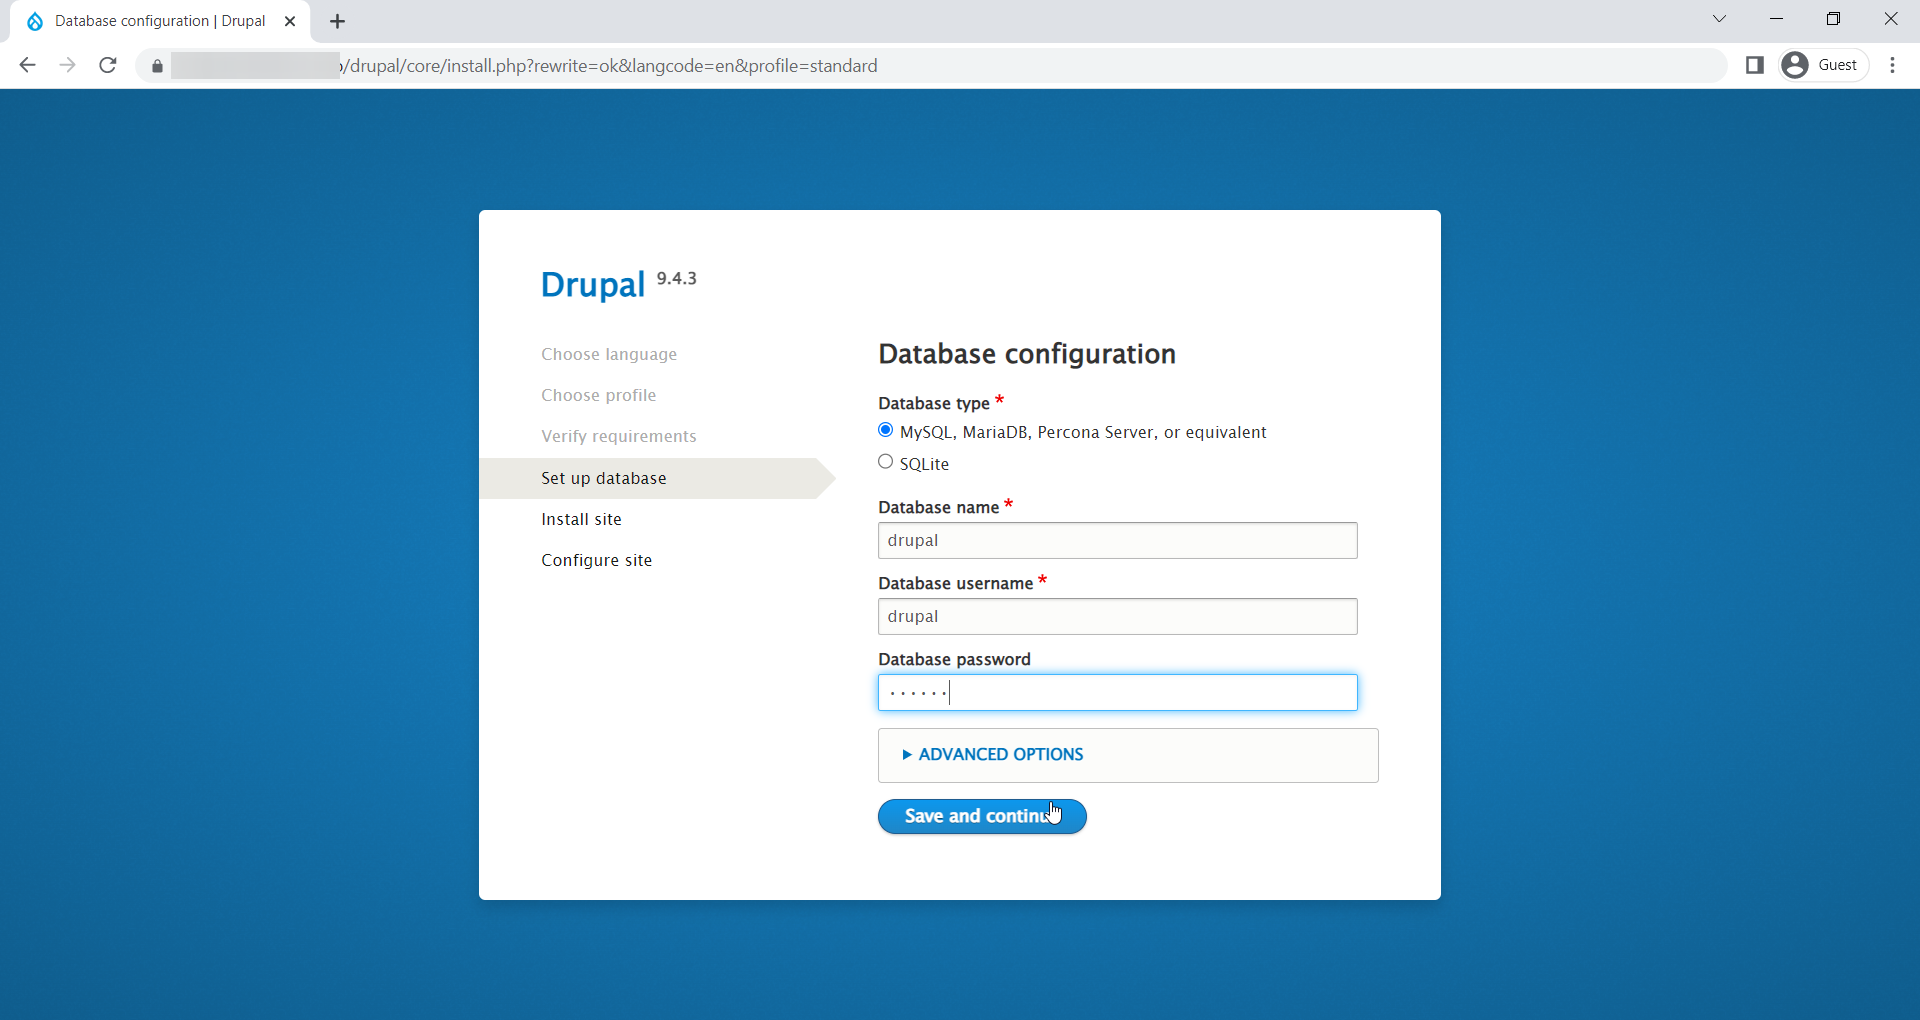
Set Database Configure for Drupal.
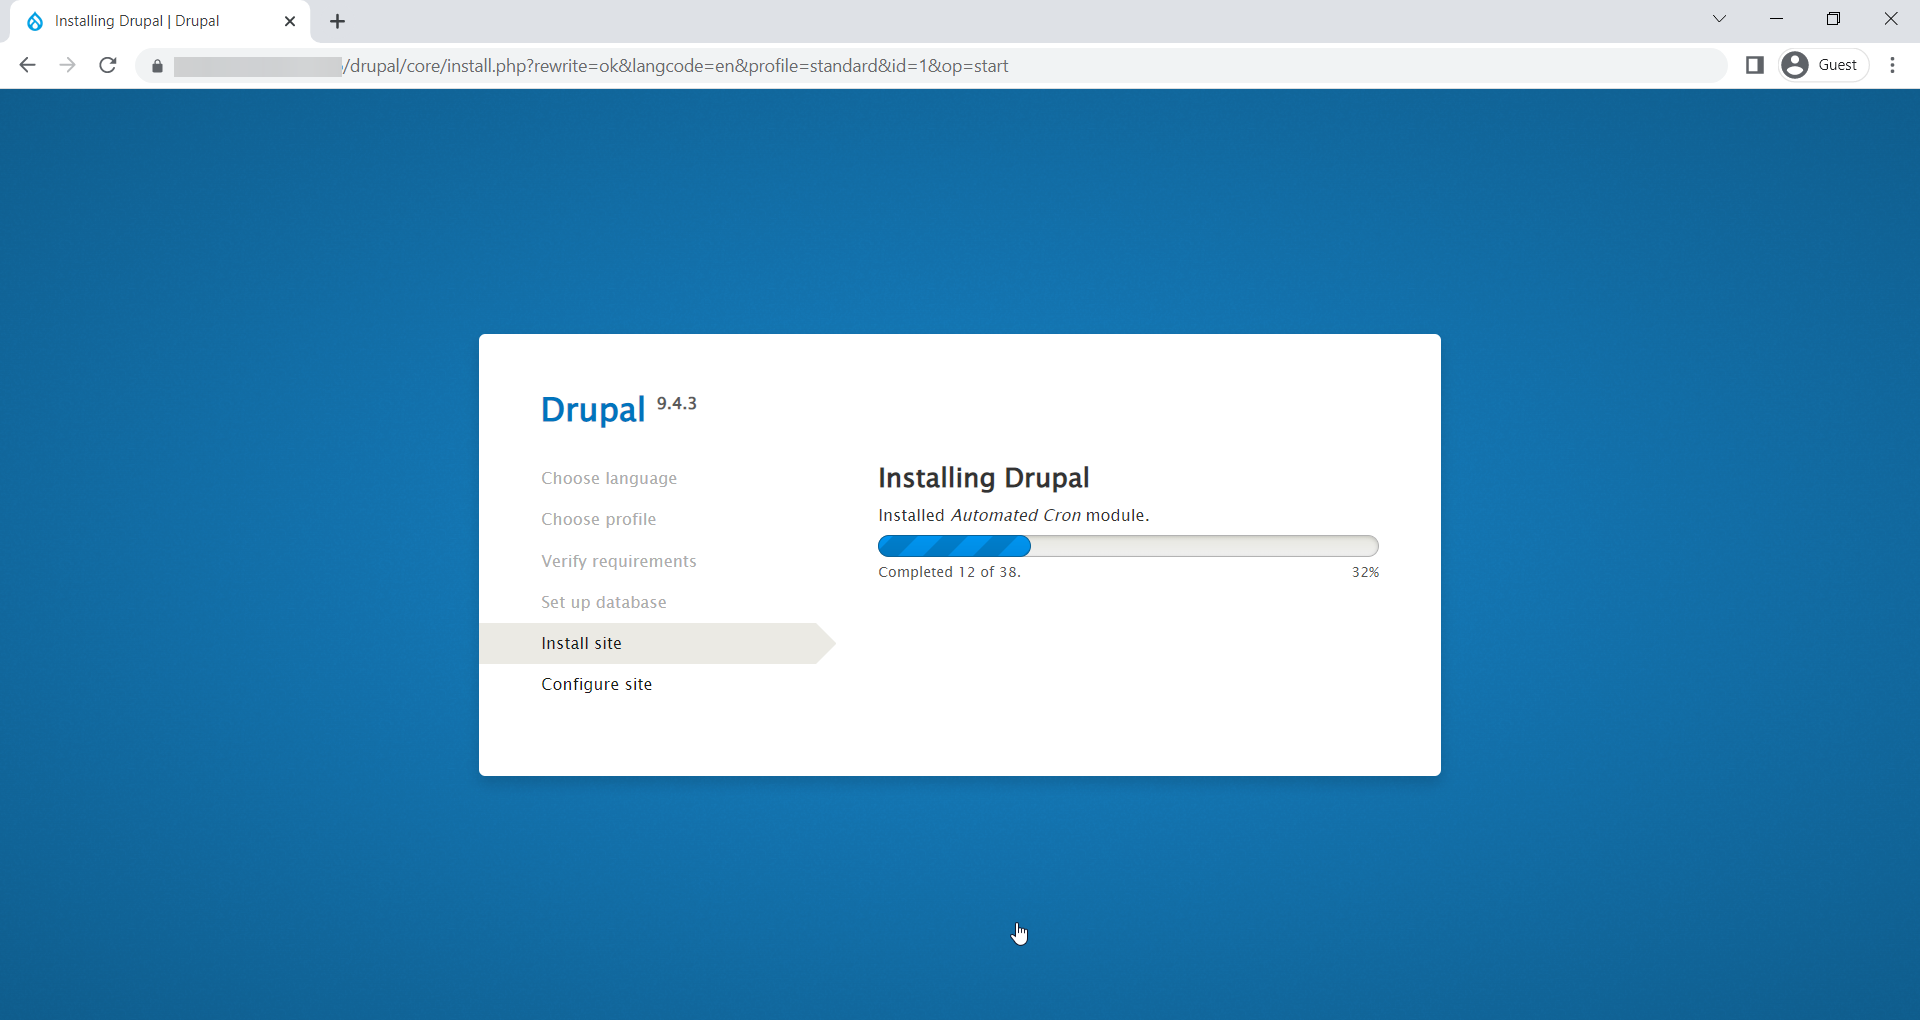
Wait for the installation to complete,
Configure your site,

You’ll get to the Drupal dashboard in a few,
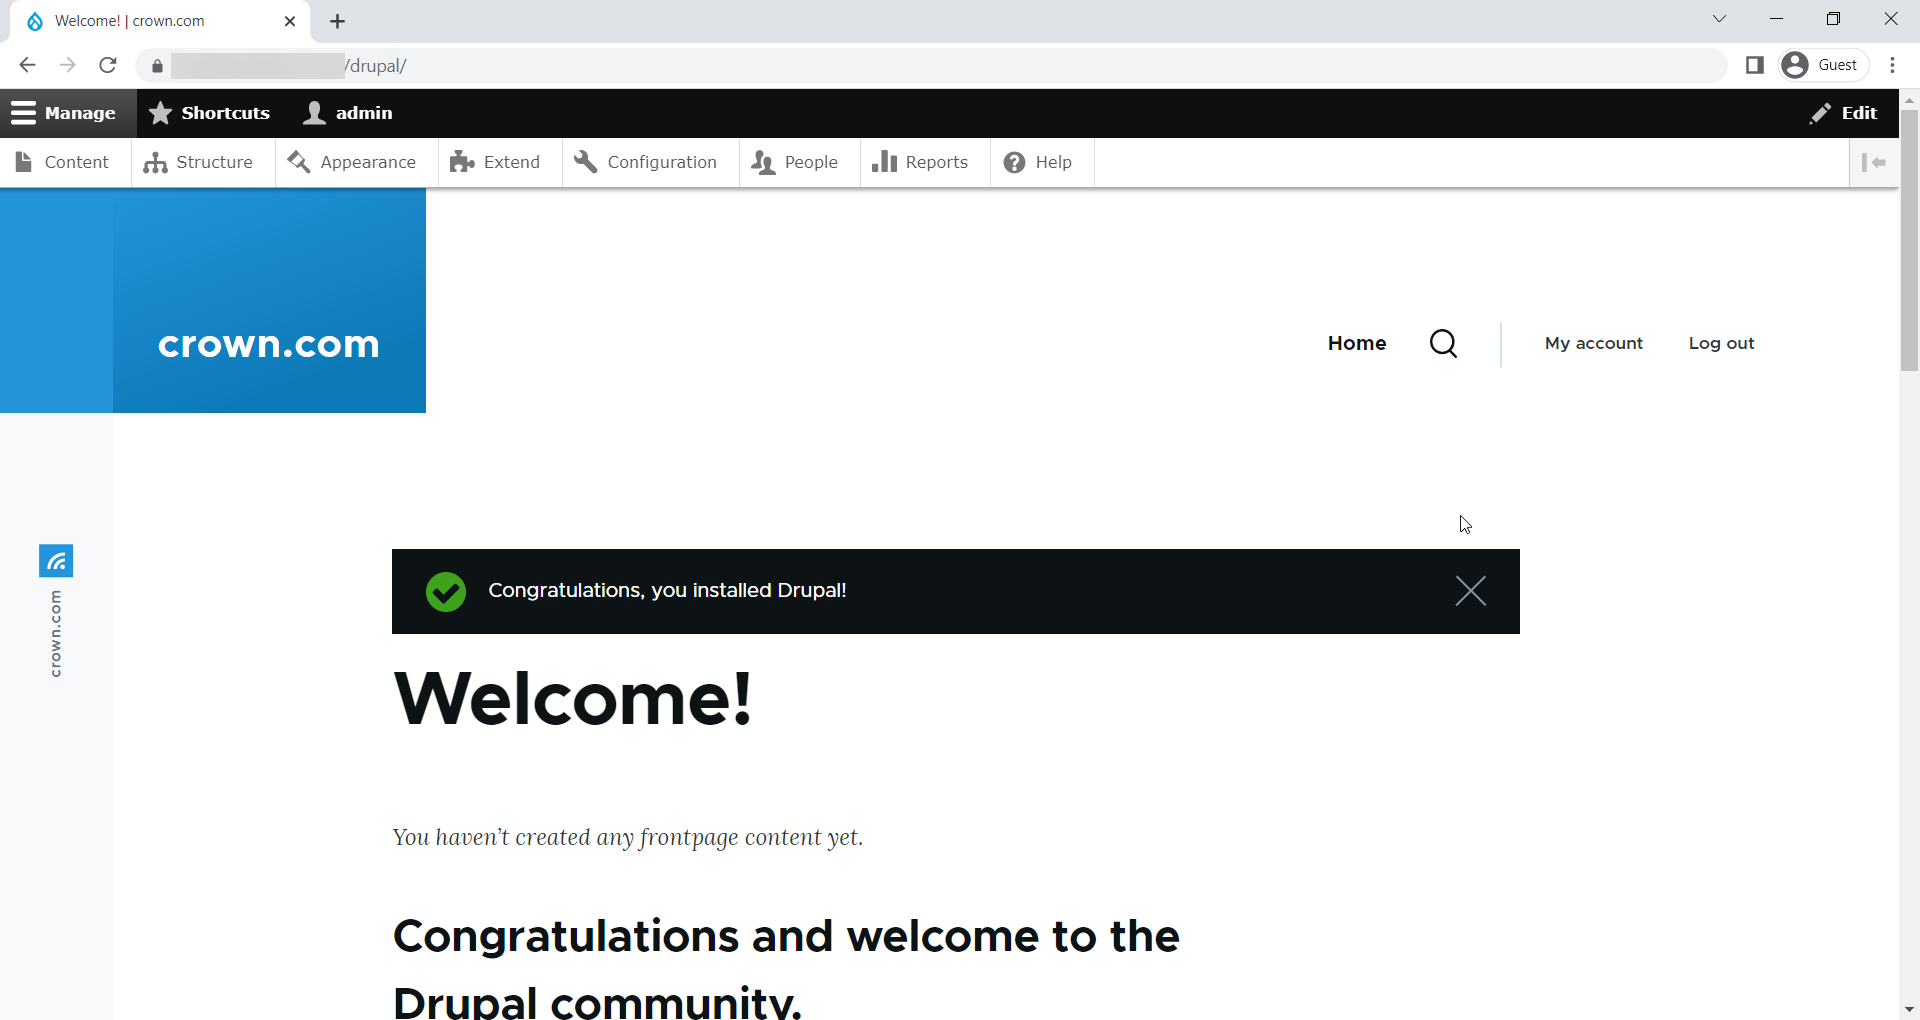
This concludes the topic of installing Drupal on the Rocky Linux 9 server.
CrownCloud - Get a SSD powered KVM VPS at $4.5/month!
Use the code WELCOME for 10% off!
1 GB RAM / 25 GB SSD / 1 CPU Core / 1 TB Bandwidth per month
Available Locations: LAX | MIA | ATL | FRA | AMS