How to Install LEMP Stack (Nginx, MariaDB, PHP7.4) on Ubuntu 21.10 Impish Indri
Updating the system
We first update the system to make sure that all our installed packages are up to date. Your Ubuntu system can be updated easily with the following command.
sudo apt update

sudo apt upgrade
Install Nginx
We will start by installing the Nginx web server. To complete the installation, use the following command.
apt install nginxOnce the installation is complete, enable Nginx (to start automatically upon system boot), start the webserver, and verify the status using the commands below.
systemctl start nginx

systemctl enable nginx

systemctl status nginx
Output:
root@server:~# systemctl status nginx
● nginx.service - A high performance web server and a reverse proxy server
 Loaded: loaded (/lib/systemd/system/nginx.service; enabled; vendor preset: enabled)
 Active: active (running) since Sun 2021-09-12 14:46:45 UTC; 13s ago
   Docs: man:nginx(8)
Main PID: 13807 (nginx)
  Tasks: 3 (limit: 3409)
 Memory: 3.2M
 CGroup: /system.slice/nginx.service
         ├─13807 nginx: master process /usr/sbin/nginx -g daemon on; master_process on;
         ├─13808 nginx: worker process
         └─13809 nginx: worker process
To check the Nginx version.
nginx -vOutput:
root@server:~# nginx -v
nginx version: nginx/1.18.0 (Ubuntu)
Verify that the webserver is running and accessible by accessing your server’s IP address.
From your browser,
http://IP_address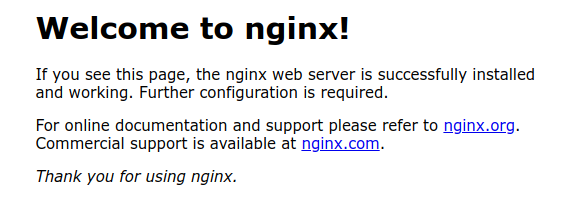
we need to make user Nginx the owner of the web directory. By default, it’s owned by the root user.
chown www-data:www-data /usr/share/nginx/html -R Install MariaDB Server
MariaDB is a popular database server. The installation is simple and requires just a few steps as shown.
sudo apt install mariadb-server mariadb-clientOutput:
root@server:~#     sudo apt install mariadb-server mariadb-client
Reading package lists... Done
Building dependency tree... Done
Reading state information... Done
The following packages were automatically installed and are no longer required:
  libapr1 libaprutil1 libaprutil1-dbd-sqlite3 libaprutil1-ldap libjansson4 liblua5.3-0
The following NEW packages will be installed:
  mariadb-client mariadb-server
Once the installation is complete, enable MariaDB (to start automatically upon system boot), start the MariaDB, and verify the status using the commands below.
systemctl start mariadb

systemctl enable mariadb

systemctl status mariadb
Output:
root@server:~# systemctl enable mariadb
Synchronizing state of mariadb.service with SysV service script with /lib/systemd/systemd-sysv-install.
Executing: /lib/systemd/systemd-sysv-install enable mariadb
systemctroot@server:~# systemctl status mariadb
● mariadb.service - MariaDB 10.5.12 database server
     Loaded: loaded (/lib/systemd/system/mariadb.service; enabled; vendor preset: enabled)
     Active: active (running) since Sun 2021-09-12 12:51:25 UTC; 2h 38min ago
       Docs: man:mariadbd(8)
             https://mariadb.com/kb/en/library/systemd/
   Main PID: 839 (mariadbd)
     Status: "Taking your SQL requests now..."
      Tasks: 8 (limit: 3409)
     Memory: 96.9M
     CGroup: /system.slice/mariadb.service
             └─839 /usr/sbin/mariadbd
Finally, you will want to secure your MariaDB installation by issuing the following command.
sudo mysql_secure_installationOutput:
user@server:~$ sudo mysql_secure_installation

NOTE: RUNNING ALL PARTS OF THIS SCRIPT IS RECOMMENDED FOR ALL MariaDB
      SERVERS IN PRODUCTION USE!  PLEASE READ EACH STEP CAREFULLY!

In order to log into MariaDB to secure it, we'll need the current
password for the root user. If you've just installed MariaDB, and
haven't set the root password yet, you should just press enter here.

Enter current password for root (enter for none):
OK, successfully used password, moving on...
Once secured, you can connect to MySQL and review the existing databases on your database server by using the following command.
sudo mysql -e "SHOW DATABASES;" -pOutput:
user@server:~$ sudo mysql -e "SHOW DATABASES;" -p
Enter password:
+--------------------+
| Database           |
+--------------------+
| information_schema |
| mysql              |
| performance_schema |
+--------------------+
Install PHP 7.4
To Install PHP 7.4, use the command.
sudo apt install php7.4 php7.4-fpm php7.4-mysql php-common php7.4-cli php7.4-common php7.4*-json php7.4-opcache php7.4-readline php7.4-mbstring php7.4-xml php7.4-gd php7.4-curlTo start php7.4-fpm.
systemctl start php7.4-fpmTo auto-start on boot php7.4-fpm.
systemctl enable php7.4-fpmTo Check status.
systemctl status php7.4-fpmOutput:
root@vps:~# systemctl status php7.4-fpm
● php7.4-fpm.service - The PHP 7.4 FastCGI Process Manager
     Loaded: loaded (/lib/systemd/system/php7.4-fpm.service; enabled; vendor preset: enabled)
     Active: active (running) since Sat 2021-11-06 03:21:08 UTC; 4min 37s ago
       Docs: man:php-fpm7.4(8)
   Main PID: 52030 (php-fpm7.4)
     Status: "Processes active: 0, idle: 2, Requests: 0, slow: 0, Traffic: 0req/sec"
      Tasks: 3 (limit: 1063)
     Memory: 9.3M
     CGroup: /system.slice/php7.4-fpm.service
             ├─52030 php-fpm: master process (/etc/php/7.4/fpm/php-fpm.conf)
             ├─52032 php-fpm: pool www
             └─52033 php-fpm: pool www

Nov 06 03:21:08 vps.server.com systemd[1]: php7.4-fpm.service: Succeeded.
Nov 06 03:21:08 vps.server.com systemd[1]: Stopped The PHP 7.4 FastCGI Process Manager.
Nov 06 03:21:08 vps.server.com systemd[1]: Starting The PHP 7.4 FastCGI Process Manager...
Nov 06 03:21:08 vps.server.com systemd[1]: Started The PHP 7.4 FastCGI Process Manager.
Setting Up Server Blocks
You need to remove the file default, located in /etc/nginx/sites-enabled.
rm /etc/nginx/sites-enabled/defaultCreate new server block file under /etc/nginx/conf.d/ directory.
nano /etc/nginx/conf.d/default.confAdd the following text into the file.
  server {
  listen 80;
  listen [::]:80;
  server_name _;
  root /var/www/html/;
  index index.php index.html index.htm index.nginx-debian.html;

  location / {
    try_files $uri $uri/ /index.php;
  }

  location ~ \.php$ {
    fastcgi_pass unix:/run/php/php7.4-fpm.sock;
    fastcgi_param SCRIPT_FILENAME $document_root$fastcgi_script_name;
    include fastcgi_params;
    include snippets/fastcgi-php.conf;
  }

 # A long browser cache lifetime can speed up repeat visits to your page
  location ~* \.(jpg|jpeg|gif|png|webp|svg|woff|woff2|ttf|css|js|ico|xml)$ {
       access_log        off;
       log_not_found     off;
       expires           360d;
  }

  # disable access to hidden files
  location ~ /\.ht {
      access_log off;
      log_not_found off;
      deny all;
  }
}
Next, test to make sure that there are no syntax errors in any of your Nginx files.
nginx -tIf there aren’t any problems, restart Nginx to enable your changes.
systemctl reload nginx Test PHP
To test PHP-FPM with the Nginx Web server, we need to create an info.php file in the webroot directory.
nano /var/www/html/info.phpAdd the following PHP code into the file.
<?php phpinfo(); ?>Now again, access http://localhost/info.php or http://yourserver-ip-address/info.php. You should see a page similar to the below one.
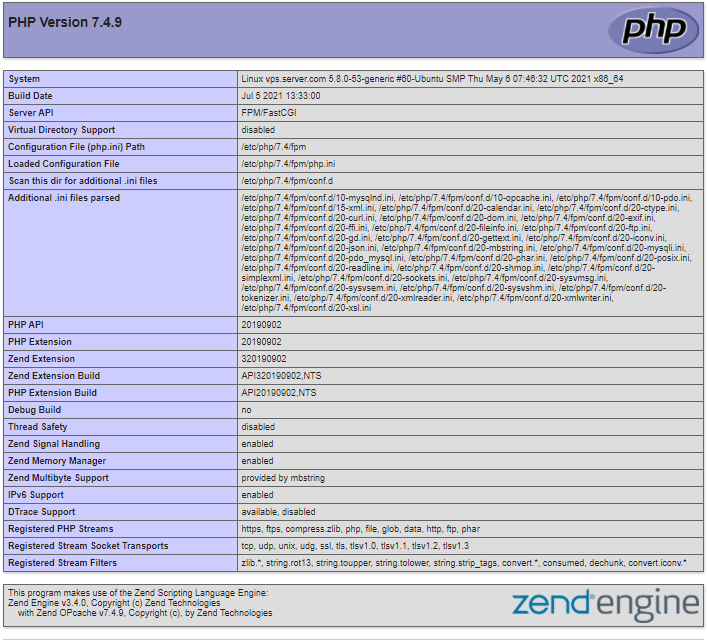
Done!
CrownCloud - Get a SSD powered KVM VPS at $4.5/month!
Use the code WELCOME for 10% off!
1 GB RAM / 25 GB SSD / 1 CPU Core / 1 TB Bandwidth per month
Available Locations: LAX | MIA | ATL | FRA | AMS