How to Install LEMP Stack (Nginx, MariaDB, PHP8.1) on Ubuntu 22.04
LEMP Stack is a combination of free, open source software. The acronym LEMP refers to the first letters of Linux (Operating system), Nginx Server, MySQL (database software), and PHP, PERL or Python, principal components to build a viable general purpose web server.
Updating the system
We first update the system to make sure that all our installed packages are up to date. Your Ubuntu system can be updated easily with the following command.
apt update

apt upgrade
Install Nginx
We will start by installing the Nginx web server. To complete the installation, use the following command.
apt install nginxOutput:
root@crown:~# apt install nginx
Reading package lists... Done
Building dependency tree... Done
Reading state information... Done
The following additional packages will be installed:
  fontconfig-config fonts-dejavu-core libdeflate0 libfontconfig1 libgd3
  libjbig0 libjpeg-turbo8 libjpeg8 libnginx-mod-http-geoip2
  libnginx-mod-http-image-filter libnginx-mod-http-xslt-filter
  libnginx-mod-mail libnginx-mod-stream libnginx-mod-stream-geoip2 libtiff5
  libwebp7 libxpm4 nginx-common nginx-core
Suggested packages:
  libgd-tools fcgiwrap nginx-doc ssl-cert
Once the installation is complete, enable Nginx (to start automatically upon system boot), start the webserver, and verify the status using the commands below.
systemctl start nginx

systemctl enable nginx

systemctl status nginx
Output:
 root@crown:~#     systemctl status nginx
● nginx.service - A high performance web server and a reverse proxy server
     Loaded: loaded (/lib/systemd/system/nginx.service; enabled; vendor preset: enabled)
     Active: active (running) since Thu 2022-03-17 14:43:23 UTC; 36min ago
       Docs: man:nginx(8)
    Process: 42595 ExecStartPre=/usr/sbin/nginx -t -q -g daemon on; master_process on; (code=ex>
    Process: 42596 ExecStart=/usr/sbin/nginx -g daemon on; master_process on; (code=exited, sta>
   Main PID: 42597 (nginx)
      Tasks: 2 (limit: 1074)
     Memory: 2.8M
        CPU: 34ms
     CGroup: /system.slice/nginx.service
             ├─42597 "nginx: master process /usr/sbin/nginx -g daemon on; master_process on;"
             └─42598 "nginx: worker process" "" "" "" "" "" "" "" "" "" "" "" "" "" "" "" "" "">
Check the Nginx version,
nginx -vOutput:
root@crown:~#     nginx -v
nginx version: nginx/1.18.0 (Ubuntu)
Verify that the webserver is running and accessible by accessing your server’s IP address.
From your browser,
http://IP_address
we need to make the user Nginx the owner of the web directory. By default, it’s owned by the root user.
chown www-data:www-data /usr/share/nginx/html -R Install MariaDB Server
MariaDB is a popular database server. The installation is simple and requires just a few steps as shown.
apt install mariadb-server mariadb-clientOutput:
root@crown:~# apt install mariadb-server mariadb-client
Reading package lists... Done
Building dependency tree... Done
Reading state information... Done
The following additional packages will be installed:
  galera-4 libcgi-fast-perl libcgi-pm-perl libclone-perl
  libconfig-inifiles-perl libdaxctl1 libdbd-mysql-perl libdbi-perl
  libencode-locale-perl libfcgi-bin libfcgi-perl libfcgi0ldbl
  libhtml-parser-perl libhtml-tagset-perl libhtml-template-perl
  libhttp-date-perl libhttp-message-perl libio-html-perl
  liblwp-mediatypes-perl libmariadb3 libmysqlclient21 libndctl6 libpmem1
  libsnappy1v5 libtimedate-perl liburi-perl liburing2 mariadb-client-10.6
  mariadb-client-core-10.6 mariadb-common mariadb-server-10.6
  mariadb-server-core-10.6 mysql-common socat
Once the installation is complete, enable MariaDB (to start automatically upon system boot), start the MariaDB, and verify the status using the commands below.
systemctl start mariadb

systemctl enable mariadb

systemctl status mariadb
Output:
root@crown:~# systemctl status mariadb
● mariadb.service - MariaDB 10.6.7 database server
     Loaded: loaded (/lib/systemd/system/mariadb.service; enabled; vendor preset: enabled)
     Active: active (running) since Thu 2022-03-17 13:37:36 UTC; 1h 37min ago
       Docs: man:mariadbd(8)
             https://mariadb.com/kb/en/library/systemd/
   Main PID: 26174 (mariadbd)
     Status: "Taking your SQL requests now..."
      Tasks: 7 (limit: 1074)
     Memory: 57.2M
        CPU: 1.671s
     CGroup: /system.slice/mariadb.service
             └─26174 /usr/sbin/mariadbd
Finally, you will want to secure your MariaDB installation by issuing the following command.
mysql_secure_installationOutput:
NOTE: RUNNING ALL PARTS OF THIS SCRIPT IS RECOMMENDED FOR ALL MariaDB
      SERVERS IN PRODUCTION USE!  PLEASE READ EACH STEP CAREFULLY!

In order to log into MariaDB to secure it, we'll need the current
password for the root user.  If you've just installed MariaDB, and
you haven't set the root password yet, the password will be blank,
so you should just press enter here.

Enter current password for root (enter for none):
OK, successfully used password, moving on...

Setting the root password ensures that nobody can log into the MariaDB
root user without the proper authorisation.

Set root password? [Y/n] y
New password:
Re-enter new password:
Password updated successfully!
Reloading privilege tables..
 ... Success!
Once secured, you can connect to MySQL and review the existing databases on your database server by using the following command.
mysql -e "SHOW DATABASES;" -pOutput:
root@vps:~# mysql -e "SHOW DATABASES;" -p
Enter password:
+--------------------+
| Database           |
+--------------------+
| information_schema |
| mysql              |
| performance_schema |
+--------------------+
Install PHP 8.1
To Install PHP 8.1, use the command.
apt install php php-fpm php-mysql php-common php-cli php-common php-json php-opcache php-readline php-mbstring php-xml php-gd php-curlTo start php8.1-fpm.
systemctl start php8.1-fpmTo auto-start on boot php8.1-fpm.
systemctl enable php8.1-fpmTo Check status.
systemctl status php8.1-fpmOutput:
 root@crown:~# systemctl status php8.1-fpm
● php8.1-fpm.service - The PHP 8.1 FastCGI Process Manager
     Loaded: loaded (/lib/systemd/system/php8.1-fpm.service; enabled; vendor pr>
     Active: active (running) since Thu 2022-03-17 14:12:02 UTC; 57min ago
       Docs: man:php-fpm8.1(8)
   Main PID: 41457 (php-fpm8.1)
     Status: "Processes active: 0, idle: 2, Requests: 1, slow: 0, Traffic: 0req>
      Tasks: 3 (limit: 1074)
     Memory: 11.6M
        CPU: 359ms
     CGroup: /system.slice/php8.1-fpm.service
             ├─41457 "php-fpm: master process (/etc/php/8.1/fpm/php-fpm.conf)" >
             ├─41458 "php-fpm: pool www" "" "" "" "" "" "" "" "" "" "" "" "" "">
             └─41459 "php-fpm: pool www" "" "" "" "" "" "" "" "" "" "" "" "" "">
Setting Up Server Blocks
You need to remove the file default, located in /etc/nginx/sites-enabled.
rm /etc/nginx/sites-enabled/defaultCreate new server block file under /etc/nginx/conf.d/ directory.
nano /etc/nginx/conf.d/default.confAdd the following text to the file.
  server {
  listen 80;
  listen [::]:80;
  server_name _;
  root /var/www/html/;
  index index.php index.html index.htm index.nginx-debian.html;

  location / {
    try_files $uri $uri/ /index.php;
  }

  location ~ \.php$ {
    fastcgi_pass unix:/run/php/php8.1-fpm.sock;
    fastcgi_param SCRIPT_FILENAME $document_root$fastcgi_script_name;
    include fastcgi_params;
    include snippets/fastcgi-php.conf;
  }

 # A long browser cache lifetime can speed up repeat visits to your page
  location ~* \.(jpg|jpeg|gif|png|webp|svg|woff|woff2|ttf|css|js|ico|xml)$ {
       access_log        off;
       log_not_found     off;
       expires           360d;
  }

  # disable access to hidden files
  location ~ /\.ht {
      access_log off;
      log_not_found off;
      deny all;
  }
}
Next, test to make sure that there are no syntax errors in any of your Nginx files.
nginx -tIf there aren’t any problems, restart Nginx to enable your changes.
systemctl reload nginx Test PHP
To test PHP-FPM with the Nginx Web server, we need to create an info.php file in the webroot directory.
nano /var/www/html/info.phpAdd the following PHP code to the file.
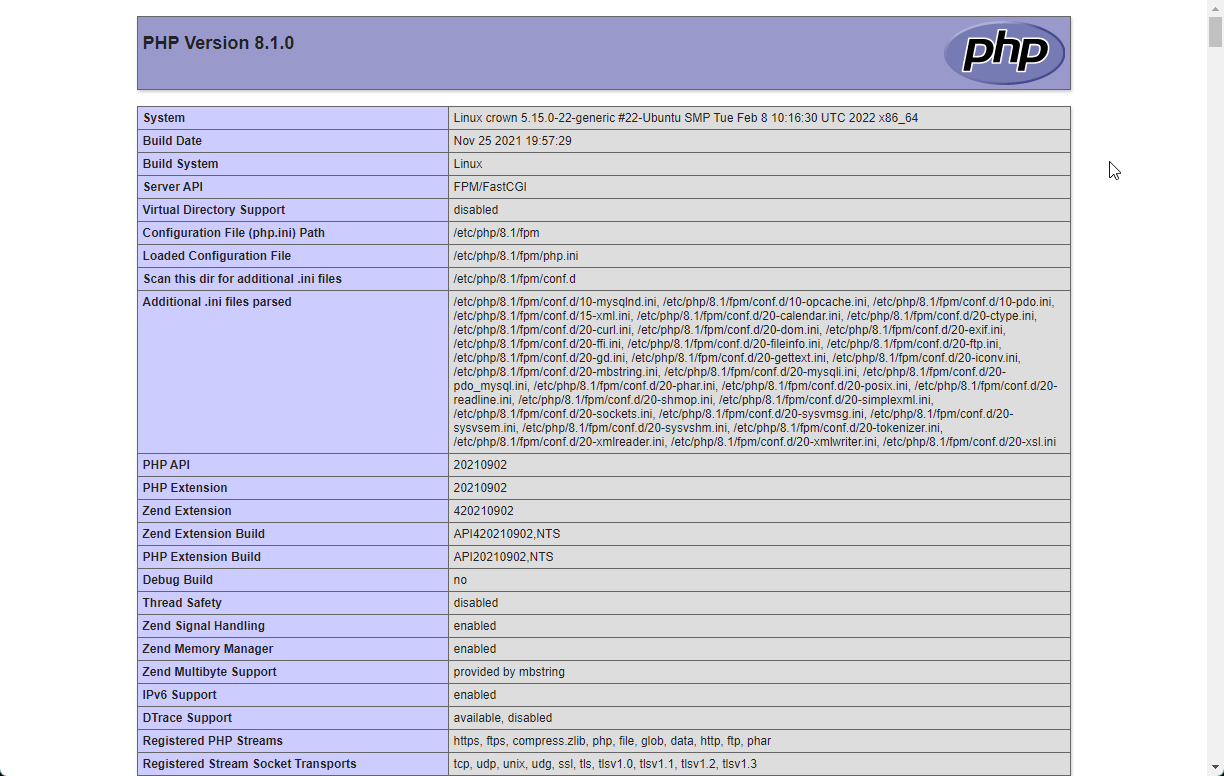
<?php phpinfo(); ?>Now again, access http://localhost/info.php or http://yourserver-ip-address/info.php. You should see a page similar to the below one.
This concludes the installation of LEMP Stack on Ubuntu 22.04 server.
CrownCloud - Get a SSD powered KVM VPS at $4.5/month!
Use the code WELCOME for 10% off!
1 GB RAM / 25 GB SSD / 1 CPU Core / 1 TB Bandwidth per month
Available Locations: LAX | MIA | ATL | FRA | AMS