How to Install Netdata on Rocky Linux 8
Netdata is an Open Source real-time server monitoring tool. It collects real-time data like CPU usage, RAM usage, Load, SWAP usage, Bandwidth usage, Disk usage, etc.
Installing EPEL Repo
Install EPEL Repo by running following command.
dnf install epel-release -yOutput:
[root@server ~]# dnf install epel-release -y
Rocky Linux 8 - AppStream                       959 kB/s | 7.8 MB     00:08
Rocky Linux 8 - BaseOS                          7.6 MB/s | 3.5 MB     00:00
Rocky Linux 8 - Extras                           14 kB/s | 3.8 kB     00:00
Dependencies resolved.
================================================================================
 Package               Architecture    Version            Repository       Size
================================================================================
Installing:
 epel-release          noarch          8-10.el8           extras           22 k
Install required packages for Netdata
Install required packages for Netdata by running following command.
dnf install git libuuid-devel autoconf automake pkgconfig zlib-devel curl findutils libmnl gcc make -y Clone Netdata from github
Clone Netdata from gituhub by running the following command.
git clone https://github.com/netdata/netdata.git --depth=100Output:
[root@server ~]# git clone https://github.com/netdata/netdata.git --depth=100
Cloning into 'netdata'...
remote: Enumerating objects: 3073, done.
remote: Counting objects: 100% (3073/3073), done.
remote: Compressing objects: 100% (2286/2286), done.
remote: Total 3073 (delta 1132), reused 1526 (delta 704), pack-reused 0
Receiving objects: 100% (3073/3073), 11.60 MiB | 10.46 MiB/s, done.
Resolving deltas: 100% (1132/1132), done.
Build and Install Netdata
Switch to Netdata directory and install required packages by running the following command.
cd netdata

./packaging/installer/install-required-packages.sh --non-interactive --dont-wait netdata
Run the following command to install libuv-dev.
dnf --enablerepo=powertools install libuv-develRun the following script to build and install Netdata.
./netdata-installer.shOnce the installation is complete, start and enable the Netdata and verify the status using the commands below.
systemctl start netdata

systemctl enable netdata

systemctl status netdata
Output:
[root@server netdata]# systemctl status netdata
● netdata.service - Real time performance monitoring
   Loaded: loaded (/usr/lib/systemd/system/netdata.service; enabled; vendor pre>
   Active: active (running) since Tue 2021-07-06 15:28:44 EDT; 1min 27s ago
 Main PID: 51061 (netdata)
    Tasks: 42 (limit: 11384)
   Memory: 49.5M
   CGroup: /system.slice/netdata.service
           ├─51061 /usr/sbin/netdata -P /var/run/netdata/netdata.pid -D
           ├─51079 /usr/sbin/netdata --special-spawn-server
           ├─51228 /usr/libexec/netdata/plugins.d/ebpf.plugin 1
Firewall Configuration
Netdata listens on port 19999 by default, enable ports in firewall to use Netdata from browser.
firewall-cmd --permanent --add-port=19999/tcp
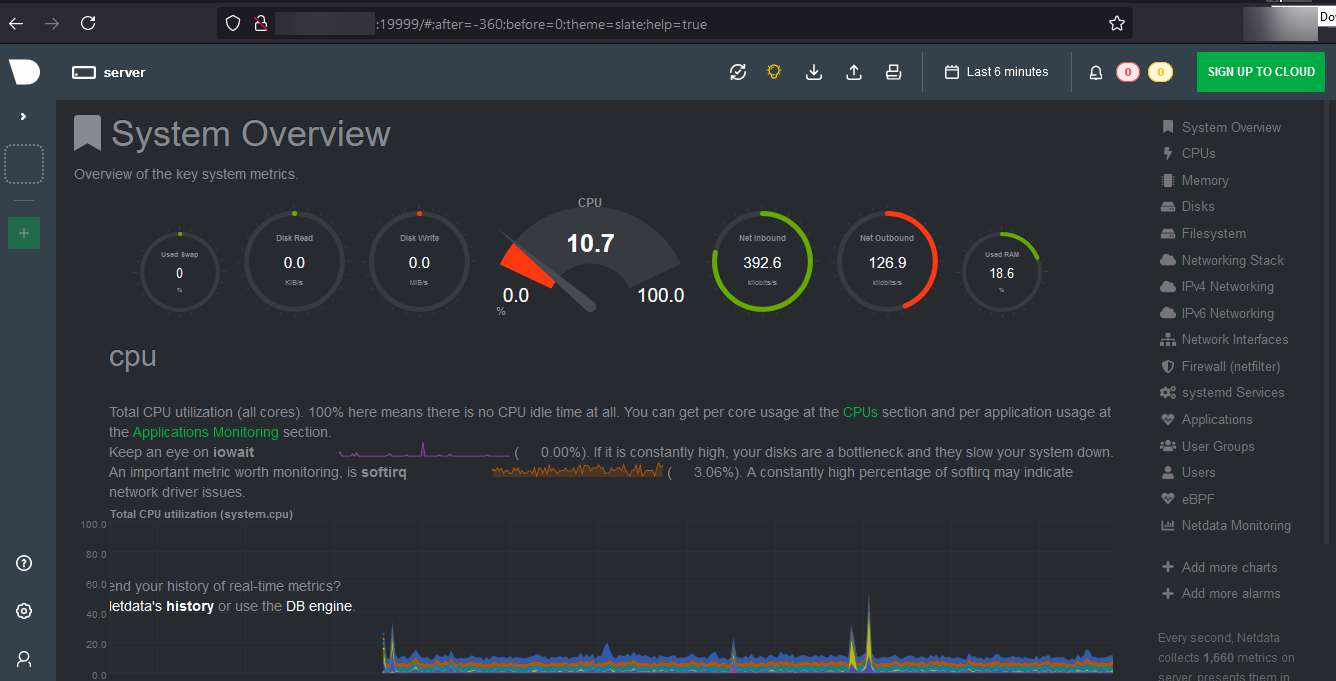
firewall-cmd --reload Netdata Dashboard
Enter the following URL on the browser to access the Netdata dashboard. By default netdata works on 19999 port.
http://<Enter Your IP Here>:19999/
The dashboard will look like this.
CrownCloud - Get a SSD powered KVM VPS at $4.5/month!
Use the code WELCOME for 10% off!
1 GB RAM / 25 GB SSD / 1 CPU Core / 1 TB Bandwidth per month
Available Locations: LAX | MIA | ATL | FRA | AMS