How to Install Screego with LEMP Stack on Debian 11
Screego is a screen sharing application for small teams or organizations. It allows you to share your screen with good quality and low latency. In this article, we are going to learn how to install Screego on Debian 11. So, let’s get started.
Checkout the Screego Project Here.
Try this wiki on our VPS. Starting at just $5/month with 24x7 In-house customer support.
Pre-requisites :
-
A system with Debian 11 installed and running.
-
rootaccess to the system. -
Let's Encrypt SSL installed, for this, you can refer to one of our guides on installing Let's Encrypt SSL on Debian.
-
Docker installed and running, for this, you can refer to one of our guides on installing Docker on Debian 11.
- LEMP Stack installed and running, for this, you can refer to one of our guides on installing LEMP Stack (Nginx, MariaDB, and PHP).
Once you're all set, we'll proceed with Screego installation and configuration.
Install Screego
Let us begin with starting docker container, and you are ready to go. Install screego using the below command
docker run --net=host -e SCREEGO_EXTERNAL_IP=CROWNCLOUD_EXTERNAL_IP screego/server:1.5.2Replace
CROWNCLOUD_EXTERNAL_IPwith your external IP address.
Configuring Nginx vHost
Create a new Nginx configuration file dev2.domainhere.info.conf for the domain with the following command:
vi /etc/nginx/sites-available/dev2.domainhere.info.confAdd the following codes:
Change
dev2.domainhere.infowithYour Domain Nameand Change SSL Path according to your SSL Path.
upstream screego {
    # Set this to the address configured in
    # SCREEGO_SERVER_ADDRESS. Default 5050
    server 192.169.7.180:5050;
    }

server {
    listen 80;

    # Here goes your domain / subdomain
    server_name dev2.domainhere.info;

    listen 443 ssl; # managed by Certbot
    ssl_certificate /etc/letsencrypt/live/dev2.domainhere.info/fullchain.pem; # managed by Certbot
    ssl_certificate_key /etc/letsencrypt/live/dev2.domainhere.info/privkey.pem; # managed by Certbot
    include /etc/letsencrypt/options-ssl-nginx.conf; # managed by Certbot
    ssl_dhparam /etc/letsencrypt/ssl-dhparams.pem; # managed by Certbot

location / {
    # Proxy to screego
    proxy_pass         http://screego;
    proxy_http_version 1.1;

    # Set headers for proxying WebSocket
    proxy_set_header   Upgrade $http_upgrade;
    proxy_set_header   Connection "upgrade";
    proxy_redirect     http:// $scheme://;

    # Set proxy headers
    proxy_set_header   X-Real-IP $remote_addr;
    proxy_set_header   X-Forwarded-For $proxy_add_x_forwarded_for;
    proxy_set_header   X-Forwarded-Proto http;

    # The proxy must preserve the host because screego verifies it with the origin
    # for WebSocket connections
    proxy_set_header   Host $http_host;
}
}
Now, press the Esc key, and type in :wq! and press the Enter key to save and exit the file.
Now, restart & check the Nginx with the following commands:
systemctl restart nginx

systemctl status nginx
Enable Firewall:
ufw allow 5050/tcp

ufw allow 80/tcp

ufw allow 443/tcp
Start using Screego
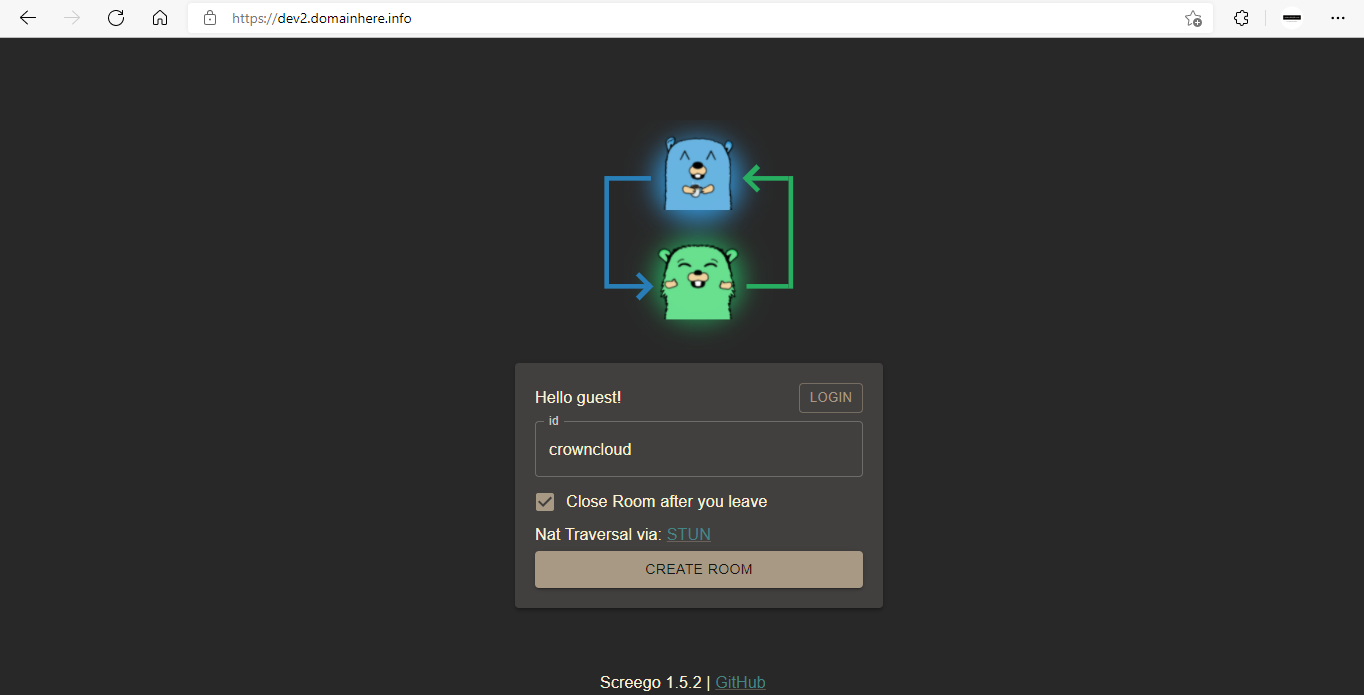
Now open the domain name from your browser, this will redirect you to the Screego application.
https://dev2.domainhere.infoReplace the
dev2.domainhere.infowith the actual IP or domain configured on the server.
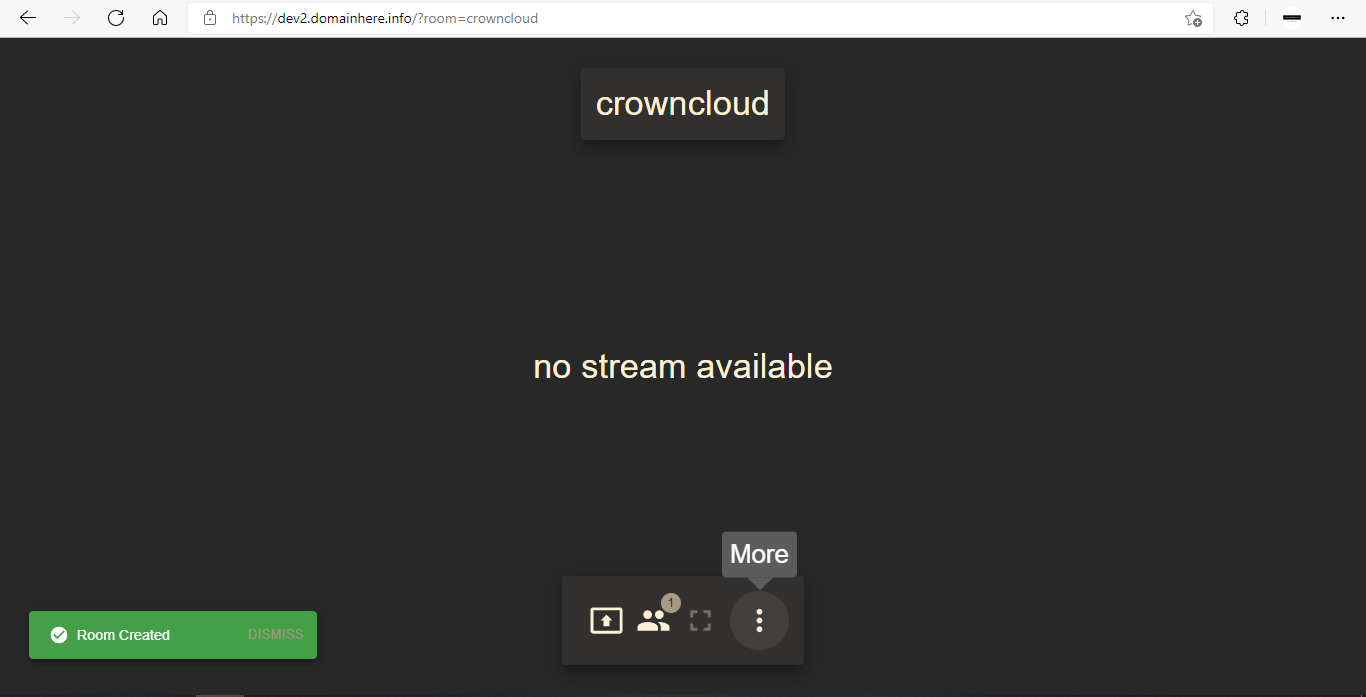
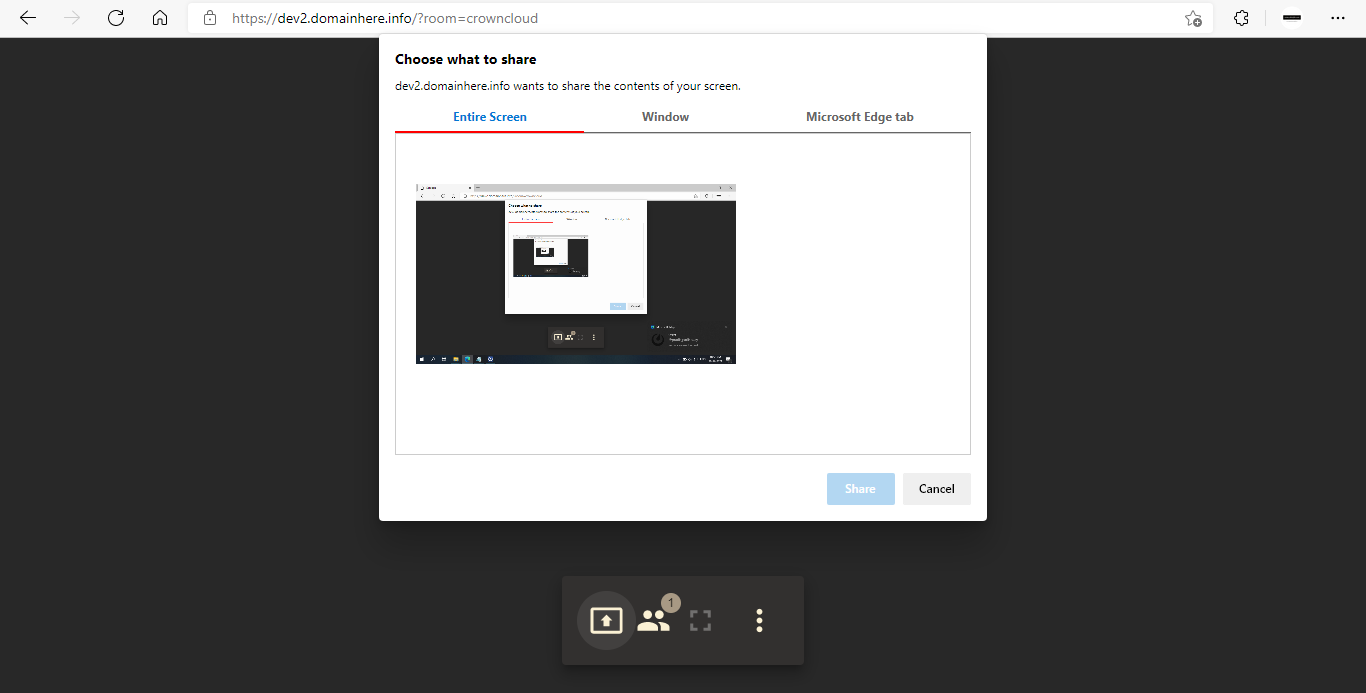
Example screenshots for Screego:
Now you have successfully installed Screego with LEMP Stack on Debian 11.
CrownCloud - Get a SSD powered KVM VPS at $4.5/month!
Use the code WELCOME for 10% off!
1 GB RAM / 25 GB SSD / 1 CPU Core / 1 TB Bandwidth per month
Available Locations: LAX | MIA | ATL | FRA | AMS