How to Install Windows Server 2022
Login to your Panel (https://crownpanel.com/)
To start the installation you will have to mount the Windows Server ISO. To mount the ISO click on CD-ROM and then select the Windows Server ISO from the drop-down menu and click on the Mount button(It will take 2-3 minutes)

Once the ISO has mounted (Task Log tab will show the status of the task), navigate to "Power Control" tab and then perform a Reboot task on the server.
Now Launch VNC to start the installation. If the VNC doesn't boot to Windows Server , please click on ctrl alt del from the VNC console to send a reboot.
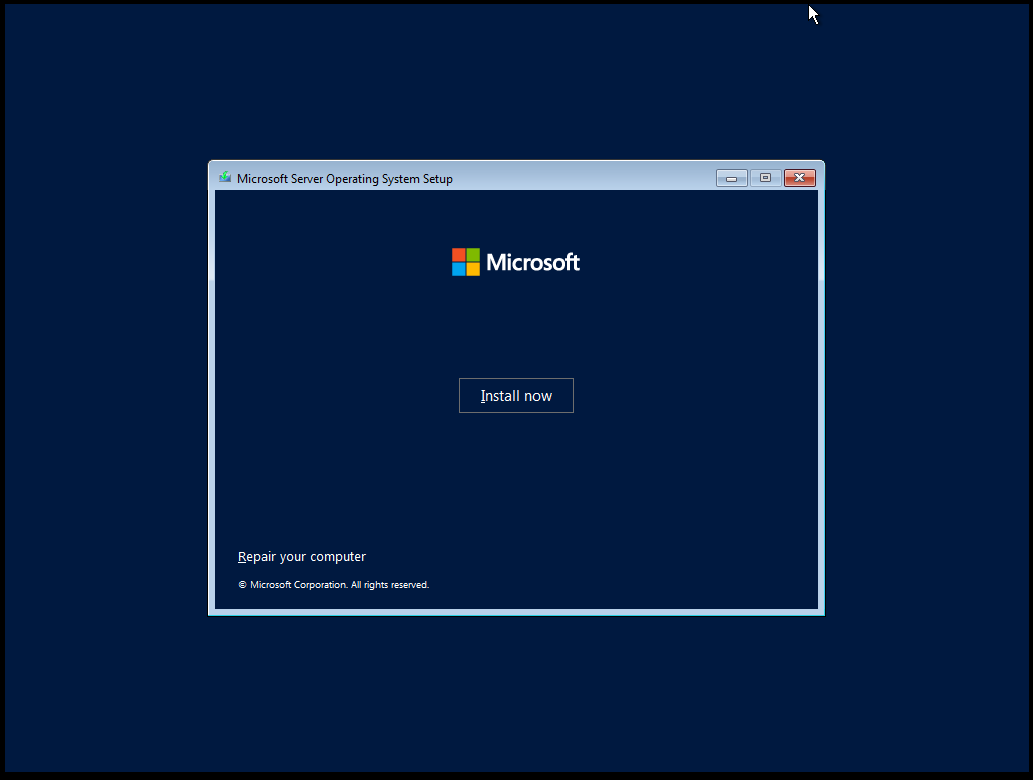
Start Windows Installation
Select the Install Windows Server 2022.
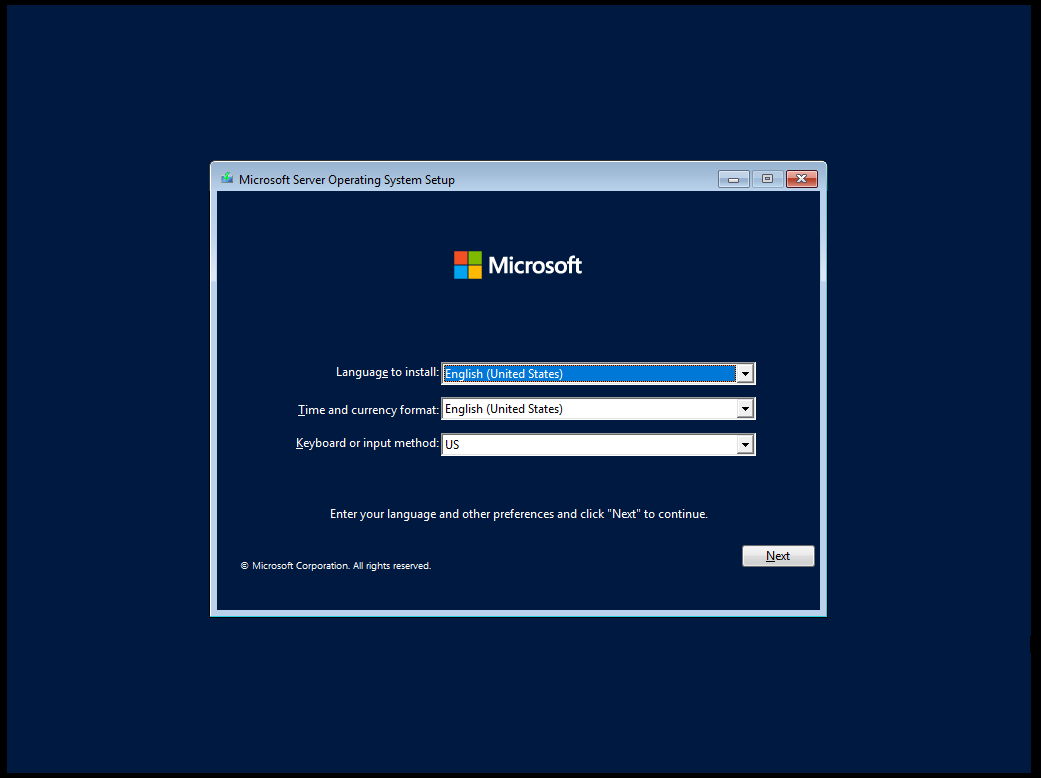
Select the desired language and click on continue.
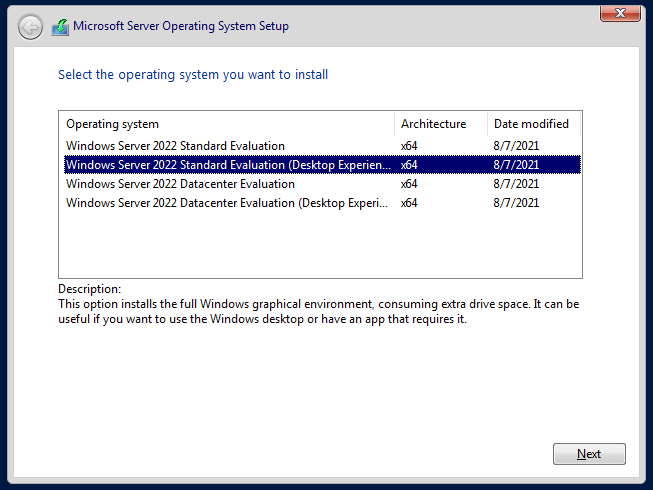
Since we usually use Windows with Graphical User Interface, We will have to select the Operating System with Desktop Experience. This will install GUI based Windows Server.
You can also choose between Standard Evaluation or Datacenter Evaluation.
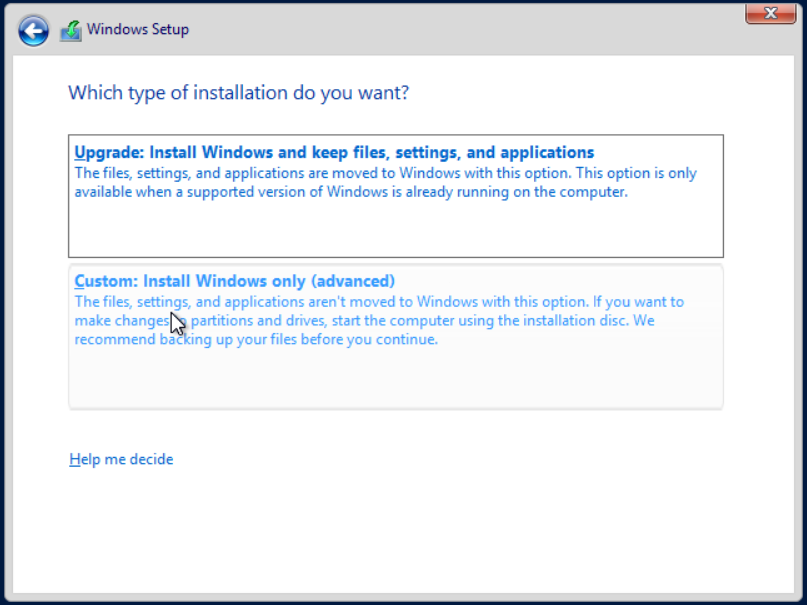
Next, select the Custom Install Windows only.
After that, Click on CD-ROM tab and then click on Unmount.

Mount and load VirtIO ISO
Next, Mount Virtio ISO.

Once the VirtIO Drivers is mounted, click on the "Load Driver". This will open up another dialog which prompts what drivers are in the VirtIO, Just click on scan and it will list all the related drivers. You will have to select the driver that's for the Windows version. If the specific version is not available, you can choose which ever is closer and it will work.
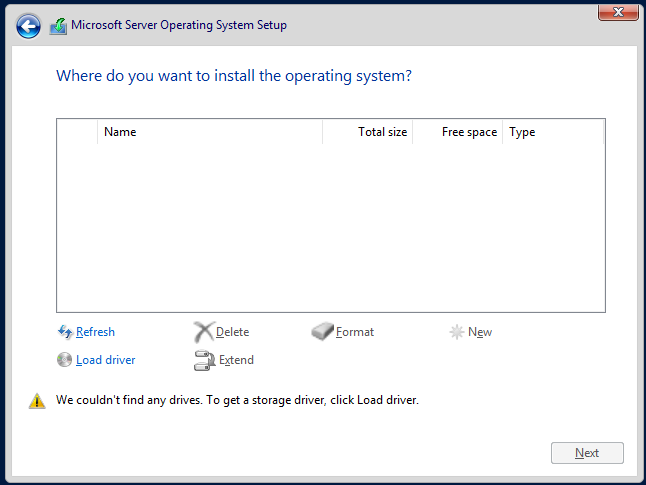
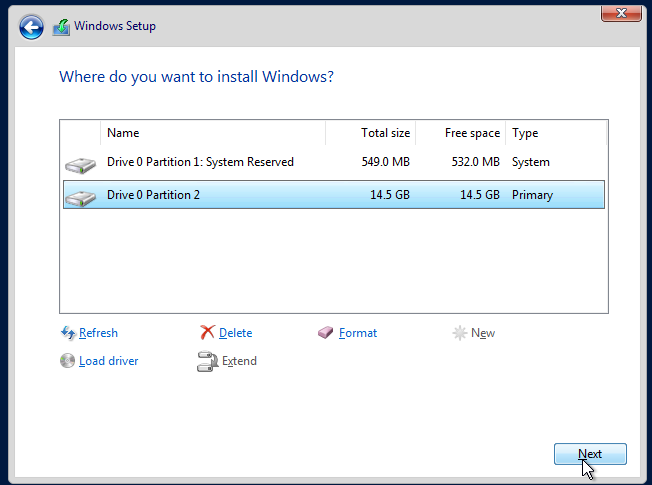
After the driver is installed, you will get the available partitions or drives.
Delete any old partitions and create new partitions as per your use-case.
In this example, we will have just one partition.
NOTE: Unmount VirtIO driver and mount back Windows ISO
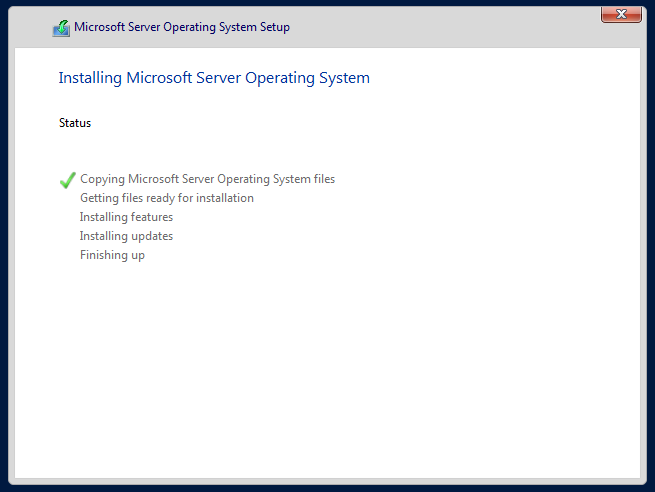
It will take 5 minutes for installing,
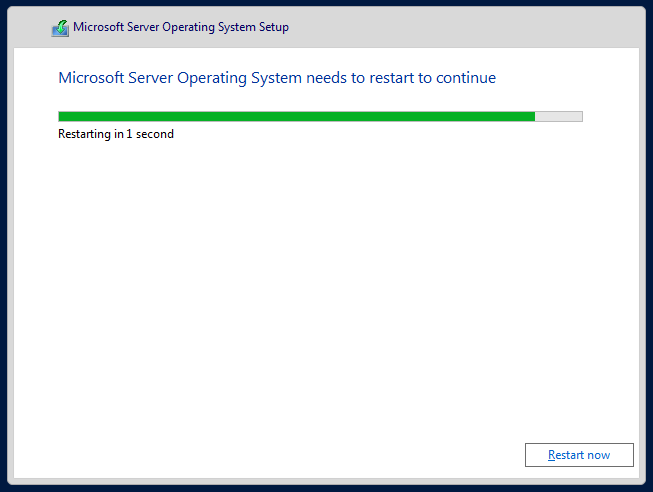
After installation completed press on Restart now.
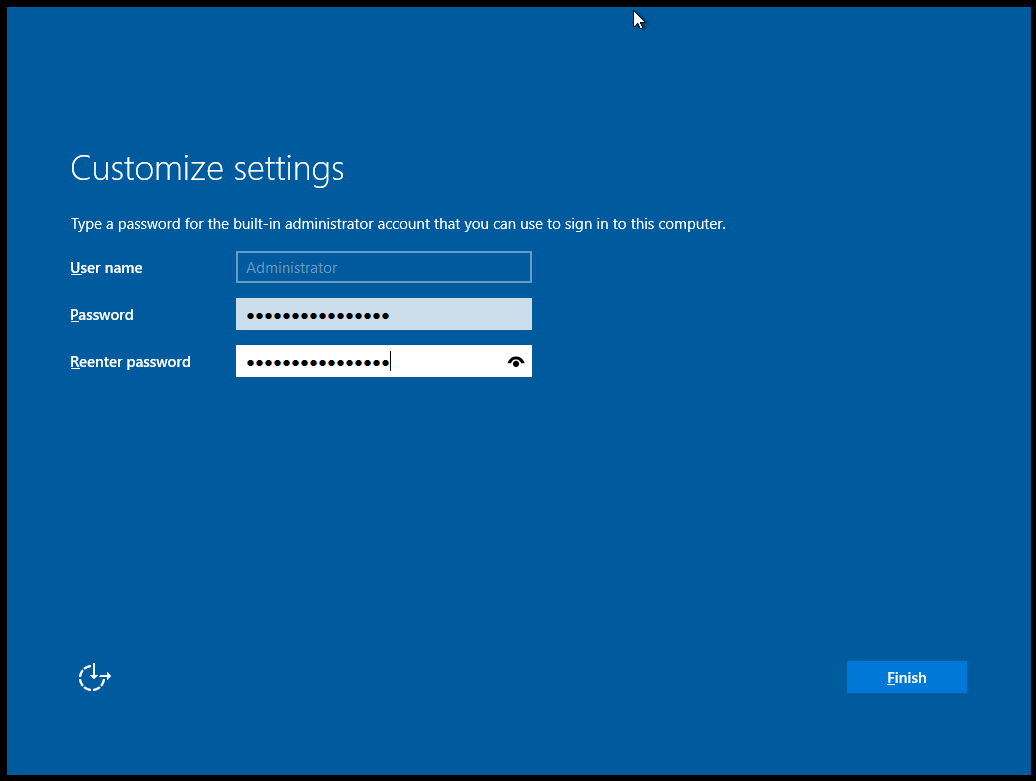
Once the installation is complete, You will have to set a new password for Administrator.
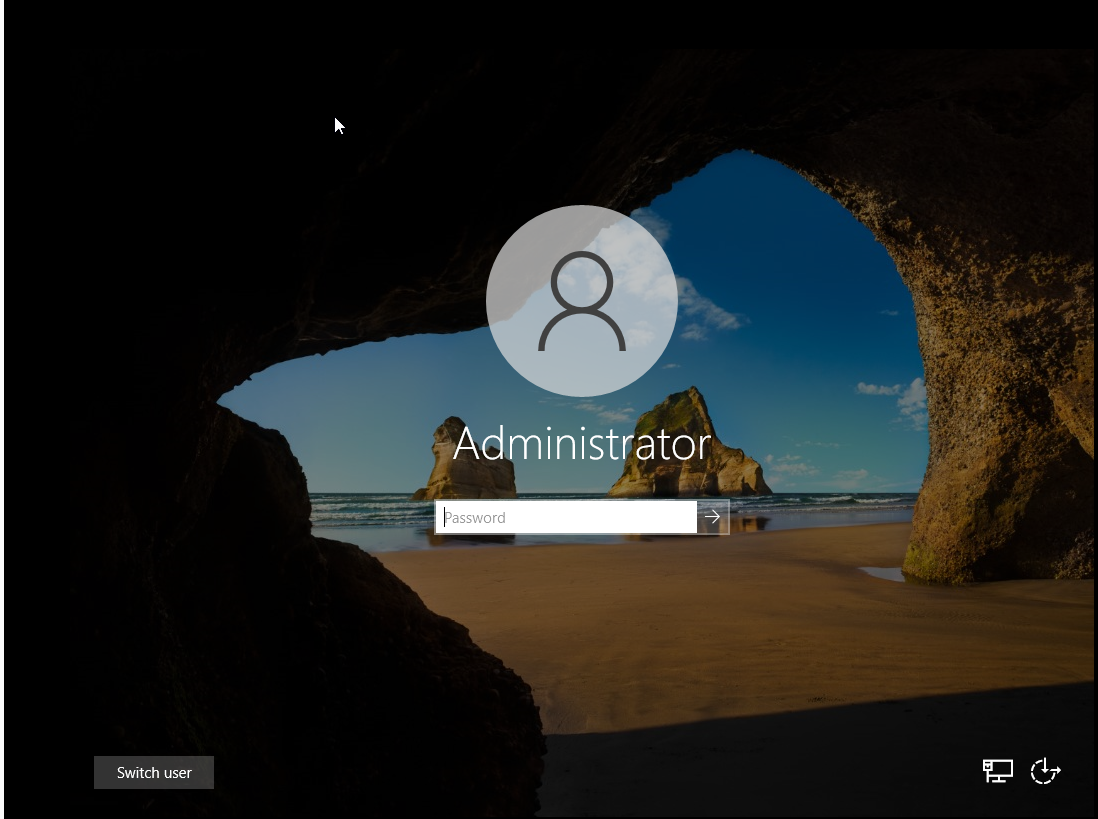
You will get a login screen. Enter the password that was set earlier and you've gained access to the Windows Server.
Steps to Enable RDP (Remote Desktop)
Windows allows users to access the server remotely. This option by default is disabled by Microsoft.
To enable the Remote Desktop connections to the Server, follow the below steps:
- Open the Server Manager from the Windows Start.
- Navigate to Local Server, this allows configuring the Server you're in.
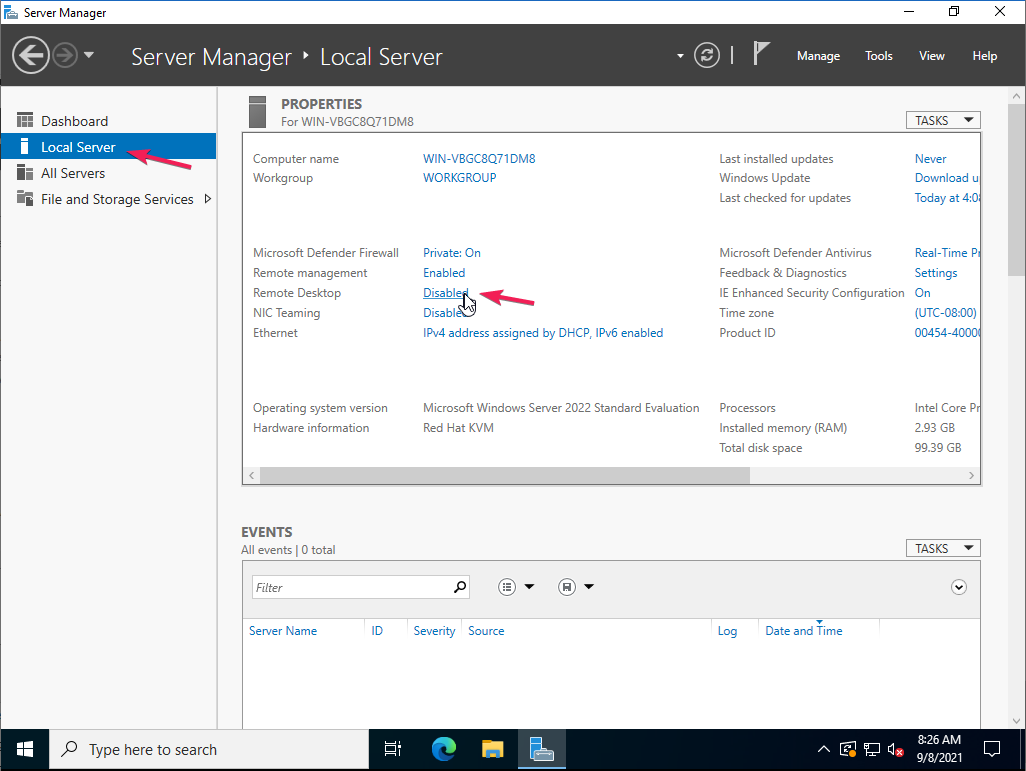
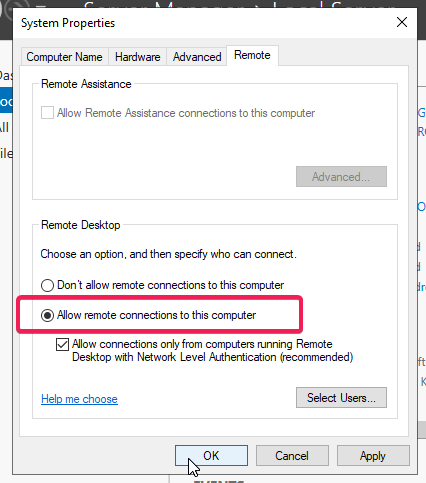
- Click on the "Remote Desktop", this will open a dialog box for System Properties.
- Select the "Allow remote connections to this computer" option and click on Apply.
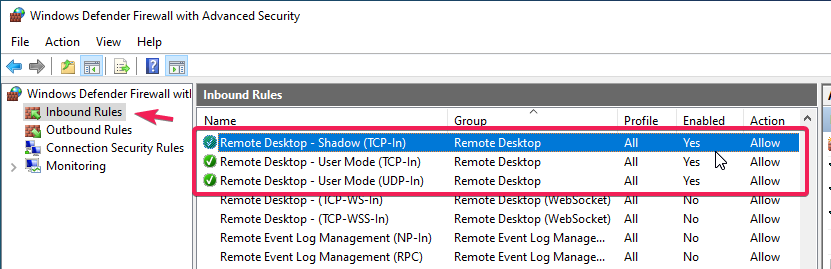
- Next ensure Firewall allows Remote Desktop connections,
- Open Windows Firewall from Windows Start.
Navigate to "Inbound Rules" and enable the below rules as shown in the picture below.
Done.
CrownCloud - Get a SSD powered KVM VPS at $4.5/month!
Use the code WELCOME for 10% off!
1 GB RAM / 25 GB SSD / 1 CPU Core / 1 TB Bandwidth per month
Available Locations: LAX | MIA | ATL | FRA | AMS