How to Install WordPress with LEMP Stack on Ubuntu 22.04
WordPress is one of the most popular website-building tools available out there. It is a simple way to get your online presence and perfect for those who do not know how to code and want a simple and effective way to share and build your story on the internet.
Prerequisites:
-
Root access to your Ubuntu 22.04 server.
- LEMP Stack installed and running. Learn how to setup LEMP Stack.
Creating Database
Log into MySQL with the following command.
mysql -u root -pFirst, we'll create a new database.
CREATE DATABASE wordpress_db;Next, create a new MySQL user account that we will use to operate on WordPress's new database, with the username "wordpress_user".
CREATE USER 'wordpress_user'@'localhost' IDENTIFIED BY 'Your_Password_Here';Replace Your_Password_Here with the actual Strong Password
Link the user and DB together by granting our user access to the database.
GRANT ALL PRIVILEGES ON wordpress_db.* to wordpress_user@'localhost';Flush the privileges so that MySQL knows about the user permissions we just added.
FLUSH PRIVILEGES;Exit out of the MySQL command prompt by typing.
exitOutput:
root@crown:~# mysql
Welcome to the MariaDB monitor.  Commands end with ; or \g.
Your MariaDB connection id is 81
Server version: 10.6.7-MariaDB-2ubuntu1 Ubuntu 22.04

Copyright (c) 2000, 2018, Oracle, MariaDB Corporation Ab and others.

Type 'help;' or '\h' for help. Type '\c' to clear the current input statement.

MariaDB [(none)]> CREATE DATABASE wordpress_db;
Query OK, 1 row affected (0.003 sec)

MariaDB [(none)]> CREATE USER 'wordpress_user'@'localhost' IDENTIFIED BY 'password';
Query OK, 0 rows affected (0.005 sec)

MariaDB [(none)]> GRANT ALL PRIVILEGES ON wordpress_db.* to wordpress_user@'localhost';
Query OK, 0 rows affected (0.003 sec)

MariaDB [(none)]> FLUSH PRIVILEGES;
Query OK, 0 rows affected (0.003 sec)

MariaDB [(none)]> exit
Bye
Download and Install WordPress
Download the latest WordPress,
wget -O /tmp/wordpress.tar.gz https://wordpress.org/latest.tar.gzUnzip the downloaded WordPress file.
tar -xzvf /tmp/wordpress.tar.gz -C /var/www/htmlChange the permission of the site directory.
chown -R www-data:www-data /var/www/html/wordpress Create a Server Block or vHost
We will create a server block (also called vHost) for the Wordpress site and have it's own configuration.
Create a new configuration file using your favourite editor,
vi /etc/nginx/sites-available/example.comReplace example.com with actual domain name.
And insert the following content into the file.
server {
  listen 80;
  listen [::]:80;
  #server_name _;
  server_name example.com
  root /var/www/html/wordpress/;
  index index.php index.html index.htm index.nginx-debian.html;

  error_log /var/log/nginx/example.com_error.log;
  access_log /var/log/nginx/example.com_access.log;

  location / {
    try_files $uri $uri/ /index.php;
  }

  location ~ \.php$ {
    fastcgi_pass unix:/run/php/php8.1-fpm.sock;
    fastcgi_param SCRIPT_FILENAME $document_root$fastcgi_script_name;
    include fastcgi_params;
    include snippets/fastcgi-php.conf;
  }

 # A long browser cache lifetime can speed up repeat visits to your page
  location ~* \.(jpg|jpeg|gif|png|webp|svg|woff|woff2|ttf|css|js|ico|xml)$ {
       access_log        off;
       log_not_found     off;
       expires           360d;
  }

  # disable access to hidden files
  location ~ /\.ht {
      access_log off;
      log_not_found off;
      deny all;
  }
}
Save and exit the file.
Next create a symbolic link of the configuration in the sites-enabled directory with the following command:
ln -s /etc/nginx/sites-available/example.com /etc/nginx/sites-enabled/Remove default Nginx server blocks to prevent Nginx automatic requests routing.
rm /etc/nginx/sites-available/defaultRun the command to install certbot specific to Nginx
snap install --classic certbot Set up SSL Certificate
Run this command to get a certificate and have Certbot edit your Nginx configuration automatically to serve it, turning on HTTPS access in a single step.
certbot --nginx -d example.com -d example.comYou will have to accept the terms of service.
IMPORTANT NOTES:
 - Congratulations! Your certificate and chain have been saved at:
   /etc/letsencrypt/live/example.com/fullchain.pem
   Your key file has been saved at:
   /etc/letsencrypt/live/example.com/privkey.pem
   Your cert will expire on 2020-09-05. To obtain a new or tweaked
   version of this certificate in the future, simply run certbot again
   with the "certonly" option. To non-interactively renew *all* of
   your certificates, run "certbot renew"
 - Your account credentials have been saved in your Certbot
   configuration directory at /etc/letsencrypt. You should make a
   secure backup of this folder now. This configuration directory will
   also contain certificates and private keys obtained by Certbot so
   making regular backups of this folder is ideal.
 - If you like Certbot, please consider supporting our work by:

   Donating to ISRG / Let's Encrypt:   https://letsencrypt.org/donate
   Donating to EFF:                    https://eff.org/donate-le
You will receive this acknowledgement that the SSL certificate for example.com and www.example.com are successfull.
You can now verify your website using https:// that the connection is secure with the lock icon in the usrl bar.
To check that you have top-of-the-line installation, navigate to https://www.ssllabs.com/ssltest/.
Confirm that the configuration is all OK and there are no errors.
nginx -tyou would see an output like below:
root@vps:~# nginx -t
nginx: the configuration file /etc/nginx/nginx.conf syntax is ok
nginx: configuration file /etc/nginx/nginx.conf test is successful
Now that the configuration has no errors, restart the web server:
systemctl restart nginxNavigate to your browser.
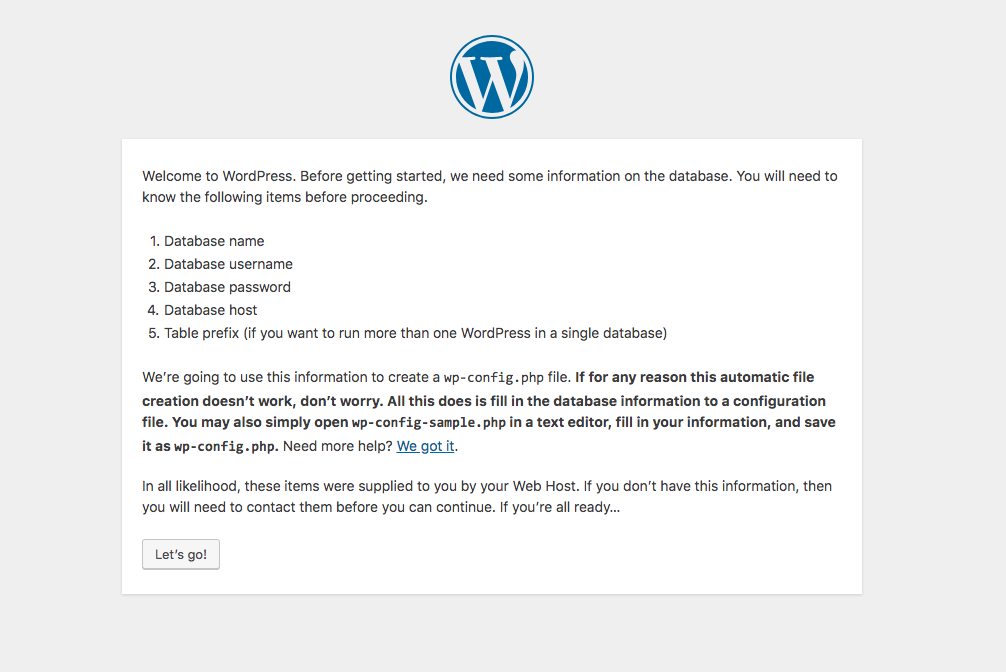
Start a WordPress installation by clicking on the Run the installation button.
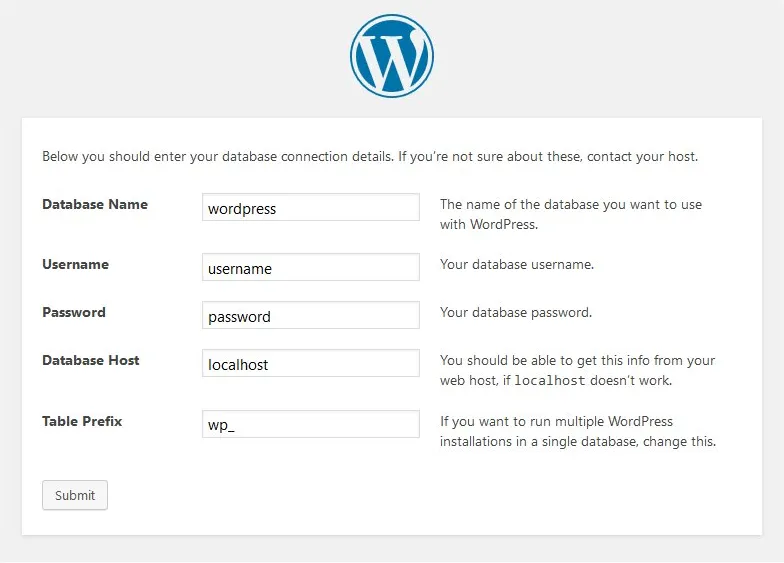
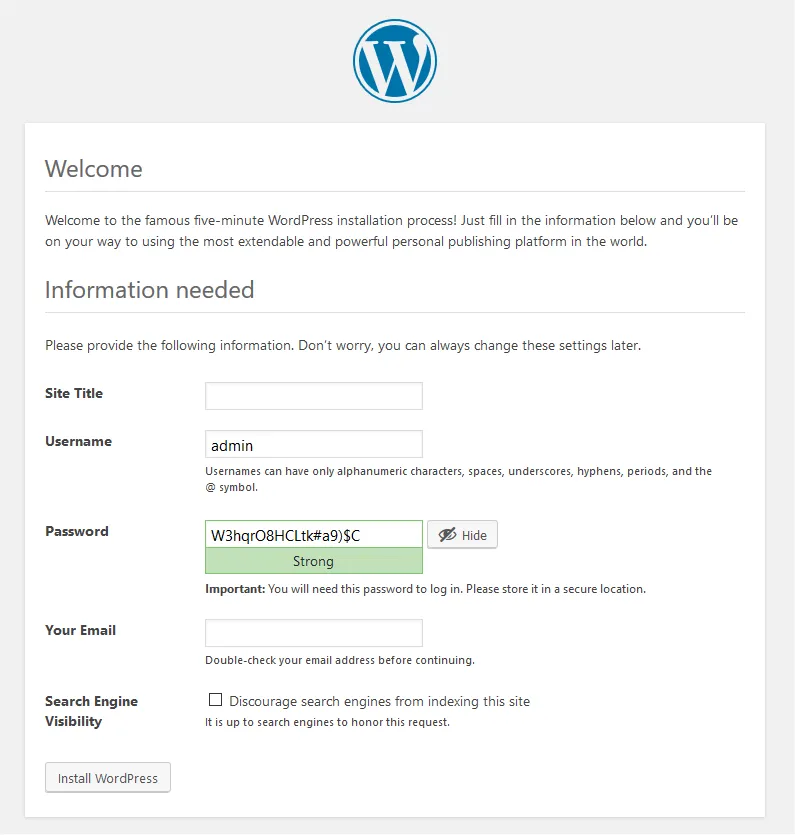
Provide the requested information.

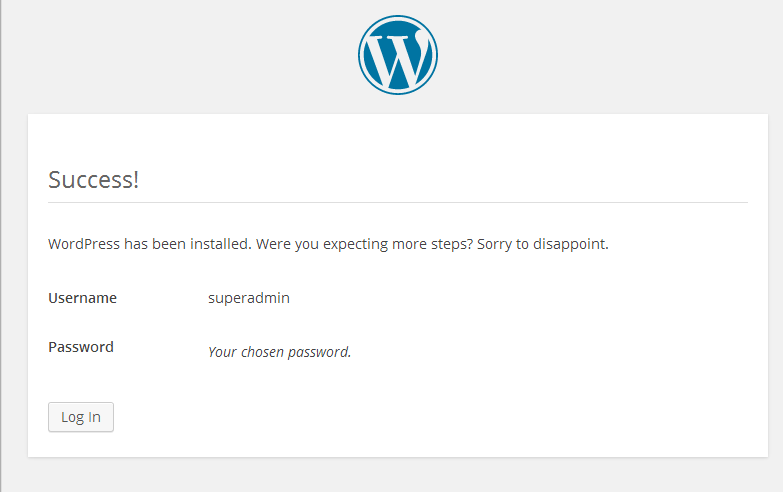
Once WordPress has been installed log in with your new user credentials.
CrownCloud - Get a SSD powered KVM VPS at $4.5/month!
Use the code WELCOME for 10% off!
1 GB RAM / 25 GB SSD / 1 CPU Core / 1 TB Bandwidth per month
Available Locations: LAX | MIA | ATL | FRA | AMS