How to Install and Configure Apache Hadoop on Debian 11
Apache Hadoop is an open-source, Java-based software platform that manages data processing and storage for big data applications. Hadoop works by distributing large data sets and analytics jobs across nodes in a computing cluster, breaking them down into smaller workloads that can be run in parallel. Hadoop can process structured and unstructured data and scale up reliably froma single server to thousands of machines.
Update the system
Update the system packages with the latest version with the following command and reboot the system once updated.
apt-get update -y Installing Java
Apache Hadoop is an application based on JAVA programming, so we need to install JAVA with the following command.
apt-get install default-jdk default-jre -yVerify the JAVA version once the installation is done.
java -versionOutput:
root@server:~# java --version
openjdk 11.0.12 2021-07-20
OpenJDK Runtime Environment (build 11.0.12+7-post-Debian-2)
OpenJDK 64-Bit Server VM (build 11.0.12+7-post-Debian-2, mixed mode, sharing)
Creating hadoop user
Create Hadoop User and Setup Passwordless SSH for Hadoop user run the follwing command to create Hadoop user.
adduser hadoopOutput:
root@server:~# adduser hadoop
Adding user `hadoop' ...
Adding new group `hadoop' (1001) ...
Adding new user `hadoop' (1001) with group `hadoop' ...
Creating home directory `/home/hadoop' ...
Copying files from `/etc/skel' ...
Switch to Hadoop user once the user has been created.
su - hadoopRun the following command to generate the SSH key.
ssh-keygen -t rsaOutput:
hadoop@server:~$ ssh-keygen -t rsa
Generating public/private rsa key pair.
Enter file in which to save the key (/home/hadoop/.ssh/id_rsa): /home/hadoop/.ssh/id_rsa
Created directory '/home/hadoop/.ssh'.
Enter passphrase (empty for no passphrase):
Enter same passphrase again:
Your identification has been saved in /home/hadoop/.ssh/id_rsa
Your public key has been saved in /home/hadoop/.ssh/id_rsa.pub
The key fingerprint is:
SHA256:2/sLwfVmXrgJmGHiijhZnu6mR6p3P3lLSGgq9RtksU8 hadoop@server
The key's randomart image is:
+---[RSA 3072]----+
|                 |
|                 |
|    .   . o .    |
|     + . + = . . |
|  . B E S = . = .|
| . @.* o o . = + |
|. =o* +.o o   +  |
| .oo+oo..  o     |
|.o.*+..o....o.   |
+----[SHA256]-----+
You have to add the public key of your computer to the authorized_keys file of the computer also give permission to the authorized_keys file.
cat ~/.ssh/id_rsa.pub >> ~/.ssh/authorized_keys
chmod 0600 ~/.ssh/authorized_keys
Verify the passwordless SSH connection with the following command.
ssh Server's_IP_Address Install Hadoop
Switch Hadoop user and download the latest version of Hadoop using the following "wget" command.
su - hadoop

wget https://downloads.apache.org/hadoop/common/hadoop-3.3.0/hadoop-3.3.0.tar.gz
Extract the downloaded "tar" file with the following command.
tar -xvzf hadoop-3.3.1.tar.gz Next, switch back to root user for the below commands. We will move the extracted files to a specific directory.
su root
cd /home/hadoop
mv hadoop-3.3.0 /usr/local/hadoop
The /home/hadoop path will differ in case you have a different username.
Create the log directory to store the "Apache Hadoop" logs.
mkdir /usr/local/hadoop/logsChange the ownership of /usr/local/hadoop directory to hadoop and switch back to hadoop user.
chown -R hadoop:hadoop /usr/local/hadoop
su hadoop
Enter the edit mode to ".bashrc" and define the Hadoop environment variables by adding the following content to the end of the file.
nano ~/.bashrcAnd add the follwing configuration to the end of the file.
export HADOOP_HOME=/usr/local/hadoop
export HADOOP_INSTALL=$HADOOP_HOME
export HADOOP_MAPRED_HOME=$HADOOP_HOME
export HADOOP_COMMON_HOME=$HADOOP_HOME
export HADOOP_HDFS_HOME=$HADOOP_HOME
export YARN_HOME=$HADOOP_HOME
export HADOOP_COMMON_LIB_NATIVE_DIR=$HADOOP_HOME/lib/native
export PATH=$PATH:$HADOOP_HOME/sbin:$HADOOP_HOME/bin
export HADOOP_OPTS="-Djava.library.path=$HADOOP_HOME/lib/native"
Run the following command to activate the added environment variables.
source ~/.bashrc Configure Hadoop
If you are new to Hadoop and want to explore basic commands or test applications, you can configure Hadoop on a single node. Configure Java Environment Variables.
Next, you will need to define Java environment variables in hadoop-env.sh to configure YARN, HDFS, MapReduce, and Hadoop-related project settings.
To locate the correct path of Java by using the following command.
which javacOutput:
hadoop@server:~$ which javac
/bin/javac
Next, find the OpenJDK directory with the following command.
readlink -f /usr/bin/javacOutput:
hadoop@server:~$ readlink -f /usr/bin/javac
/usr/lib/jvm/java-11-openjdk-amd64/bin/javac
Next, edit the hadoop-env.sh file and define the Java path.
nano $HADOOP_HOME/etc/hadoop/hadoop-env.shAnd add the following configuration to the end of the file.
export JAVA_HOME=/usr/lib/jvm/java-11-openjdk-amd64
export HADOOP_CLASSPATH+=" $HADOOP_HOME/lib/*.jar"
Need to download the Javax activation file by running the following command.
cd /usr/local/hadoop/lib
sudo wget https://jcenter.bintray.com/javax/activation/javax.activation-api/1.2.0/javax.activation-api-1.2.0.jar
Output:
hadoop@server:/usr/local/hadoop/lib$ wget https://jcenter.bintray.com/javax/activation/javax.activation-api/1.2.0/javax.activation-api-1.2.0.jar
--2021-08-09 15:45:15--  https://jcenter.bintray.com/javax/activation/javax.activation-    api/1.2.0/javax.activation-api-1.2.0.jar
Resolving jcenter.bintray.com (jcenter.bintray.com)... 34.95.74.180
Connecting to jcenter.bintray.com (jcenter.bintray.com)|34.95.74.180|:443... connected.
HTTP request sent, awaiting response... 200 OK
Length: 56674 (55K) [application/java-archive]
Saving to: ‘javax.activation-api-1.2.0.jar’

javax.activati 100%  55.35K  --.-KB/s    in 0.003s

2021-08-09 15:45:15 (19.1 MB/s) - ‘javax.activation-api-1.2.0.jar’ saved [56674/56674]
Next, Verify the hadoop version.
hadoop versionOutput:
hadoop@server:~$ hadoop version
Hadoop 3.3.1
Source code repository https://github.com/apache/hadoop.git -r a3b9c37a397ad4188041dd80621bdeefc46885f2
Compiled by ubuntu on 2021-06-15T05:13Z
Compiled with protoc 3.7.1
From source with checksum 88a4ddb2299aca054416d6b7f81ca55
This command was run using /usr/local/hadoop/share/hadoop/common/hadoop-common-3.3.1.jar
Configure core-site.xml File
To set up Hadoop you need to specify the URL for your NameNode as following.
vi $HADOOP_HOME/etc/hadoop/core-site.xmlAnd add the follwing configuration to the end of the file.
<configuration>
 <property>
            <name>fs.default.name</name>
        <value>hdfs://0.0.0.0:9000</value>
        <description>The default file system URI</description>
 </property>
</configuration>
Configure hdfs-site.xml File
Need to define the location for storing node metadata, fsimage file, and edit log file. Configure the file by defining the NameNode and DataNode storage directories.
Before configure create a directory for storing node metadata.
mkdir -p /home/hadoop/hdfs/{namenode,datanode}
chown -R hadoop:hadoop /home/hadoop/hdfs
Edit the hdfs-site.xml file and define the location of the directory as follows.
vi $HADOOP_HOME/etc/hadoop/hdfs-site.xmlAnd add the follwing configuration to the end of the file.
<configuration>
     <property>
            <name>dfs.replication</name>
        <value>1</value>
     </property>

     <property>
        <name>dfs.name.dir</name>
        <value>file:///home/hadoop/hdfs/namenode</value>
     </property>

     <property>
        <name>dfs.data.dir</name>
        <value>file:///home/hadoop/hdfs/datanode</value>
     </property>
</configuration>
Configure mapred-site.xml File
Use the following command to access the mapred-site.xml file and define MapReduce values.
vi $HADOOP_HOME/etc/hadoop/mapred-site.xmlAnd add the following configuration to the end of the file.
<configuration>
 <property>
        <name>mapreduce.framework.name</name>
        <value>yarn</value>
 </property>
</configuration>
Configure yarn-site.xml File
You would need to edit the yarn-site.xml file and define YARN-related settings.
vi $HADOOP_HOME/etc/hadoop/yarn-site.xmlAnd add the following configuration to the end of the file.
<configuration>
 <property>
        <name>yarn.nodemanager.aux-services</name>
        <value>mapreduce_shuffle</value>
 </property>
</configuration>
Format HDFS NameNode
It is important to format the NameNode before starting Hadoop services for the first time.
hdfs namenode -format Start the Hadoop Cluster
First, start the NameNode and DataNode with the following command.
start-dfs.shOutput:
hadoop@server:~$ start-dfs.sh
Starting namenodes on [server]
server: ssh: Could not resolve hostname server: Name or service not known
Starting datanodes
localhost: Warning: Permanently added 'localhost' (ECDSA) to the list of known hosts.
2021-08-09 15:58:34,014 ERROR conf.Configuration: error parsing conf core-site.xml
Next, start the YARN resource and nodemanagers by typing.
start-yarn.shOutput:
hadoop@server:~$ start-yarn.sh
Starting resourcemanagers on []
Starting nodemanagers
Verify if all the daemons are active and running as Java processes.
jpsOutput:
hadoop@server:~$ jps
58000 NameNode
54897 DataNode
55265 ResourceManager
55043 SecondaryNameNode
58506 Jps
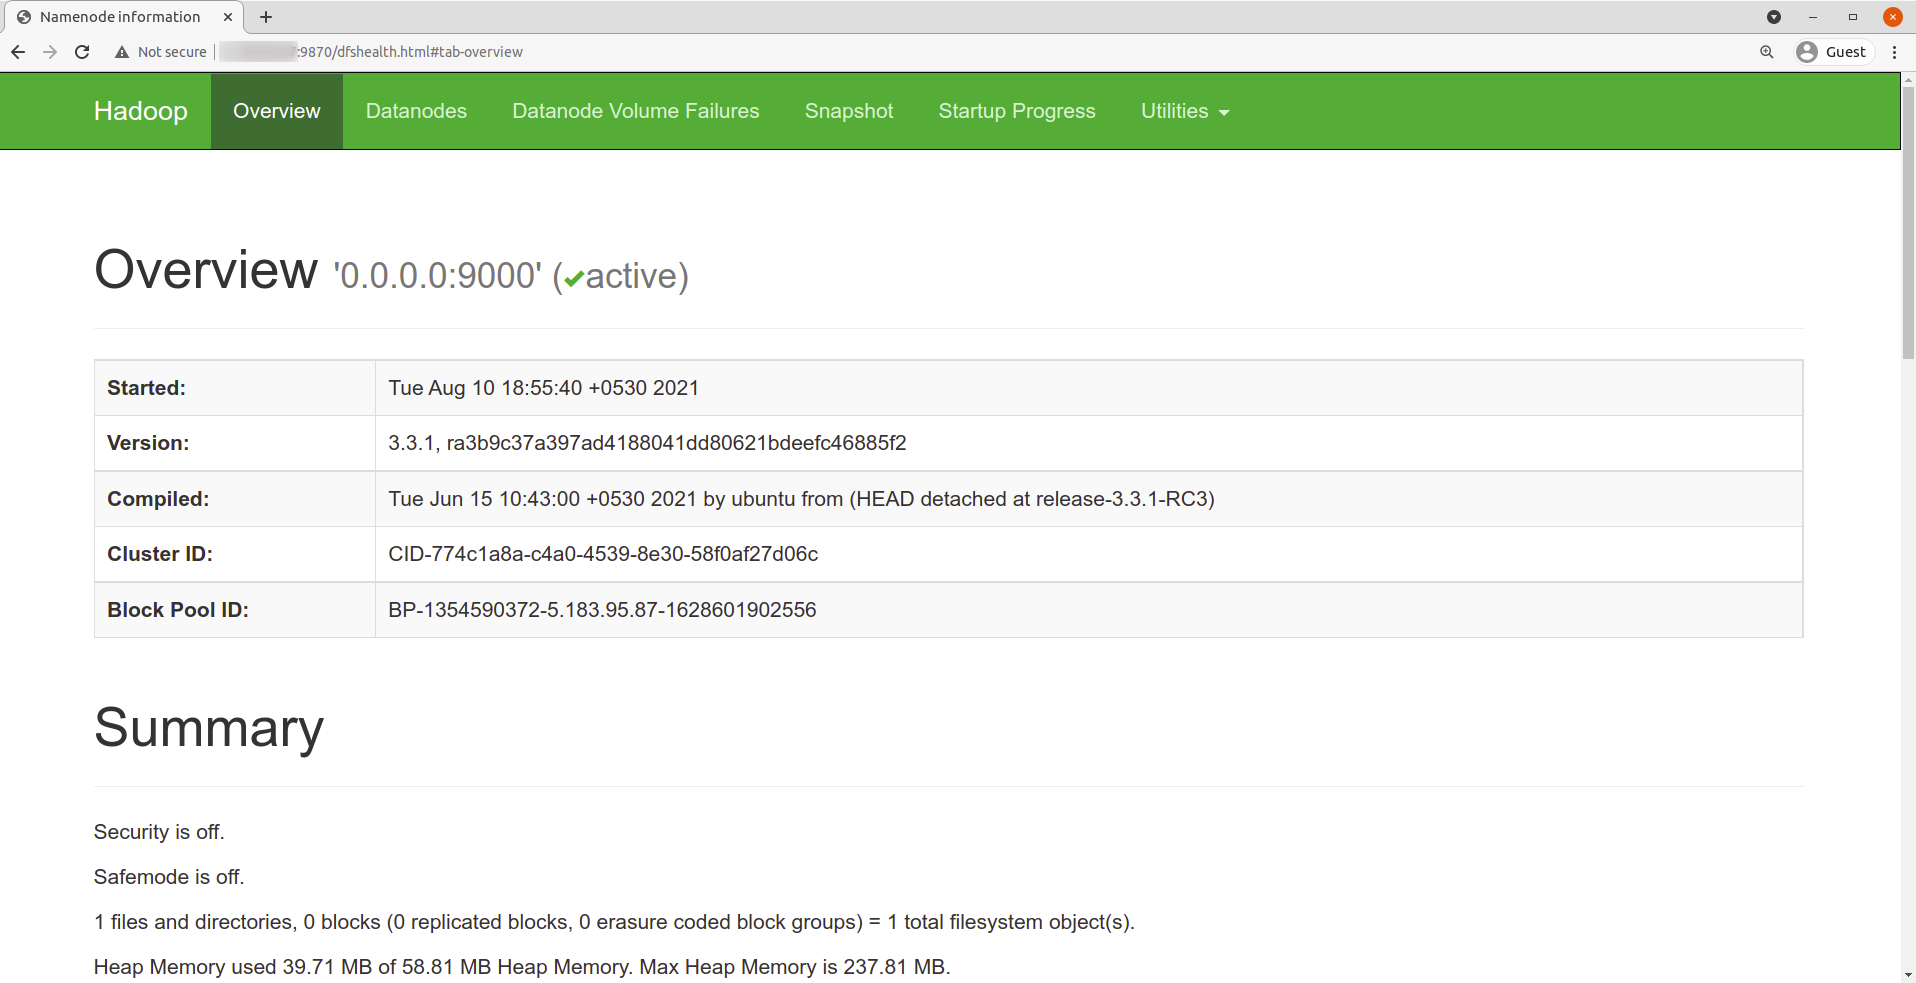
55355 NodeManager Access Hadoop Web Interface
Navigate your localhost URL or IP to access Hadoop NameNode: http://your-server-ip:9870
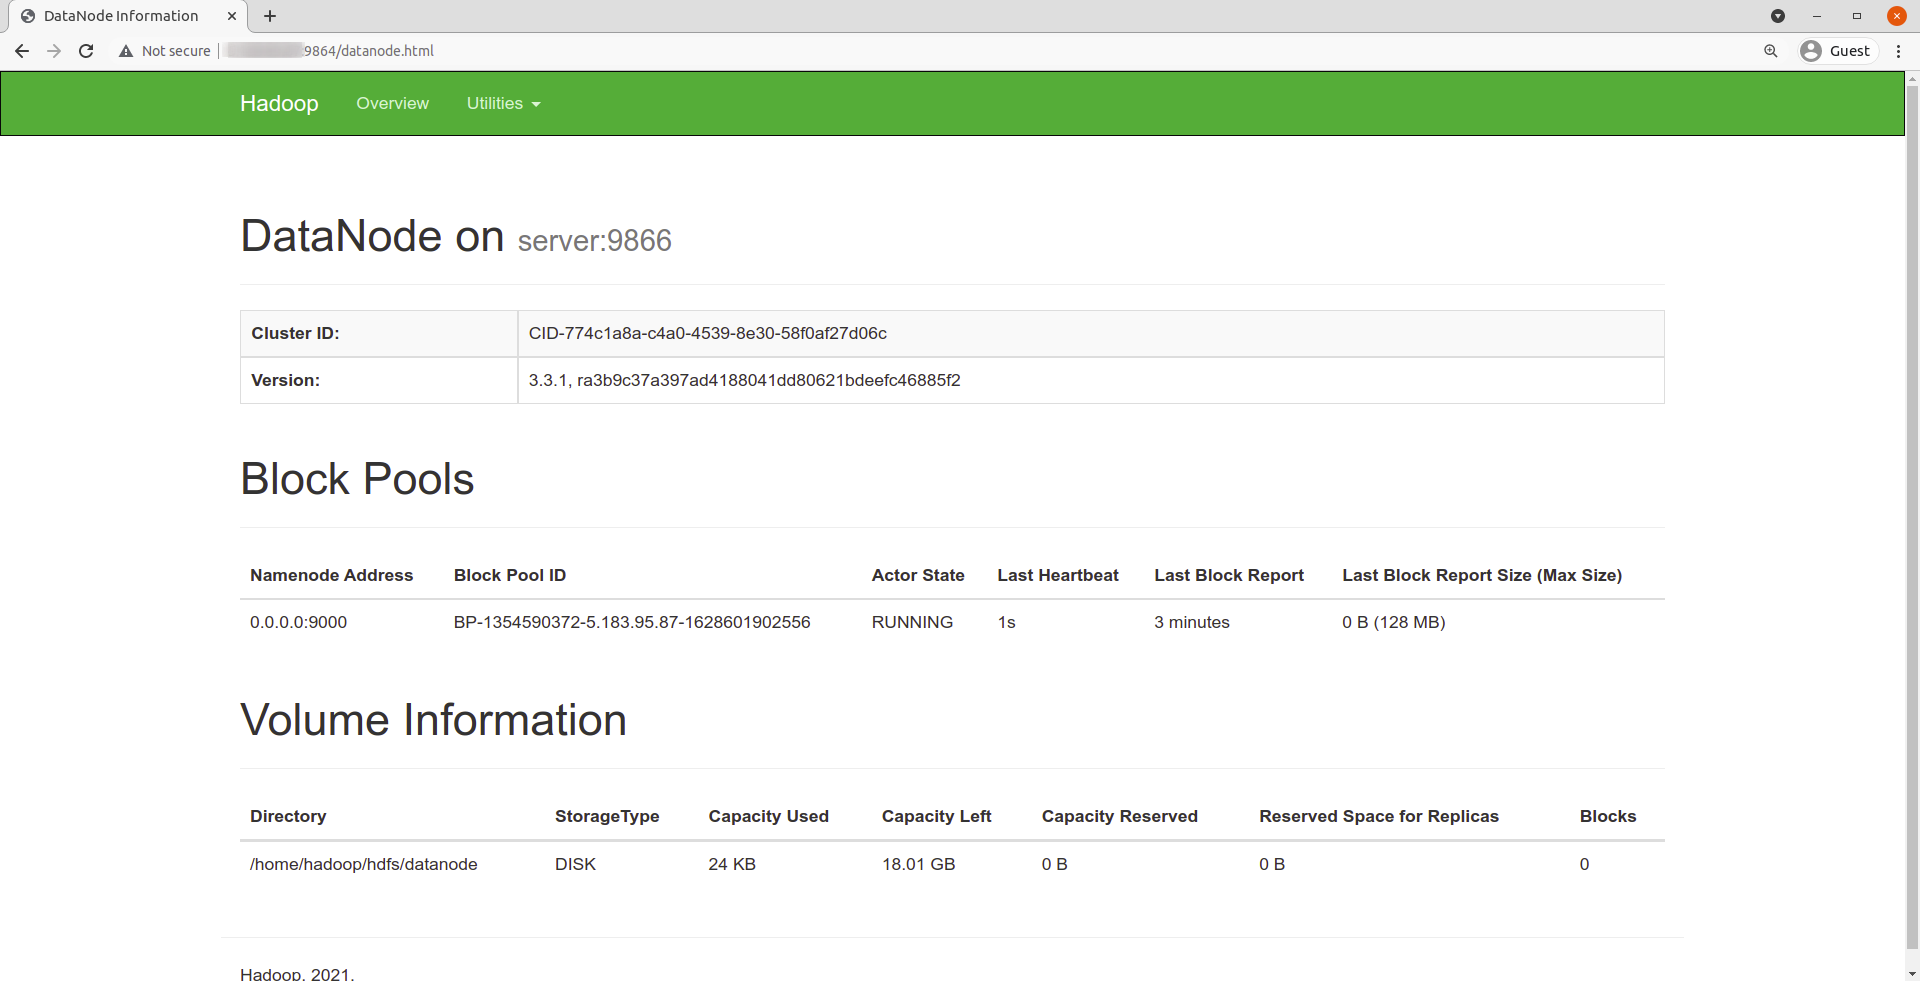
Navigate your localhost URL or IP to access individual DataNodes : http://your-server-ip:9864
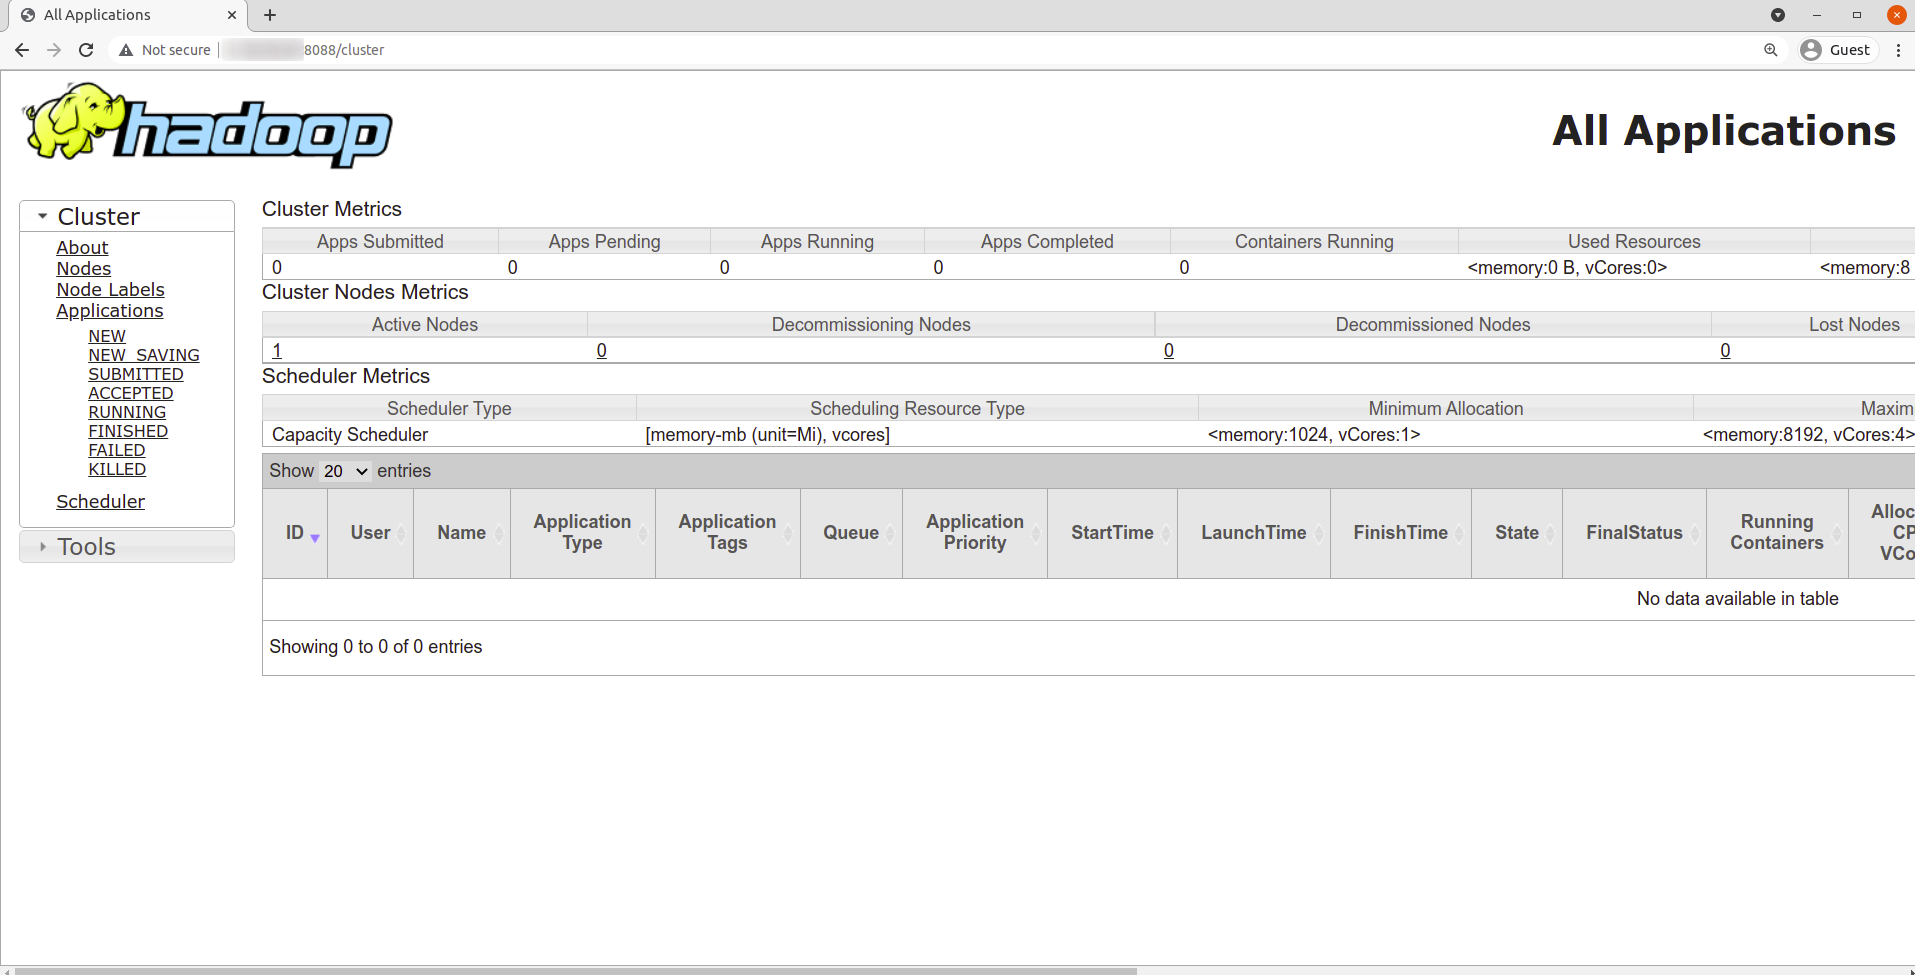
Navigate your localhost URL or IP to access the YARN Resource Manager: http://your-server-ip:8088
Done!
CrownCloud - Get a SSD powered KVM VPS at $4.5/month!
Use the code WELCOME for 10% off!
1 GB RAM / 25 GB SSD / 1 CPU Core / 1 TB Bandwidth per month
Available Locations: LAX | MIA | ATL | FRA | AMS