How to Install and SetUp Lighttpd Web Server on Ubuntu 18.04
Install Lighttpd
Enter the following command to install Lighttpd.
apt-get install lighttpd -yCommand to check the status
systemctl status lighttpdOutput:
root@vps:~# systemctl status lighttpd
● lighttpd.service - Lighttpd Daemon
   Loaded: loaded (/lib/systemd/system/lighttpd.service; enabled; vendor preset: enabled)
   Active: active (running) since Fri 2021-08-06 02:04:52 UTC; 16min ago
 Main PID: 10214 (lighttpd)
    Tasks: 1 (limit: 1106)
   CGroup: /system.slice/lighttpd.service
           └─10214 /usr/sbin/lighttpd -D -f /etc/lighttpd/lighttpd.conf

Aug 06 02:04:52 vps.server.com systemd[1]: Starting Lighttpd Daemon...
Aug 06 02:04:52 vps.server.com systemd[1]: Started Lighttpd Daemon.
root@vps:~#
Command to check Lighttpd Version.
lighttpd -versionOutput:
root@vps:~# lighttpd -version
lighttpd/1.4.45 (ssl) - a light and fast webserver
Build-Date: Jun 15 2021 14:44:25
root@vps:~#
You can also check the verify Lighttpd by visiting the following URL on your web browser.
http://your-server-ipOutPut:
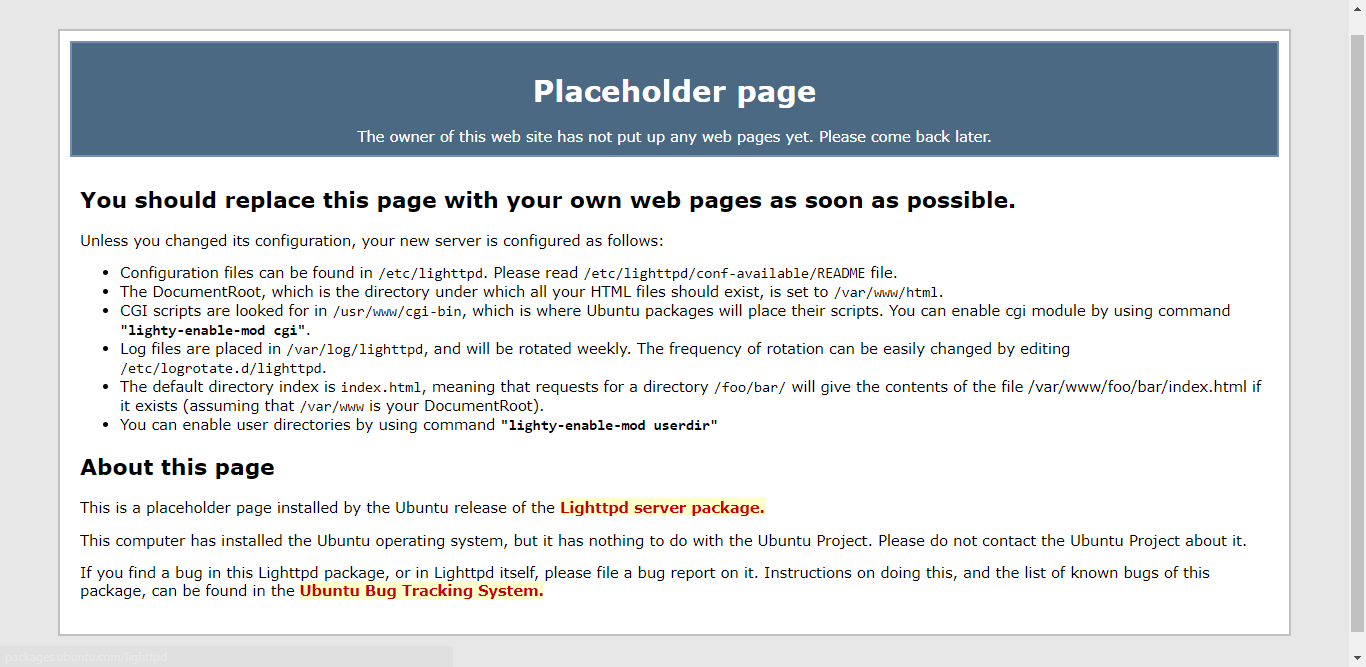
Lighttpd Configuration
The main Configuration file for Lighttpd located in the following directory
Note: Here you can make changes as per your requirements.
/etc/lighttpd/lighttpd.confYou can list all Configuration files for Lighttpd by using the tree command.
To install tree Package.
apt-get install tree -yEnter the following command to list all configuration files for Lighttpd.
tree /etc/lighttpd/Output:
root@vps:~# tree /etc/lighttpd/
/etc/lighttpd/
├── conf-available
│   ├── 05-auth.conf
│   ├── 10-accesslog.conf
│   ├── 10-cgi.conf
│   ├── 10-dir-listing.conf
│   ├── 10-evasive.conf
│   ├── 10-evhost.conf
│   ├── 10-expire.conf
│   ├── 10-fastcgi.conf
│   ├── 10-flv-streaming.conf
│   ├── 10-no-www.conf
│   ├── 10-proxy.conf
│   ├── 10-rewrite.conf
│   ├── 10-rrdtool.conf
│   ├── 10-simple-vhost.conf
│   ├── 10-ssi.conf
│   ├── 10-ssl.conf
│   ├── 10-status.conf
│   ├── 10-userdir.conf
│   ├── 10-usertrack.conf
│   ├── 11-extforward.conf
│   ├── 15-fastcgi-php.conf
│   ├── 90-debian-doc.conf
│   └── README
├── conf-enabled
└── lighttpd.conf

2 directories, 24 files
root@vps:~#
To Enable PHP and PHP-FPM for Lighttpd
Note: Lighttpd does not support PHP we need to install PHP-FPM to work with the Lighttpd.
To install PHP-FPM
apt-get install php php-cgi php-fpm -yRemove Apache Web server.
Note: While installing PHP on the system Apache Web server will be installed automatically.
Command to stop and remove Apache Web server.
systemctl stop apache2
systemctl disable apache2
Next, remove the Apache package completely from the system.
apt-get remove apache2 -yTo Configure PHP-FPM
Open the following Configuration file
nano /etc/php/7.2/fpm/pool.d/www.confAnd find the this line listen = /run/php/php7.2-fpm.sock in the configuration file and replace it with following line.
listen = 127.0.0.1:9000Save and exit the file -- And enter the following command to restart PHP-FPM
systemctl restart php7.2-fpmTo Configure PHP
Open the PHP configuration file.
nano /etc/php/7.2/fpm/php.iniAnd find and uncomment the following line
cgi.fix_pathinfo=1Open the following file and configure PHP-FPM to run as a FastCGI server on port 9000.
nano /etc/lighttpd/conf-available/15-fastcgi-php.conffind the following line the file,
"bin-path" => "/usr/bin/php-cgi",
"socket" => "/var/run/lighttpd/php.socket",
and replace it with,
"host" => "127.0.0.1",
"port" => "9000",
Next, enable FastCGI and FastCGI-PHP modules.
lighty-enable-mod fastcgi
lighty-enable-mod fastcgi-php
service lighttpd force-reload
Output:
root@vps:~# lighty-enable-mod fastcgi
Enabling fastcgi: ok
Run "service lighttpd force-reload" to enable changes
root@vps:~# lighty-enable-mod fastcgi-php
Enabling fastcgi-php: ok
Run "service lighttpd force-reload" to enable changes
root@vps:~# service lighttpd force-reload
To verify PHP and PHP-FPM on Lighttpd
Create info.php
nano /var/www/html/info.phpand the following line
<?php
phpinfo();
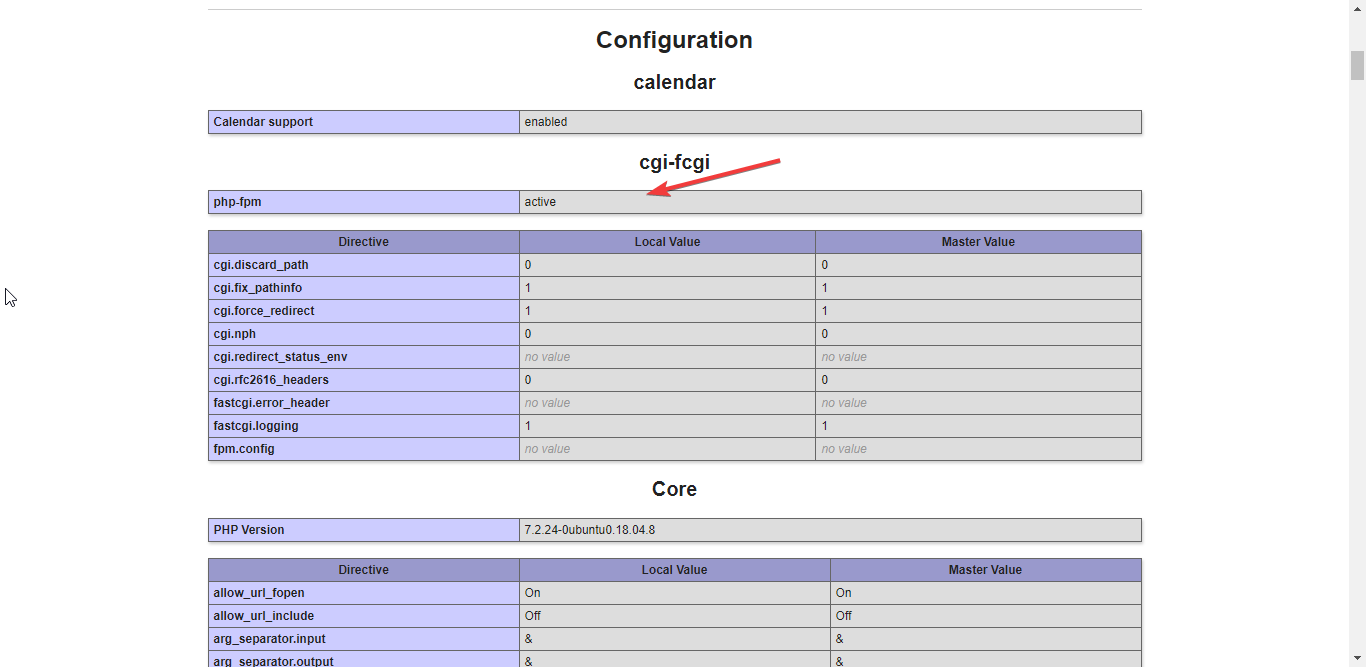
?>Open the following URL on your Web browser to verify,
http://your-server-ip/info.php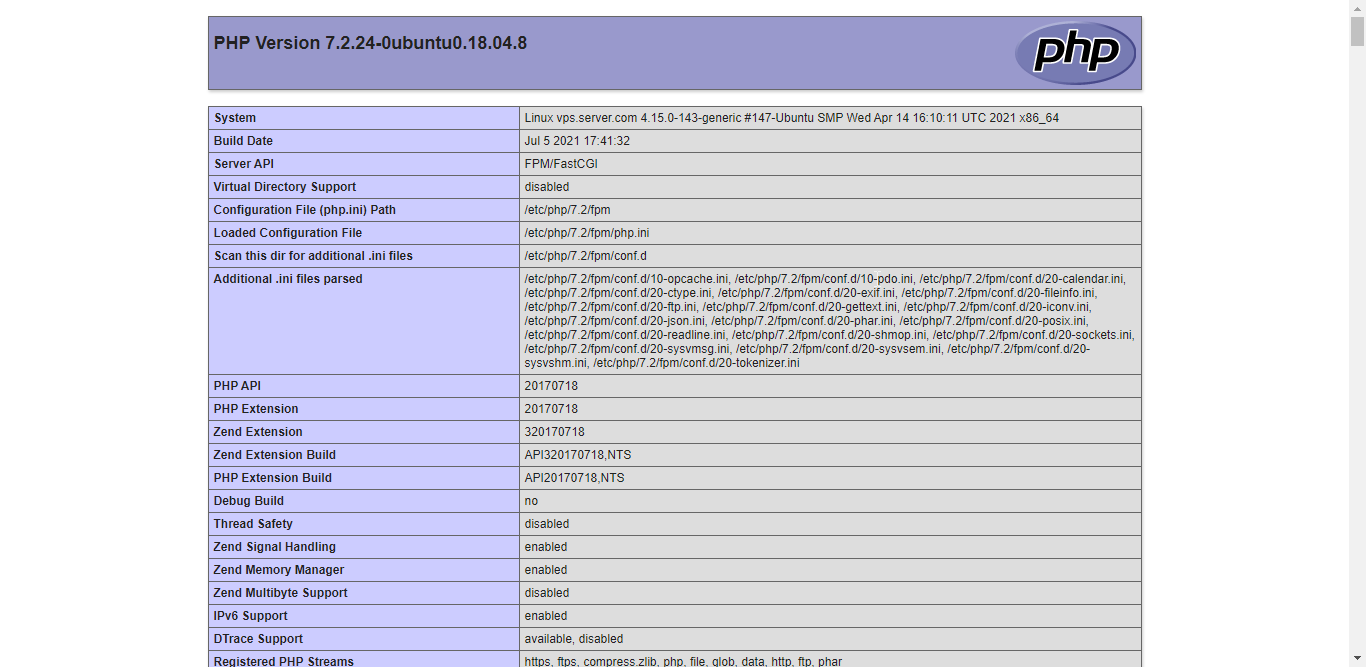
CrownCloud - Get a SSD powered KVM VPS at $4.5/month!
Use the code WELCOME for 10% off!
1 GB RAM / 25 GB SSD / 1 CPU Core / 1 TB Bandwidth per month
Available Locations: LAX | MIA | ATL | FRA | AMS