How to Install OpenLiteSpeed on AlmaLinux 9
OpenLiteSpeed is a high-performance, open-source web server software designed to efficiently serve web content. It is the open-source version of LiteSpeed Web Server, which is a commercial web server known for its speed and performance. OpenLiteSpeed is a popular choice for web developers and administrators looking for a high-performance, open-source web server solution. It's particularly well-suited for websites and applications that require fast and efficient content delivery.
First, check for any pending system updates,
dnf update Third-party DNF Repositories Installation
Install the wget command before anything else since you'll need it to download and install third-party dnf repositories,
dnf install -y wgetRun the Linux command shown below to install the LiteSpeed Official repository,
wget -O - https://repo.litespeed.sh | sudo bashOutput:
[root@vps ~]# wget -O - https://repo.litespeed.sh | sudo bash
--2023-09-01 15:11:39--  https://repo.litespeed.sh/
Resolving repo.litespeed.sh (repo.litespeed.sh)... 34.192.49.9
Connecting to repo.litespeed.sh (repo.litespeed.sh)|34.192.49.9|:443... connected.
HTTP request sent, awaiting response... 200 OK
Length: 5591 (5.5K) [application/octet-stream]
Saving to: ‘STDOUT’

-                100%[=========>]   5.46K  13.9KB/s    in 0.4s

2023-09-01 15:11:40 (13.9 KB/s) - written to stdout [5591/5591]

/tmp ~
  % Total    % Received % Xferd  Average Speed   Time    Time     Time  Current
                                 Dload  Upload   Total   Spent    Left  Speed
  0     0    0     0    0     0      0      0 --:--:-- --:--:-- --:  0     0    0     0    0     0      0      0 --:--:-- --:--:-- --:100  1798  100  1798    0     0   7460      0 --:--:-- --:--:-- --:--:--  7429
~
LiteSpeed repository has been setup!
Install ext PHP repo.
LiteSpeed Tech Repository for Cent 464 kB/s | 223 kB     00:00
LiteSpeed Tech Update Repository f 498 kB/s | 254 kB     00:00
remi-release-9.2.rpm                46 kB/s |  28 kB     00:00
Dependencies resolved.
===================================================================
 Package         Arch      Version           Repository       Size
===================================================================
Installing:
 remi-release    noarch    9.2-1.el9.remi    @commandline     28 k
Installing dependencies:
 epel-release    noarch    9-5.el9           extras           18 k

Transaction Summary
===================================================================
Install  2 Packages
Enable Epel repository
dnf install -y epel-release Install OpenLiteSpeed
Run the following command to install the OpenLitespeed server and related LiteSpeed PHP interpreter
dnf install openlitespeed lsphp81Output:
[root@vps ~]# dnf install openlitespeed lsphp81
Last metadata expiration check: 0:11:27 ago on Fri 01 Sep 2023 03:14:43 PM UTC.
Package openlitespeed-1.7.18-1.el9.x86_64 is already installed.
Dependencies resolved.
===================================================================
Package          Arch     Version        Repository          Size
===================================================================
Installing:
lsphp81          x86_64   8.1.22-2.el9   litespeed-update   5.4 M
Installing dependencies:
lsphp81-common   x86_64   8.1.22-2.el9   litespeed-update   654 k
Transaction Summary
===================================================================
Install  2 Packages
LSPHP 8.1 and the Openlitespeed server package are installed by this command. The LiteSpeed Server Application Programming Interface (LSAPI) is connected with the PHP interpreter known as LiteSpeed PHP (LSPHP).
To make sure the recently added repository is checked out by the dnf command, update the list of repositories
dnf updateYou will safeguard the OpenLiteSpeed server by changing the default administrator account after it has been set up.
Setting the Administrative Password
Before testing the server, you should set a new password for OpenLiteSpeed Admin. The below command can help us with changing the password
/usr/local/lsws/admin/misc/admpass.shOutput:
root@vps:~# /usr/local/lsws/admin/misc/admpass.sh

Please specify the user name of administrator.
This is the user name required to login the administration Web interface.

User name [admin]: Admin

Please specify the administrator's password.
This is the password required to login the administration Web interface.

Password:
Retype password:
Administrator's username/password is updated successfully!
Status of Web Server
To ensure OpenLiteSpeed starts correctly on modern RHEL-based systems, we must install the libxcrypt-compat package:
dnf install libxcrypt-compat -yRestart OpenLiteSpeed
systemctl restart lswsUse the following command to look up OpenLitespeed's status
systemctl status lswsOutput:
[root@vps ~]# systemctl status lsws
 ● lshttpd.service - OpenLiteSpeed HTTP Server
  Loaded: loaded (/usr/lib/systemd/system/lshttpd.service; enab>
  Active: active (running) since Fri 2023-09-01 18:41:35 UTC; 2>
  Process: 8545 ExecStart=/usr/local/lsws/bin/lswsctrl start (co>
  Main PID: 8558 (litespeed)
  CGroup: /system.slice/lshttpd.service
         ├─8558 "openlitespeed (lshttpd - main)"
         ├─8559 "openlitespeed (lscgid)"
         ├─8560 "openlitespeed (lshttpd - #01)"
         └─8561 lsphp

  Sep 01 18:41:32 vps.server.com systemd[1]: Starting OpenLiteSpeed >
  Sep 01 18:41:32 vps.server.com lswsctrl[8545]: [OK] Send SIGUSR1 t>
  Sep 01 18:41:35 vps.server.com systemd[1]: Started OpenLiteSpeed H>
  lines 1-14/14 (END)
Firewall
Allow the following ports on the Firewalld so it's publicy accessible.
firewall-cmd --zone=public --permanent --add-port={80/tcp,443/tcp,8088/tcp,7080/tcp}
firewall-cmd --permanent --add-service=http
firewall-cmd --permanent --add-service=https
firewall-cmd --reload
Output:
root@vps:~#firewall-cmd --zone=public --permanent --add-port={80/tcp,443/tcp,8088/tcp,7080/tcp}
success
[root@vps ~]# firewall-cmd --permanent --add-service=http
success
[root@vps ~]# firewall-cmd --permanent --add-service=https
success
root@vps:~#firewall-cmd --reload
success
Accessing OLS Dashboard
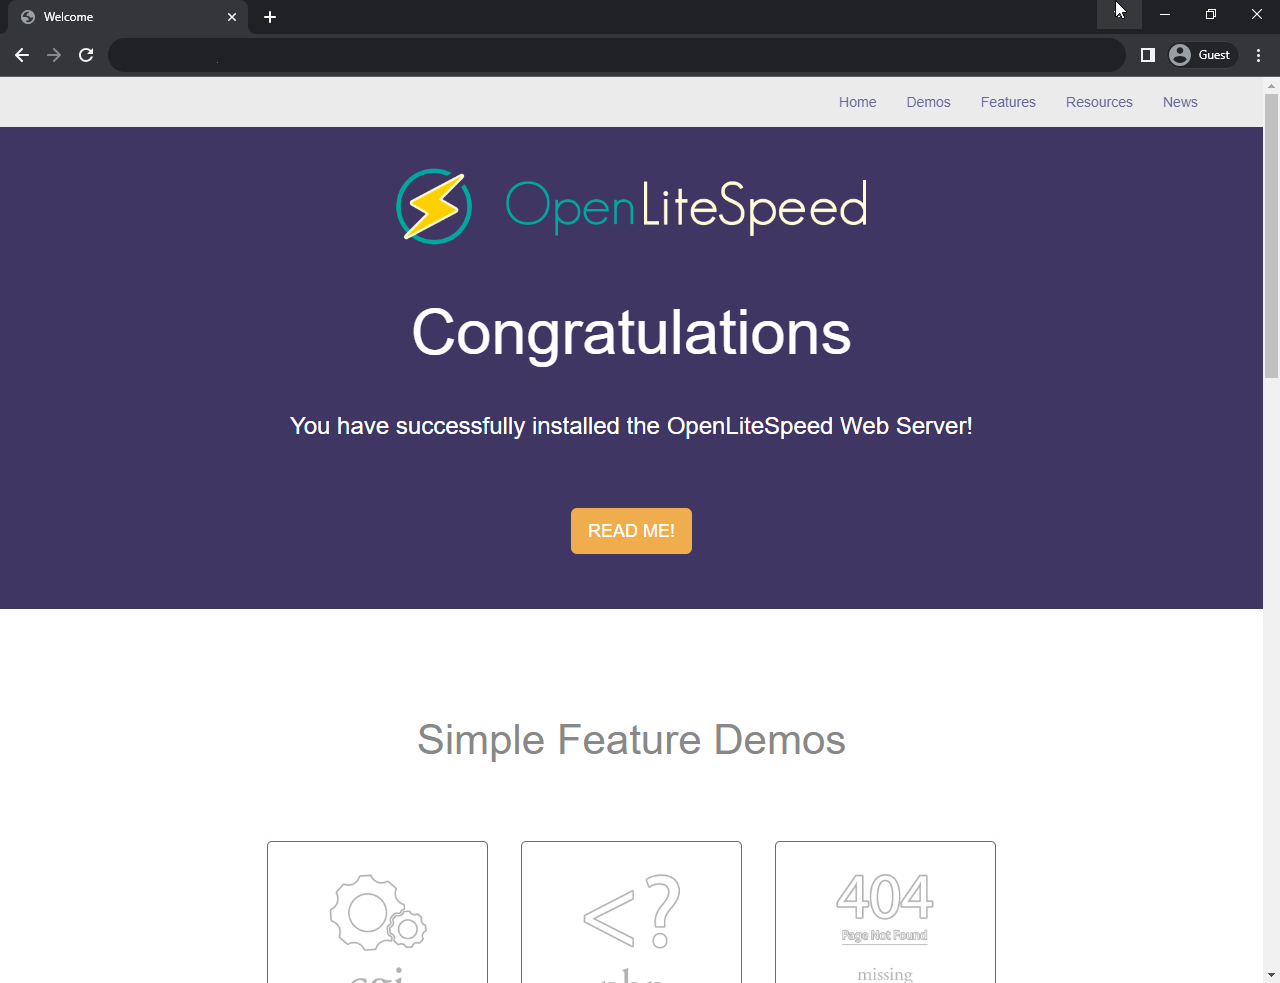
To access OpenLiteSpeed, open the URL from your web browser: http://server_domain_or_IP:8088
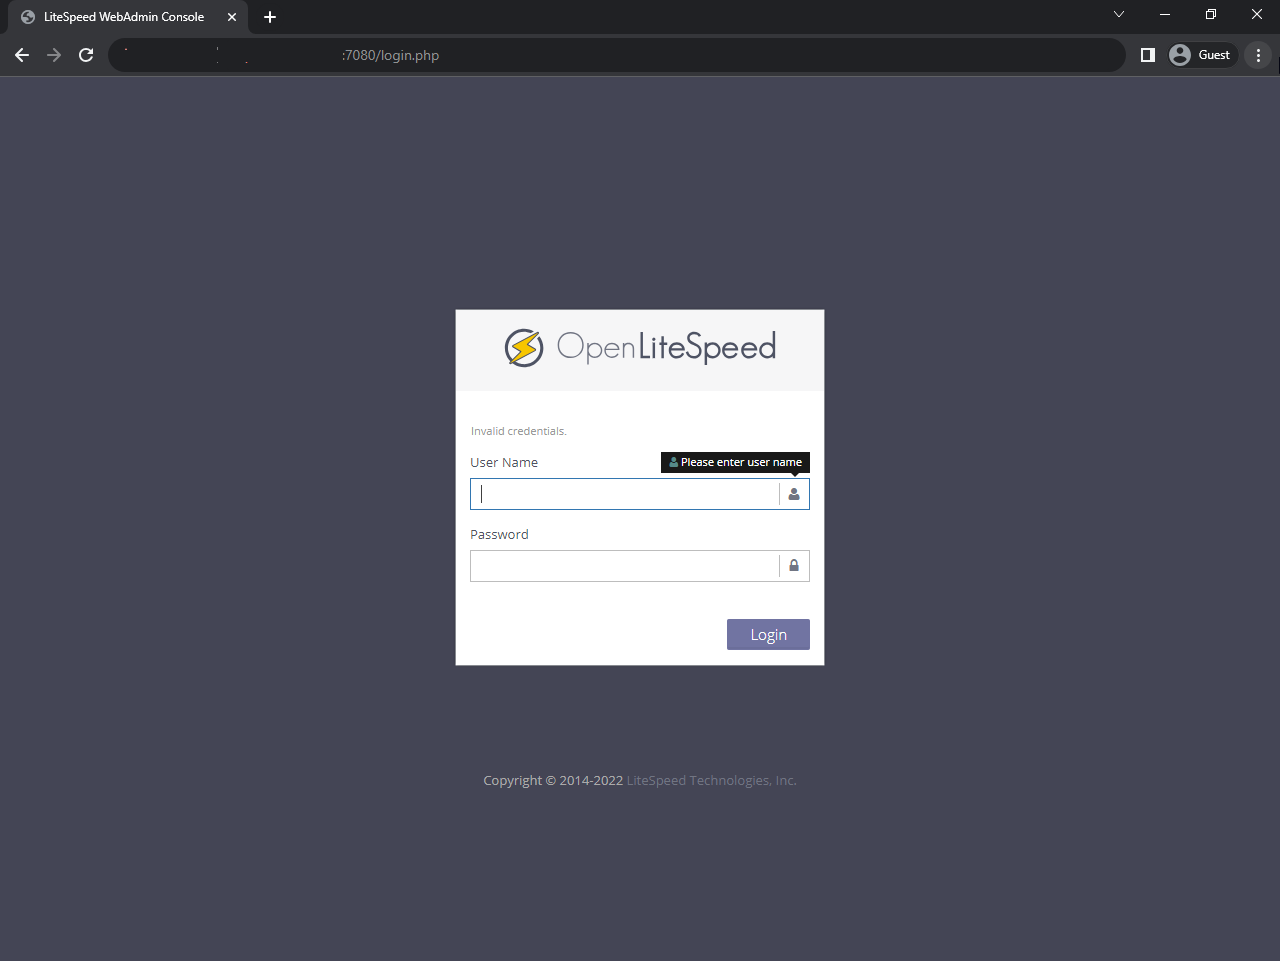
And to access OLS Dashboard, open the url http://server_domain_or_IP:7080
Username: Admin and Password would be the one set from previous step.

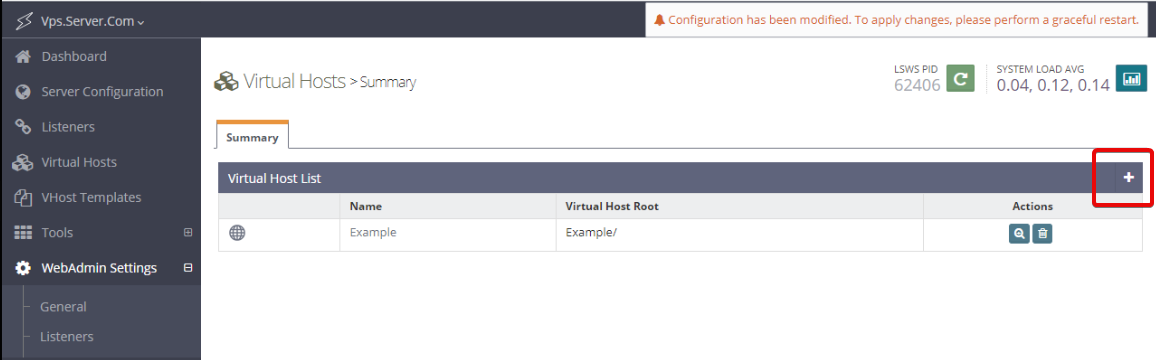
Create Virtual Host Configuration
The virtual hosts (or vHosts) are created so the web server can serve the relevant site data to the users.
This can be added in OpenLiteSpeed by going to the WebAdmin panel -> Virtual Hosts -> Add
Next, Enter the following details of the virtual host.
- virtual Host Name: Enter the name of the vHost or the site being configured.
- virtual Host Root: Enter the path where the site data are stored.
- Config File: This is the path where the vHost configuration is stored.
- Follow Symbolic Link: Yes
- Enable Scripts/ExtApps: Yes
- Restrained: Yes
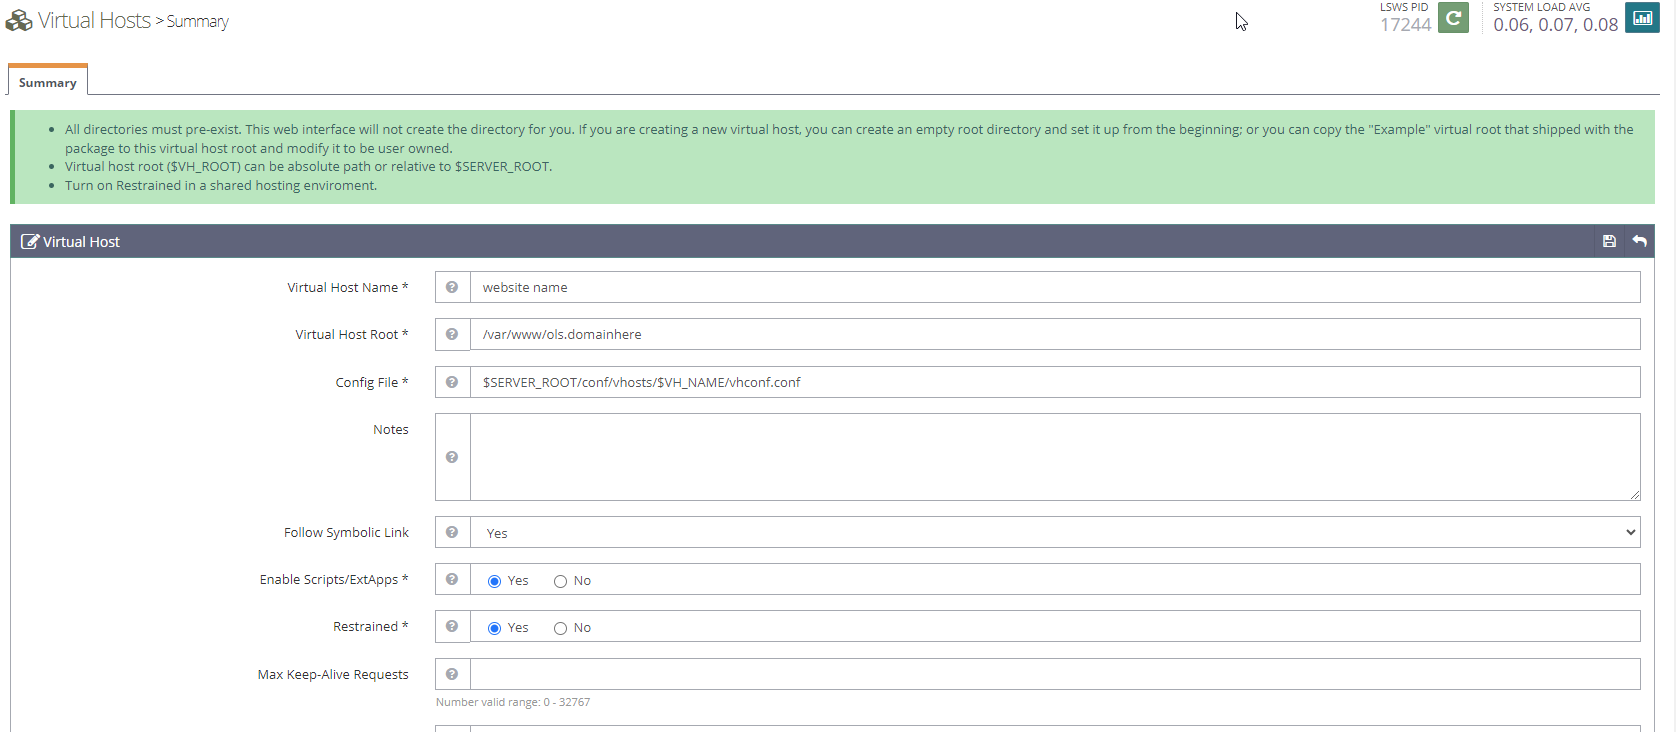
Save the configuration
Open the newly created vHost and navigate to "General" tab to update the following:
- Document Root: Enter the path where the site data are stored.
- Domain Name: Enter the domain name being used.
- Domain Aliases: You can enter if you have any Domain aliases (example: www.example.com)
Index Files
- Use Server Index Files: No
- Index Files: index.php index.html
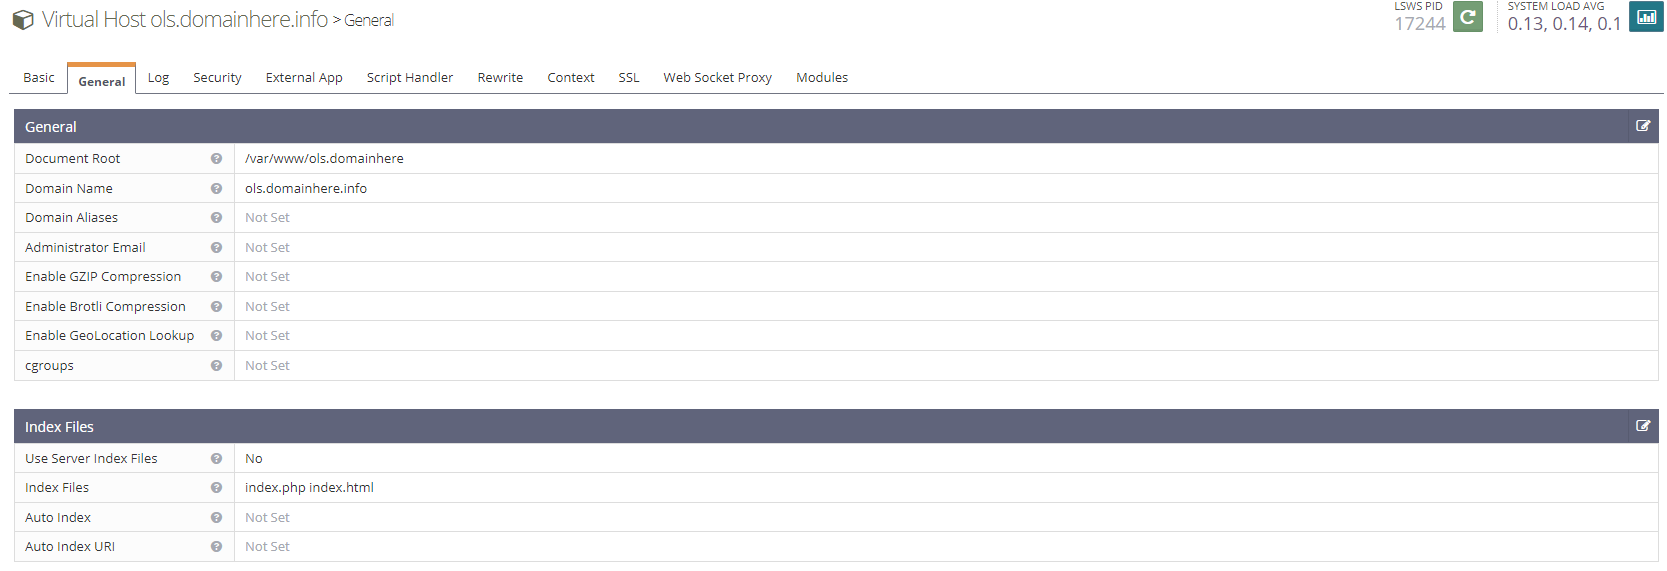
Save the configuration and then restart LSWS (Graceful restart from the webAdmin panel).
SSH into the server, we will create a directory for storing the site's data
mkdir -p /var/www/ols.domainhereReplace
ols.domainherewith your actual Domain name.
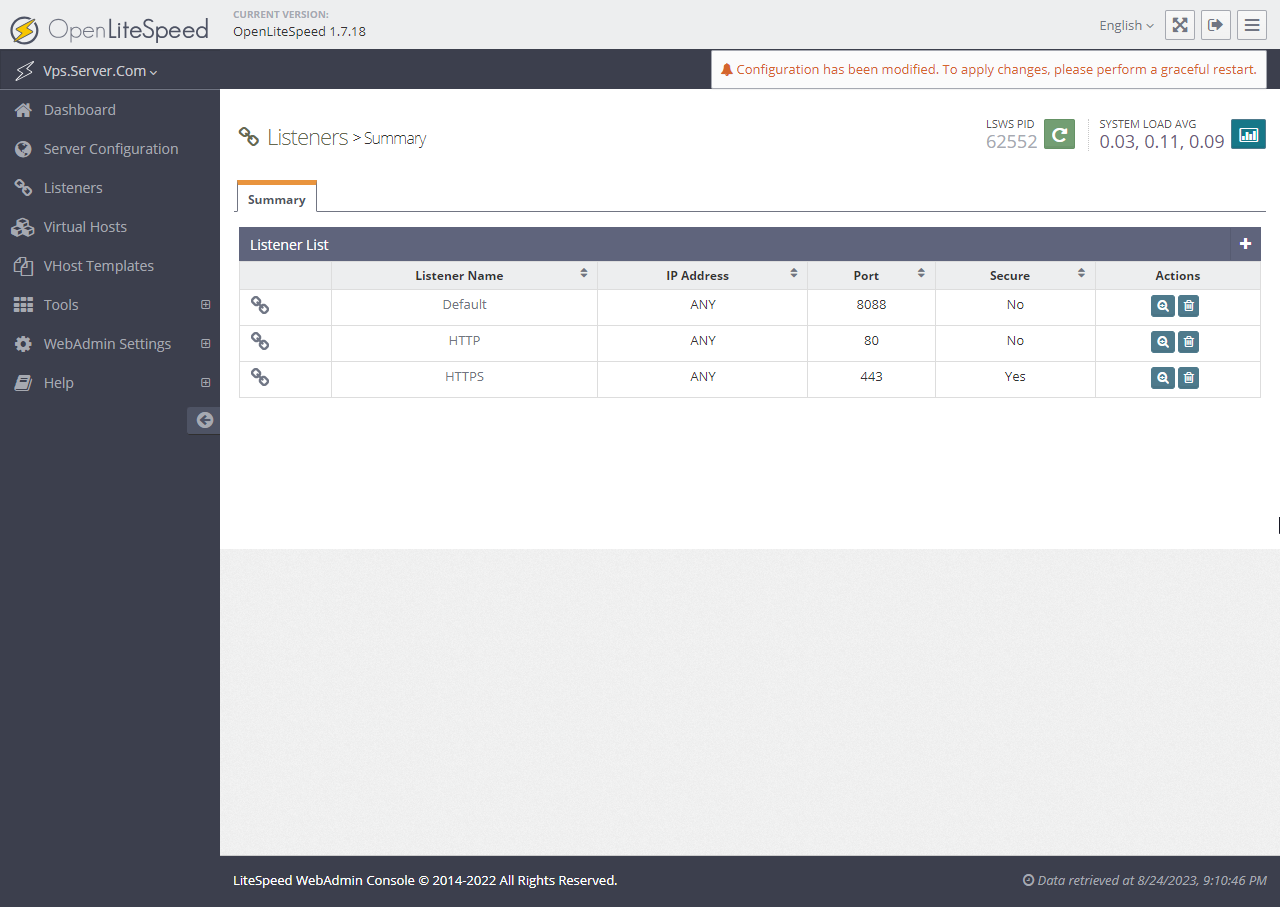
Create Listeners
Select Listeners from the WebAdmin panel.
One listener can monitor all local IP addresses, or you can set up numerous listeners, each of which exclusively monitors a single IP address. Many users will find it easier to have a single listener that is then mapped to various domains, but having multiple listeners can be advantageous if, for instance, you wish to reserve particular server processors for specific sites (see the listener binding section of LSWS's documentation) or carry out unique operations on different ports.
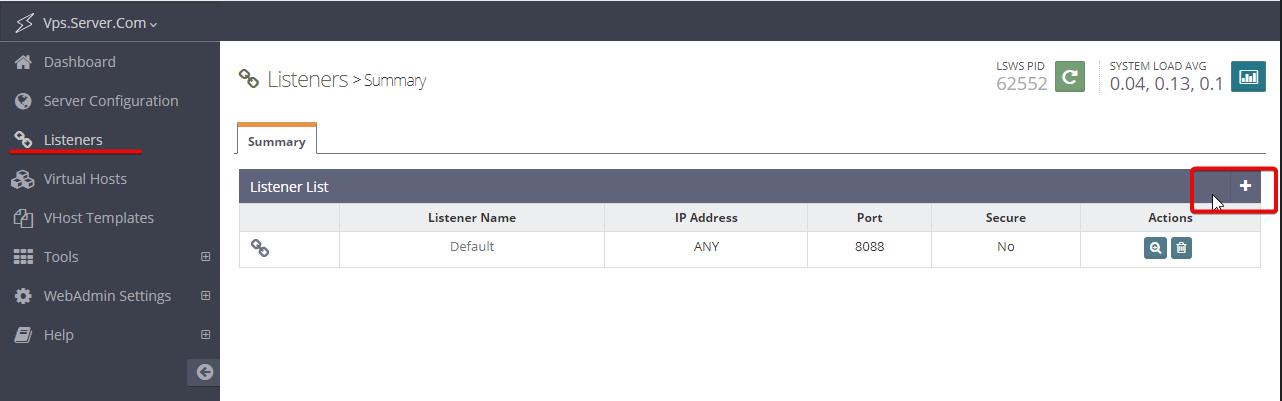
Create a listner for websites to load over HTTP, by clicking + Add button and enter the information as shown below:
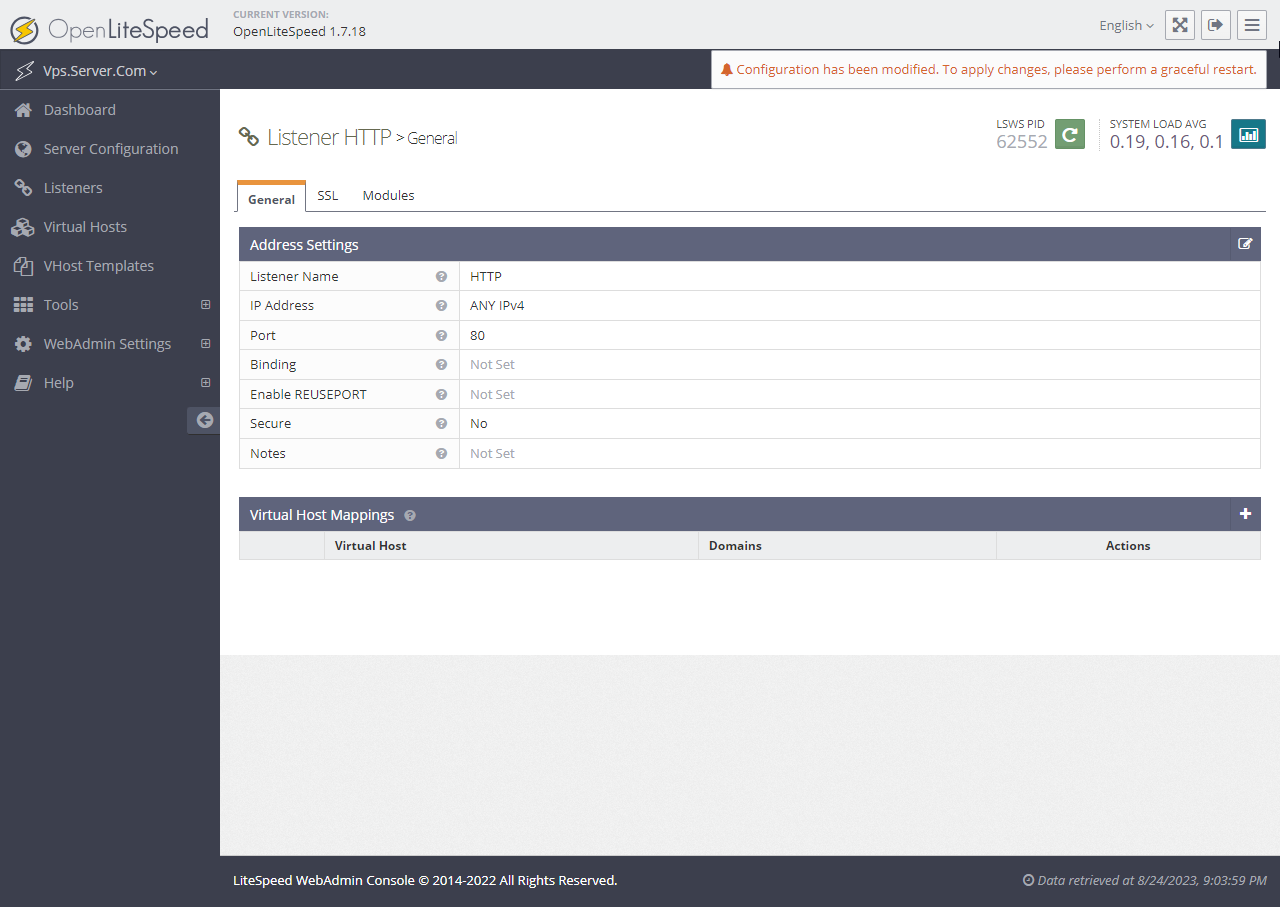
Save the configuration.
Create another listner for websites to load over HTTPS, by clicking + Add button and enter the information as shown below:
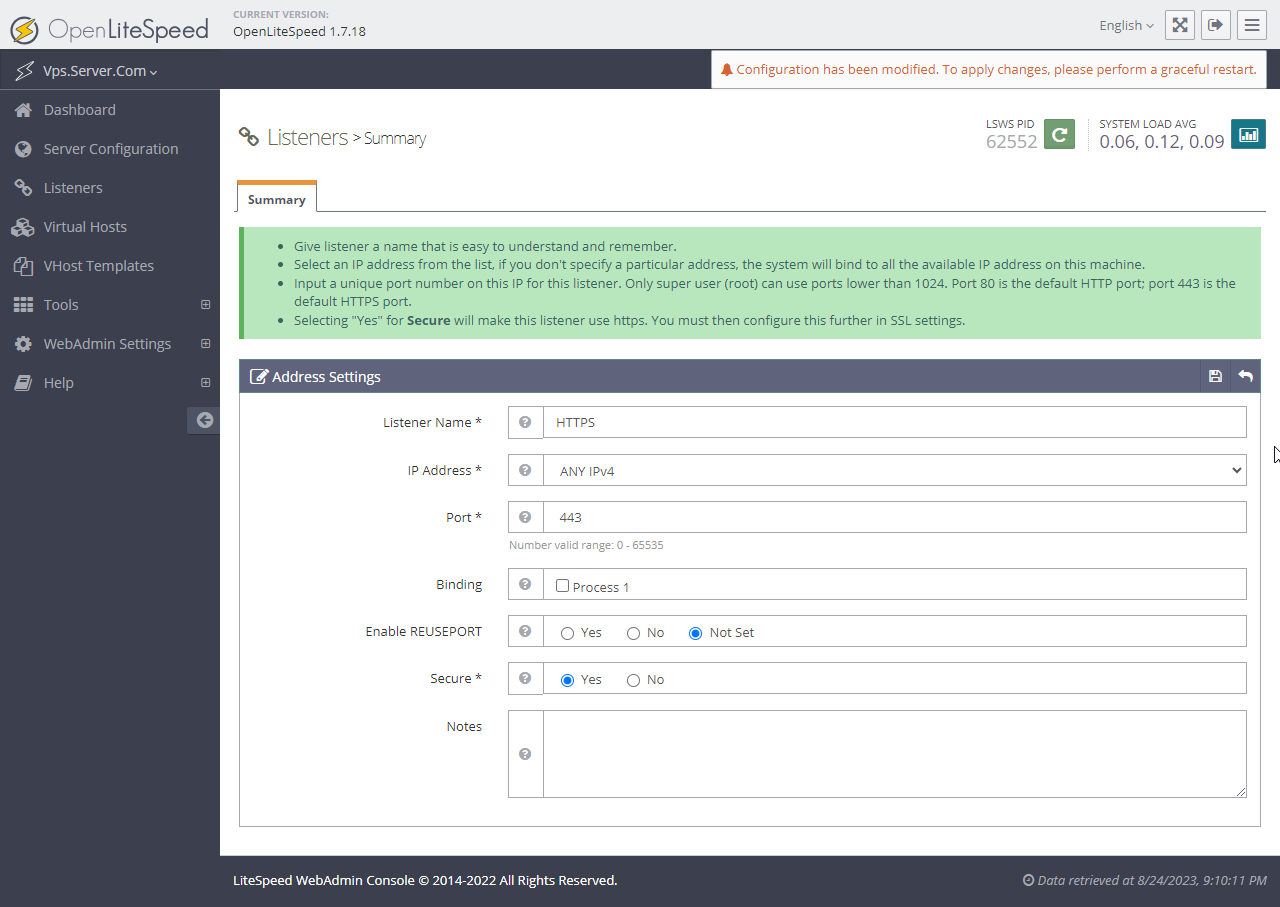
Save the configuration.
You will see the Listeners similar to below image:
Next, create virtual Host Mapping for both the Listeners that was created now.

- Virtual Host: Select the vHost name from the dropdown.
- Domains: Enter the Domain name here (If you have multiple domains, use
*).
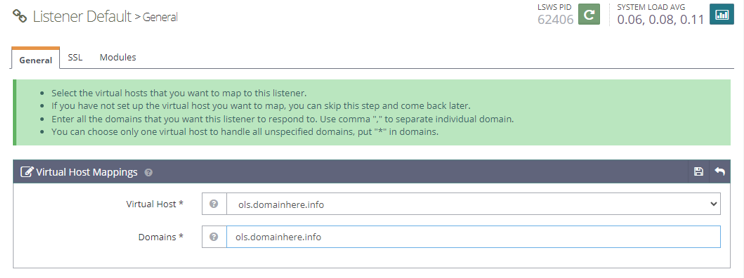
Virtual Host Mapping should be added for both the Listeners.
Once the configuration is added, Restart LSWS from webAdmin panel.
Install Let’s Encrypt SSL Certificate
Install Certbot by running the following command.
dnf install certbotUse the certbot command to issue a Let's Encrypt certificate. Replace ols.domainhere.info and demo@gmail.com with your domain name and email :
certbot certonly --non-interactive --agree-tos -m demo@gmail.com --webroot -w /var/www/ols.domainhere -d ols.domainhere.infoOutput:
[root@vps ~]# certbot certonly --non-interactive --agree-tos -m demo@gmail.com --webroot -w /var/www/ols.domainhere -d ols.domainhere.info
Saving debug log to /var/log/letsencrypt/letsencrypt.log
Requesting a certificate for ols.domainhere.info
Successfully received certificate.
Certificate is saved at: /etc/letsencrypt/live/ols.domainhere.info/fullchain.pem
Key is saved at: /etc/letsencrypt/live/ols.domainhere.info/privkey.pem
This certificate expires on 2023-11-22.
These files will be updated when the certificate renews.
Certbot has set up a scheduled task to automatically renew this certificate in the background.
- - - - - - - - - - - - - - - - - - - - - - - - - - - - - - - - - - - - - - - -
If you like Certbot, please consider supporting our work by:
* Donating to ISRG / Let's Encrypt: https://letsencrypt.org/donate
* Donating to EFF: https://eff.org/donate-le
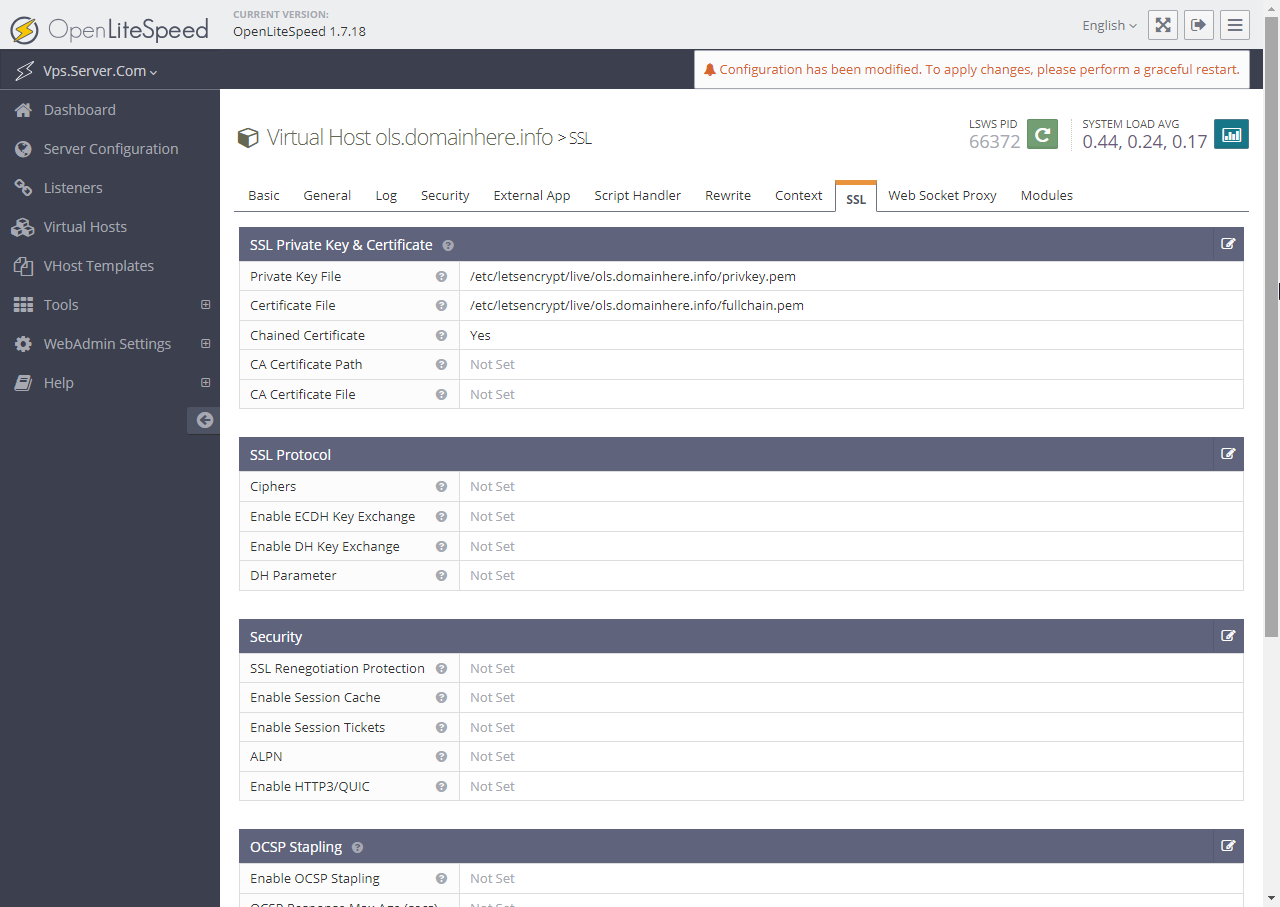
- - - - - - - - - - - - - - - - - - - - - - - - - - - - - - - - - - - - - - - -After certifiate is created successfully, add the Private Key file and Certificate file paths in the SSL section of the vHost configuration that was created earlier.
And then restart the LSWS once again for the changes to take effect.
This concludes the topic of installing OpenLightSpeed on AlmaLinux 9 along with configuring vHost and SSL Certificates.
CrownCloud - Get a SSD powered KVM VPS at $4.5/month!
Use the code WELCOME for 10% off!
1 GB RAM / 25 GB SSD / 1 CPU Core / 1 TB Bandwidth per month
Available Locations: LAX | MIA | ATL | FRA | AMS