How to Use VirtIO Network Card on Windows Servers
In this article shows how to Switch the Windows Server's Network interface from default E1000 to VirtIO.
Prerequisites,
- You will need a server with Windows installed of your choice of version along with Administrator access.
Switching the network card to VirtIO
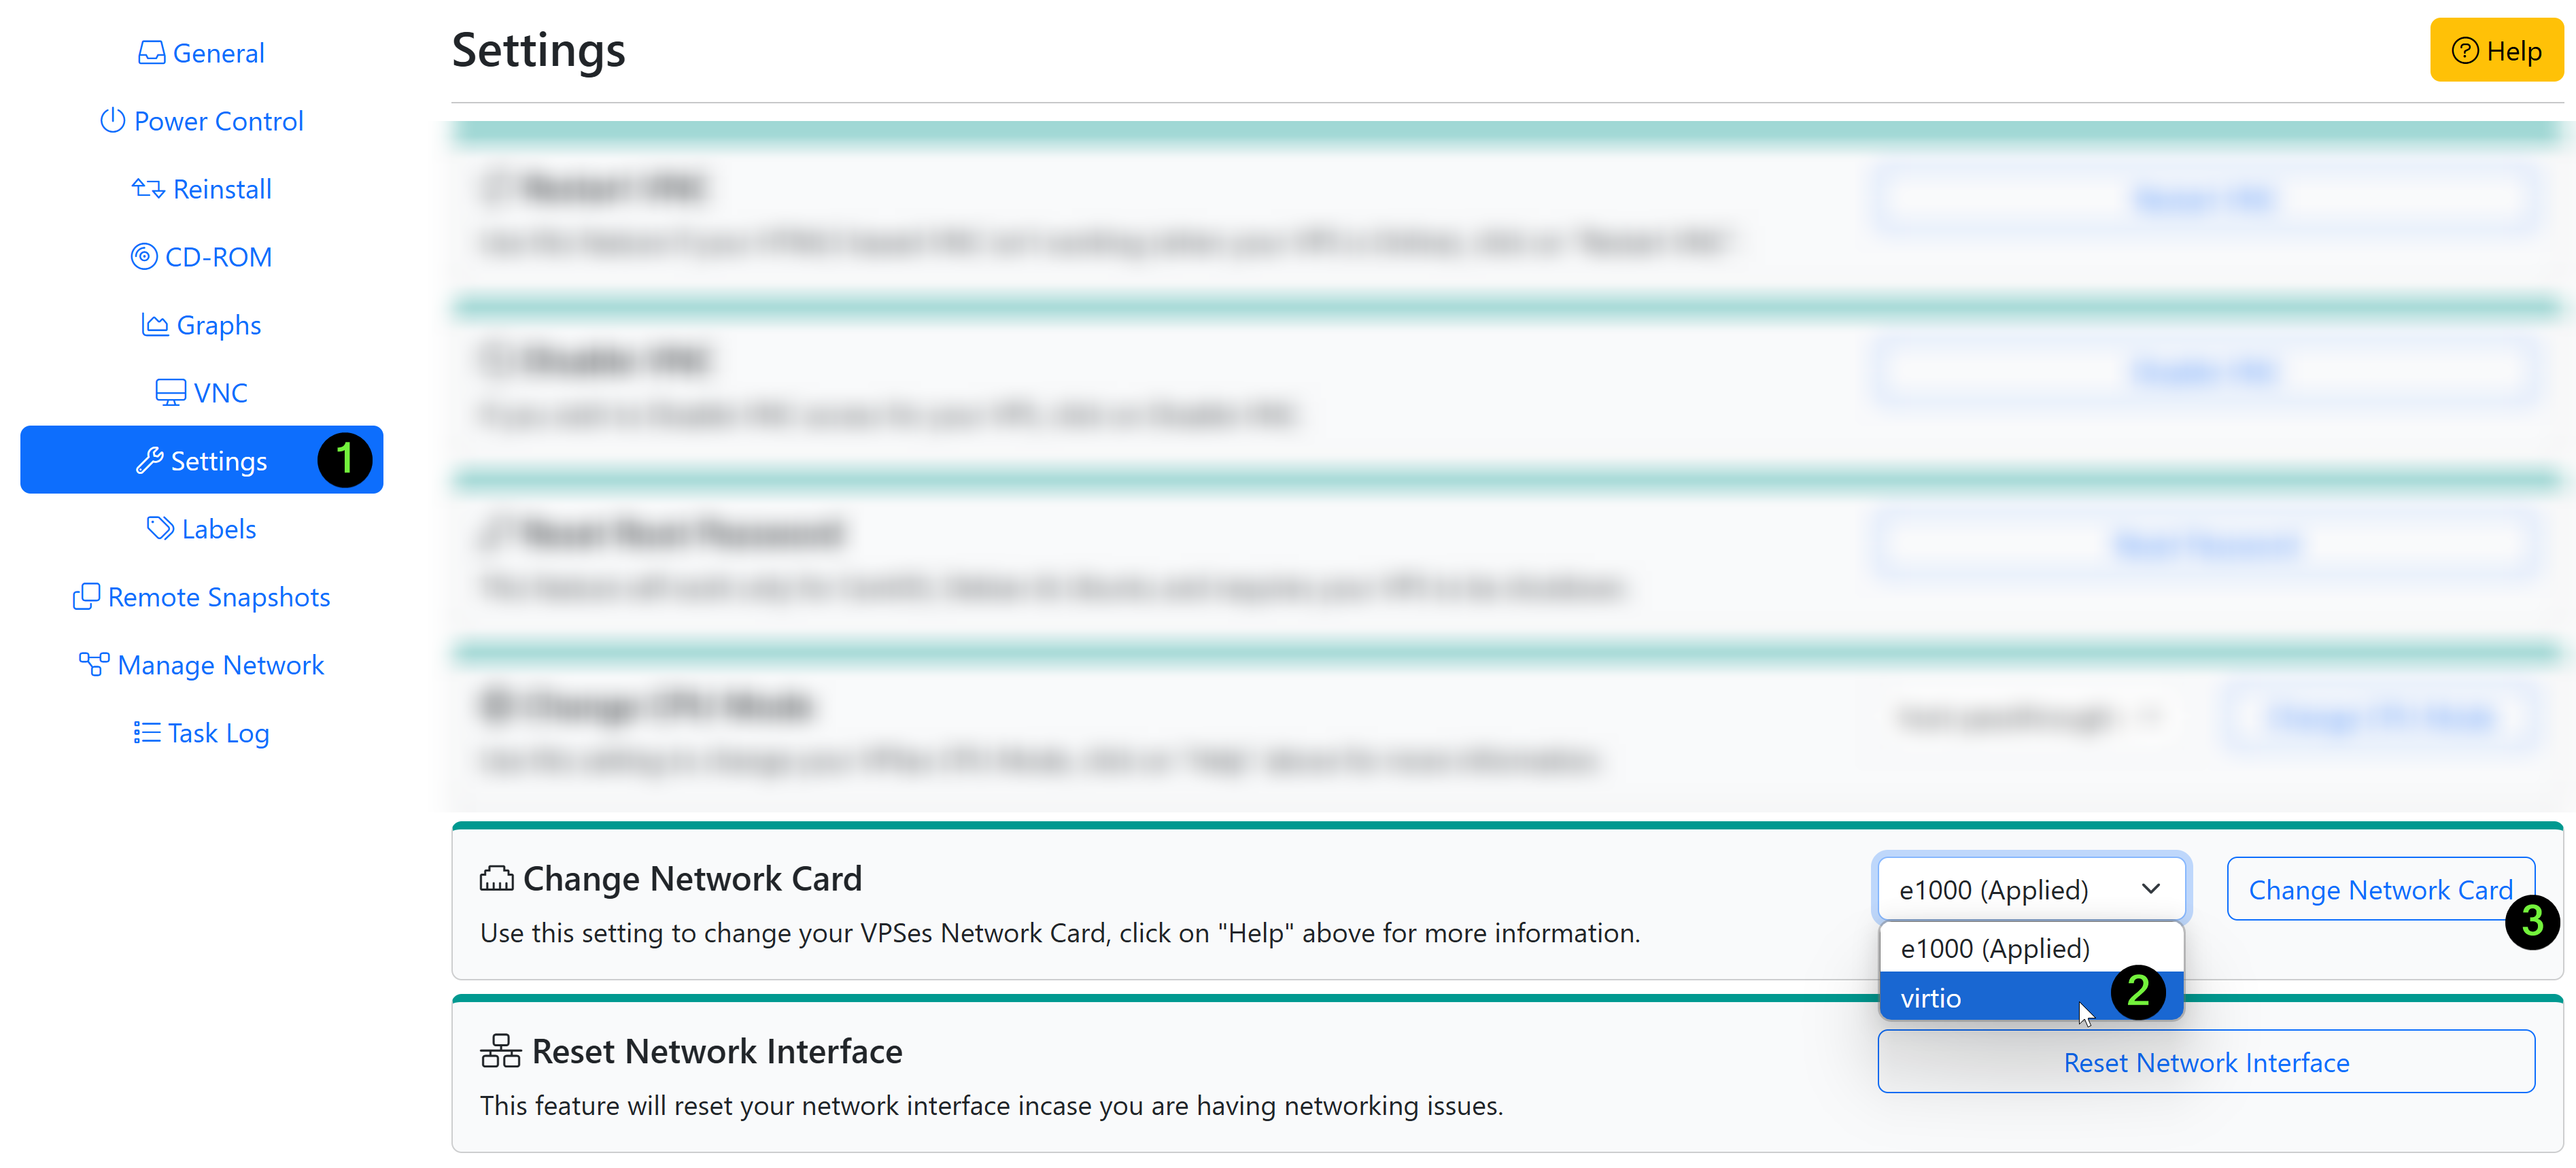
By default, the Network Card is set to e1000. First, we change the Network Card from e1000 to VirtIO via the control panel,
- Click on "Settings" from the left hand side bar
- Select "VirtIO" from the dropdown
- Click on "Change Network Card"
If you are able to access your server, all good, else continue with the steps below,
(Optionally) Steps to Install VirtIO Network Card
Follow this steps ONLY if your server loses network upon changing the Network Card. If you are able to access your server just fine, ignore these steps.
First, Mount the VirtIO drivers,
To mount the ISO, click on CD-ROM and then select the VirtIO drivers ISO from the drop-down menu and click on the Mount button(It will take 2-3 minutes)

Next, Login to the Windows Server via VNC
Instruction to access the VNC from CrownPanel - Click here
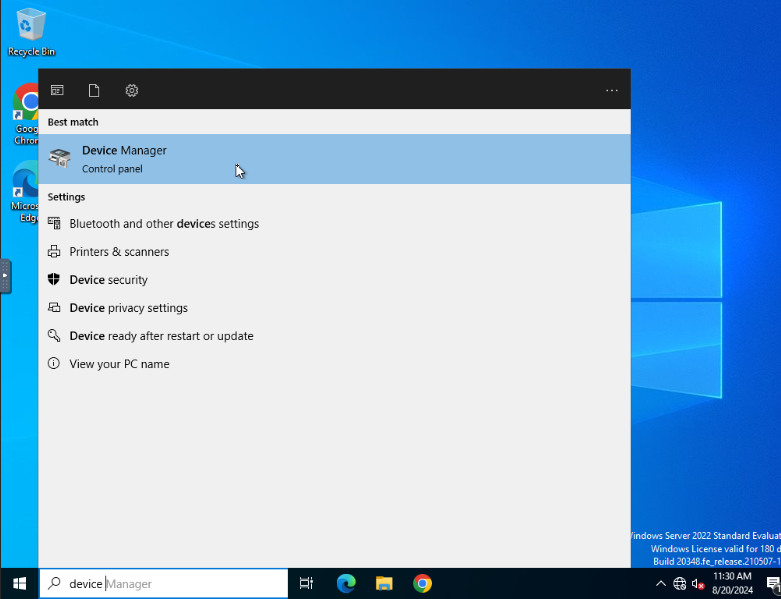
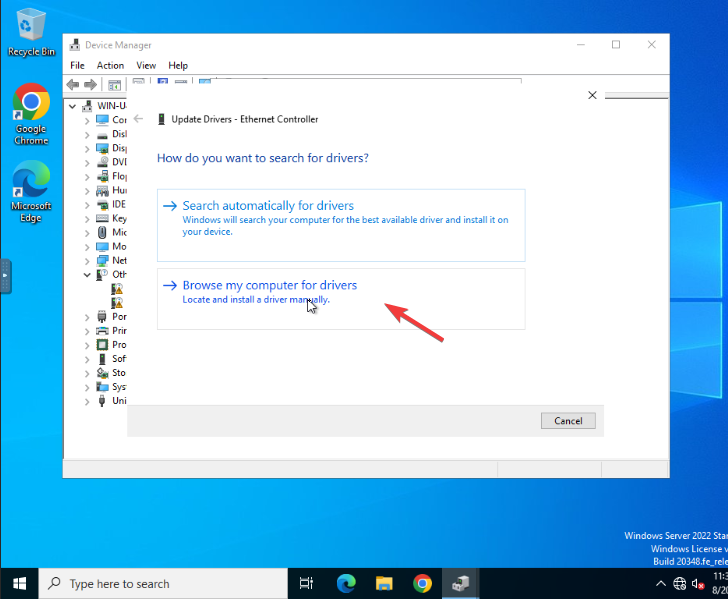
Next, Search for Device Manager
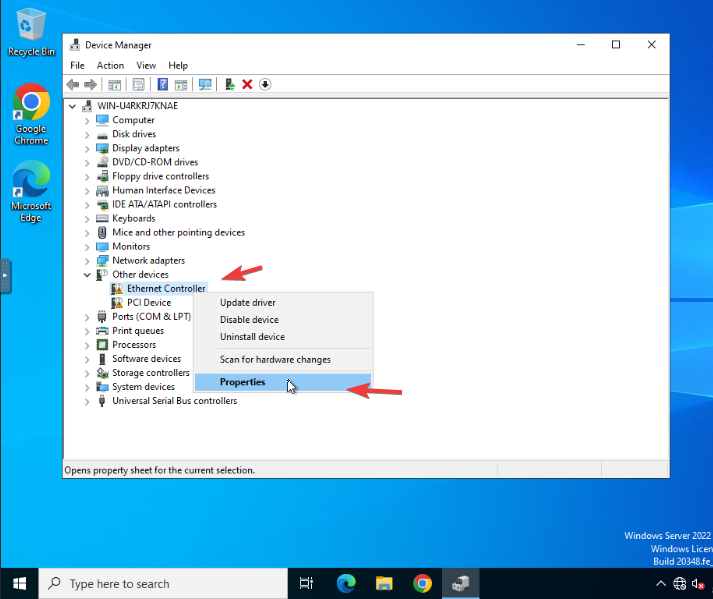
Under "Other Devices" you will notice a Ethernet Controller right click and Open its Properties
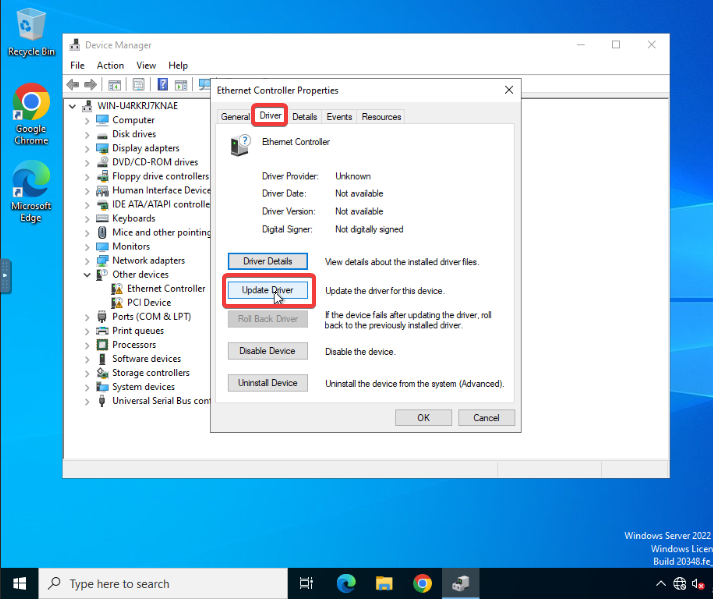
Then Switch to Driver tab and Click on the Update Driver
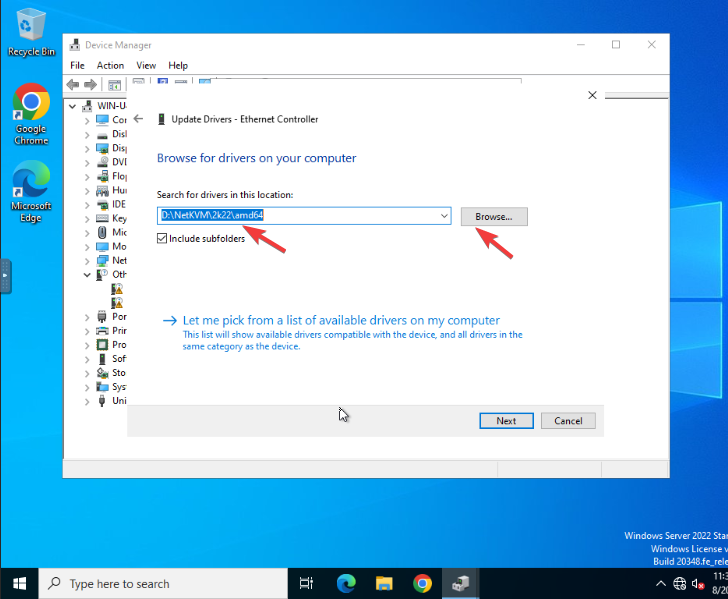
Select Browser my computer for drivers,
This particular Windows version is 2022, so 2k22 was selected as the version in VirtIO.
Select the appropriate Windows version in the VirtIO, to install the correct drivers and click on Next.
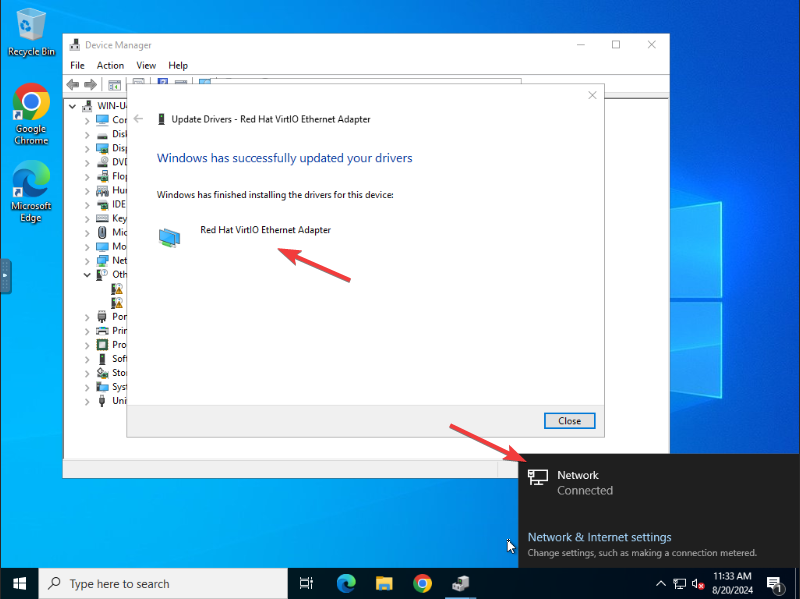
It will update and give you a successfully updated driver message and the server network will be back online.
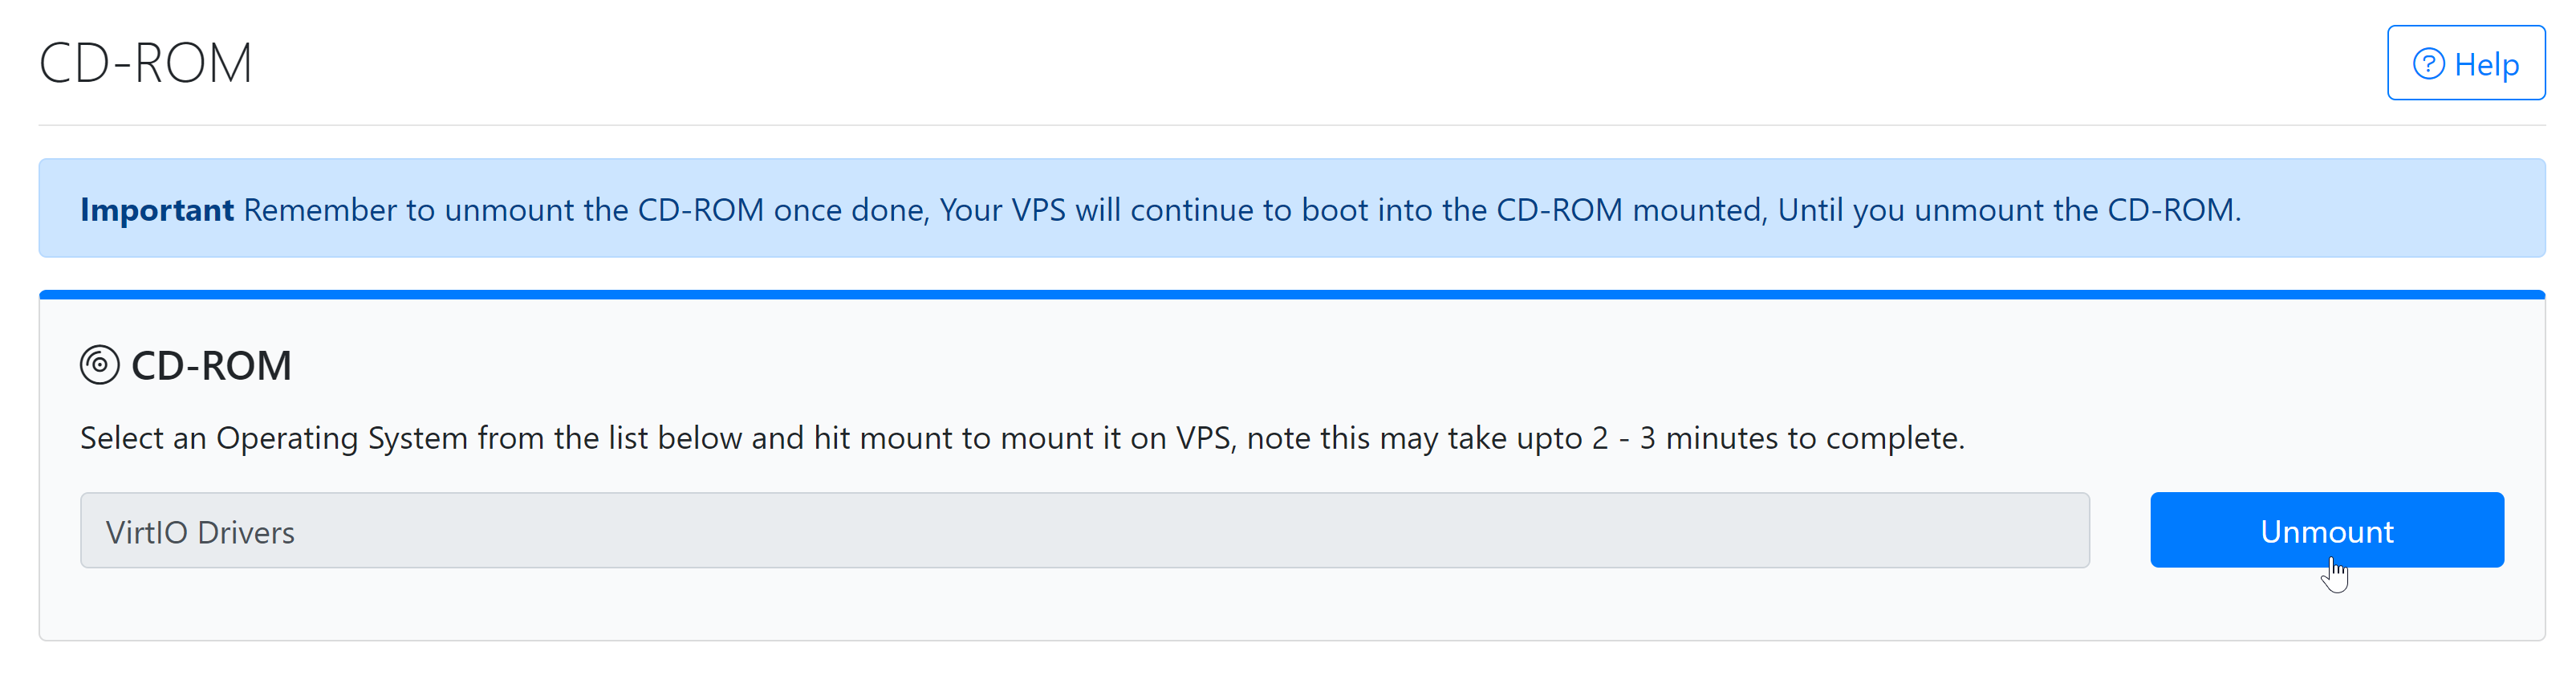
Last but not least, unmount the VirtIO drivers CD-ROM/ISO,
Done!
CrownCloud - Get a SSD powered KVM VPS at $4.5/month!
Use the code WELCOME for 10% off!
1 GB RAM / 25 GB SSD / 1 CPU Core / 1 TB Bandwidth per month
Available Locations: LAX | MIA | ATL | FRA | AMS