How to install Ubuntu 19.10
Login to your Panel (https://crownpanel.com/)
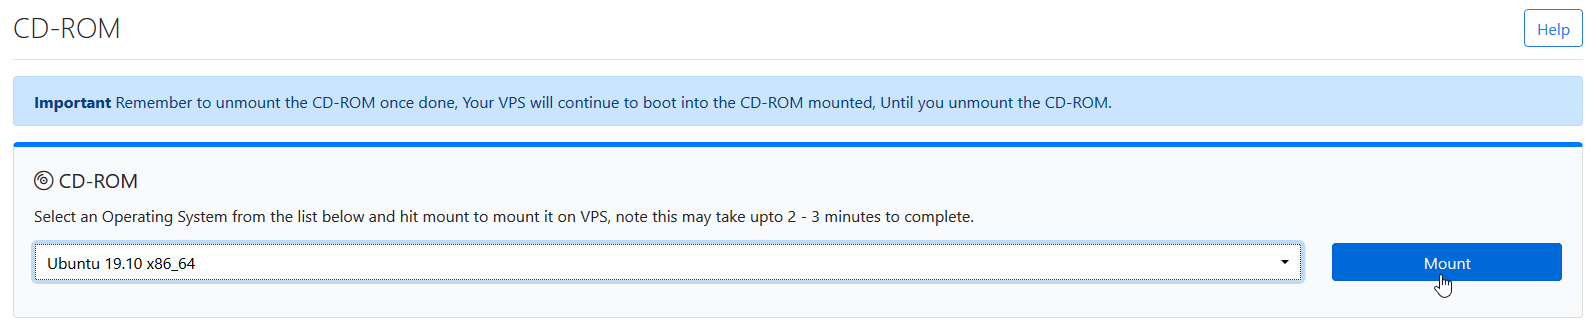
To start the installation you will have to mount the Ubuntu 19.10 ISO. To mount the ISO click on CD-ROM and then select the Ubuntu 19.10 ISO from the drop-down menu and click on Mount button(It will take 2-3 minutes)
Once the ISO has mounted (Task Log tab will show the status of the task), navigate to "Power Control" tab and then perform a Reboot task on the server.
Now Launch VNC to start the installation. If the VNC doesn't boot to ubuntu 19.10, please click on ctrl alt del from the VNC console to send a reboot.
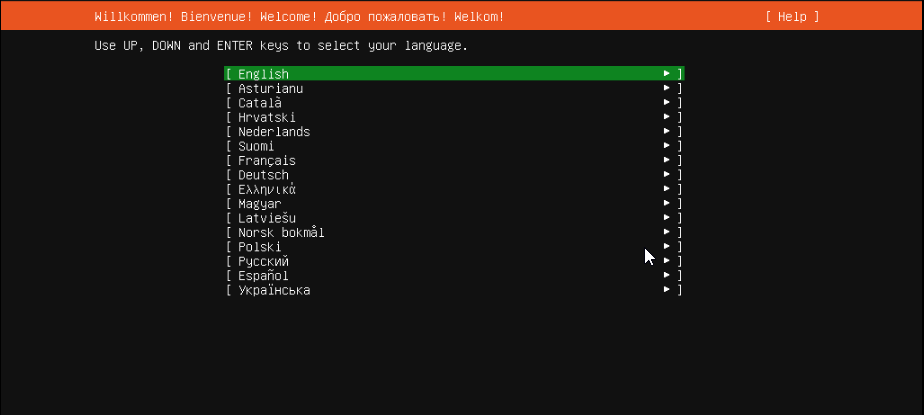
Select the desired language and click on continue.
Select the desired keyboard layout and click on done.

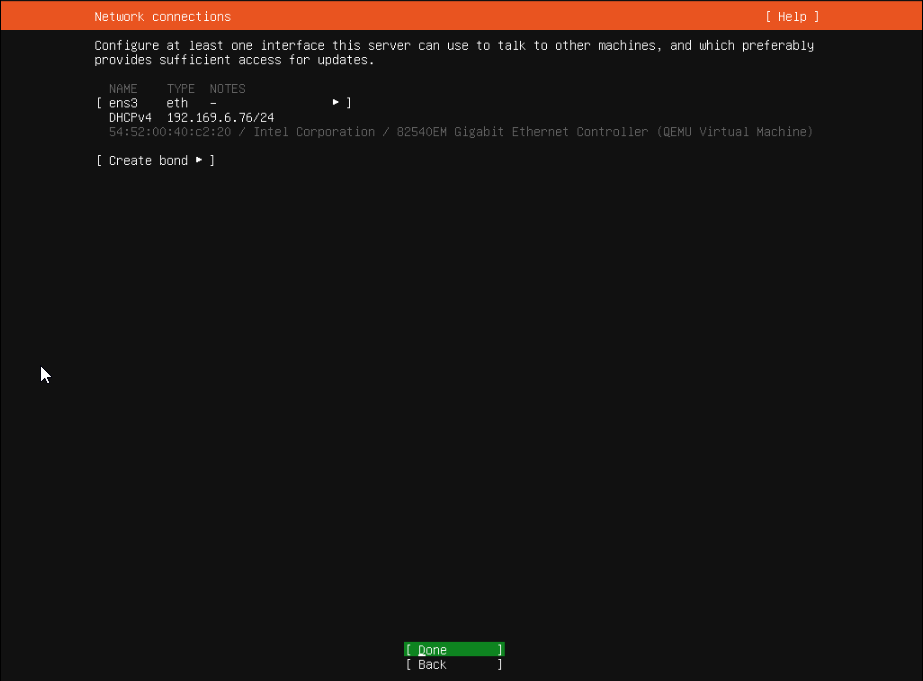
Select the Network configuration and click done. Note: you can either set up a static network configuration or go ahead with DHCP.
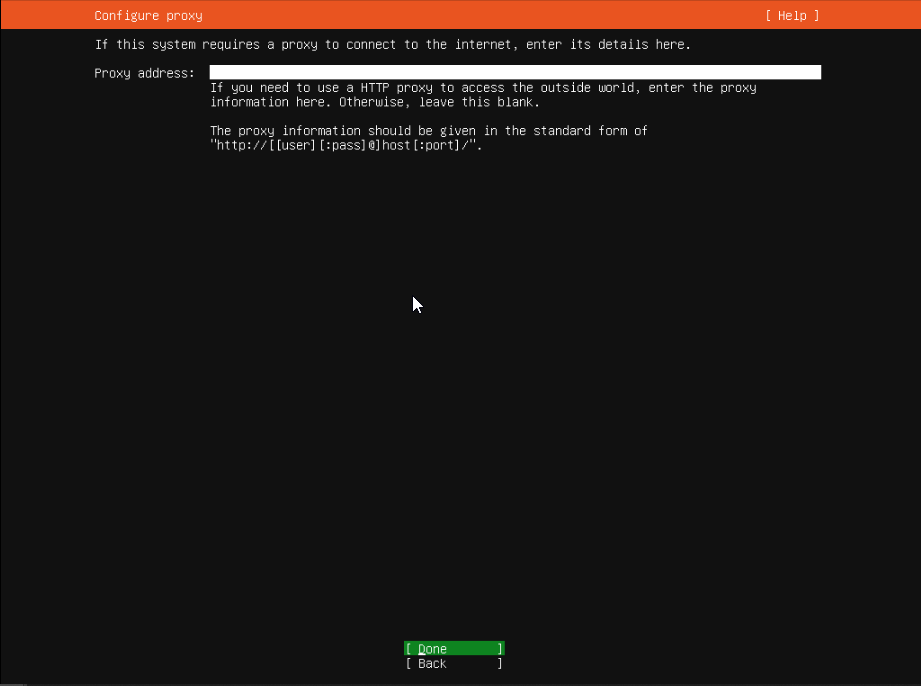
You can configure proxy for the server in this part of the process if needed. If you don't need to configure, just leave it blank and proceed.
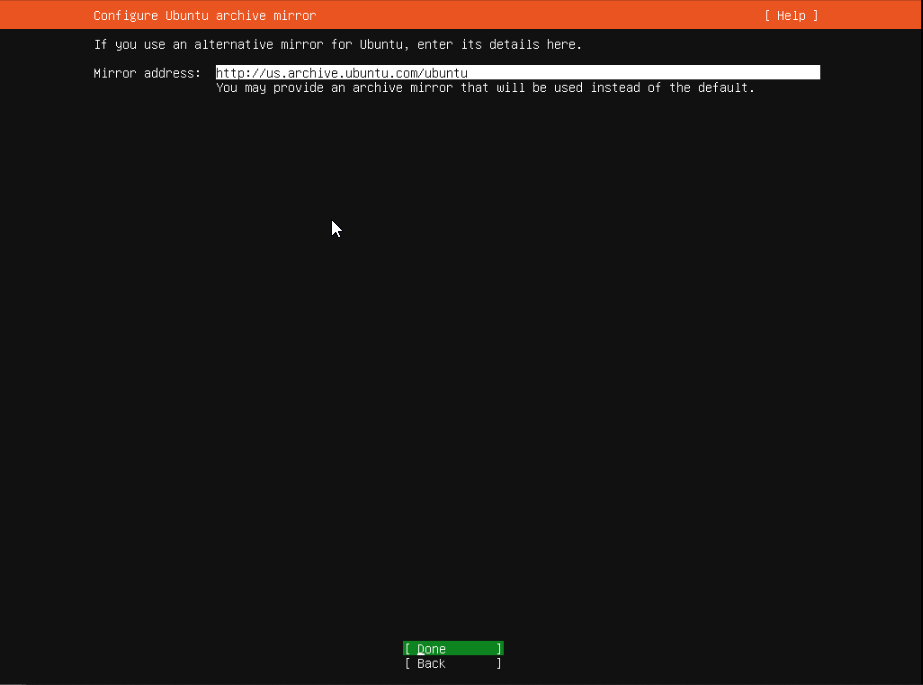
In this step, we will keep the default mirror address.
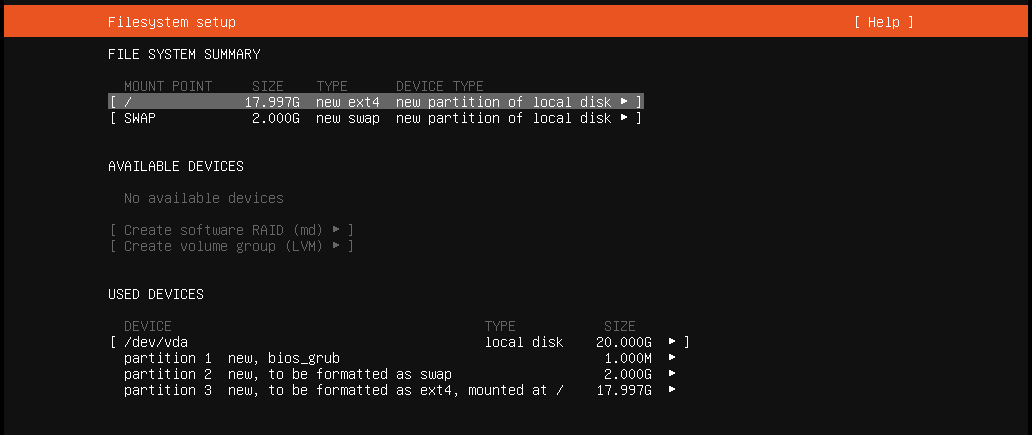
Disk partitioning, we will proceed with a manual partition of
swap: 2G
/: rest of space [leave it blank]
Review the partitions and then proceed.
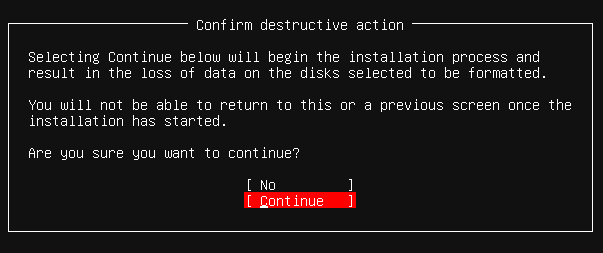
Confirm and press continue.
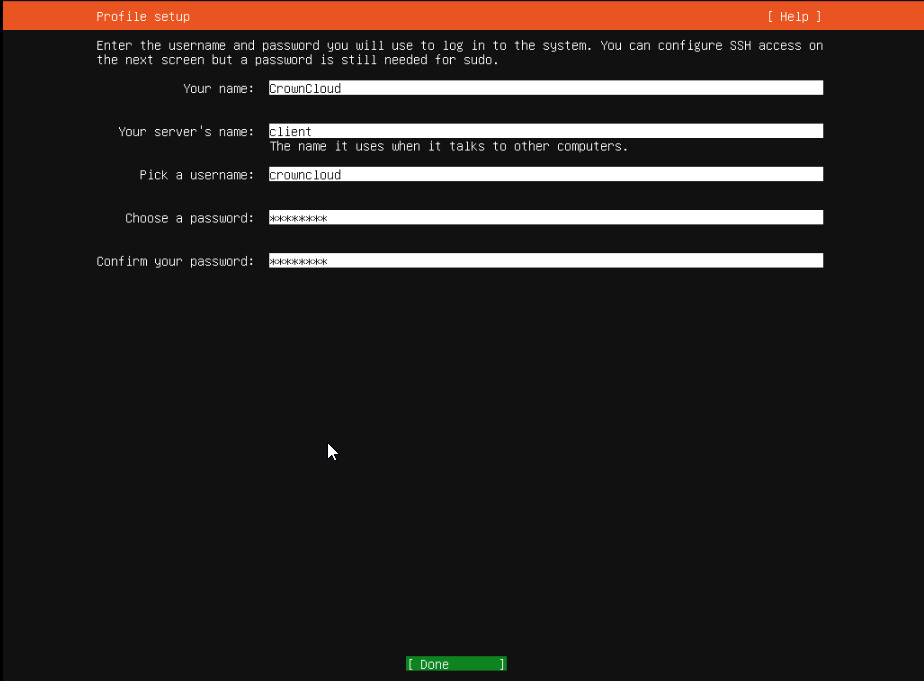
Profile setup, fill the form and press enter.
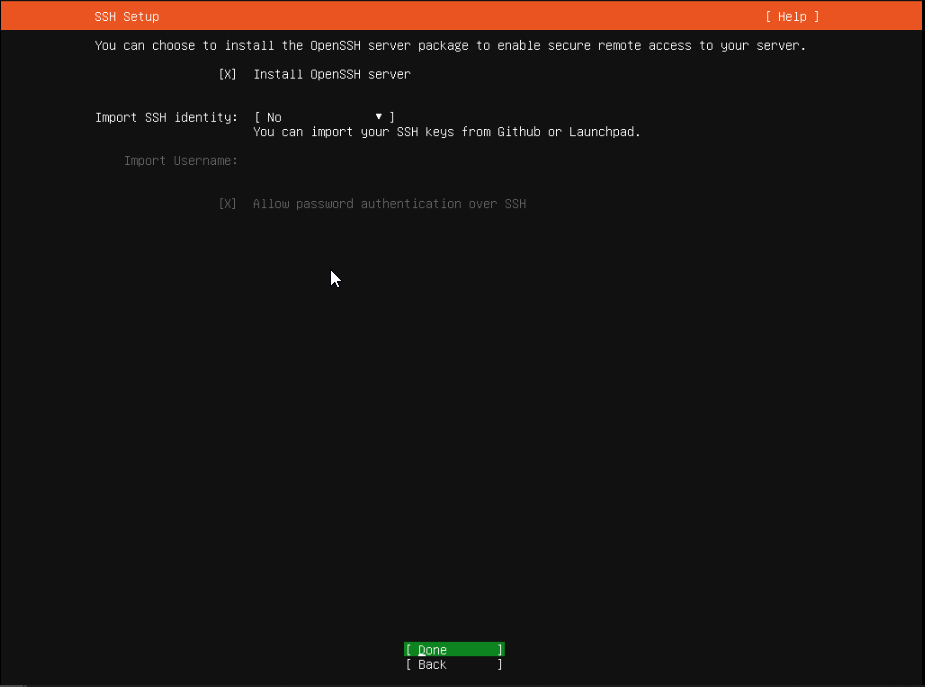
We will check this package since OpenSSH server package is essential if you need to connect using a putty.
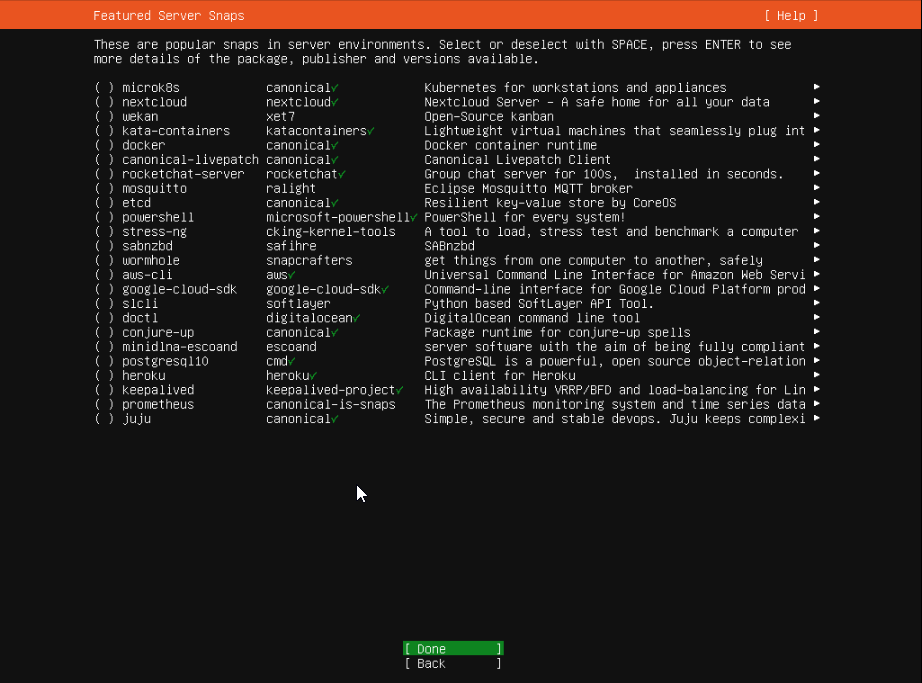
Select packages that are required in your usecase, in this example we will keep it a bare minimal.
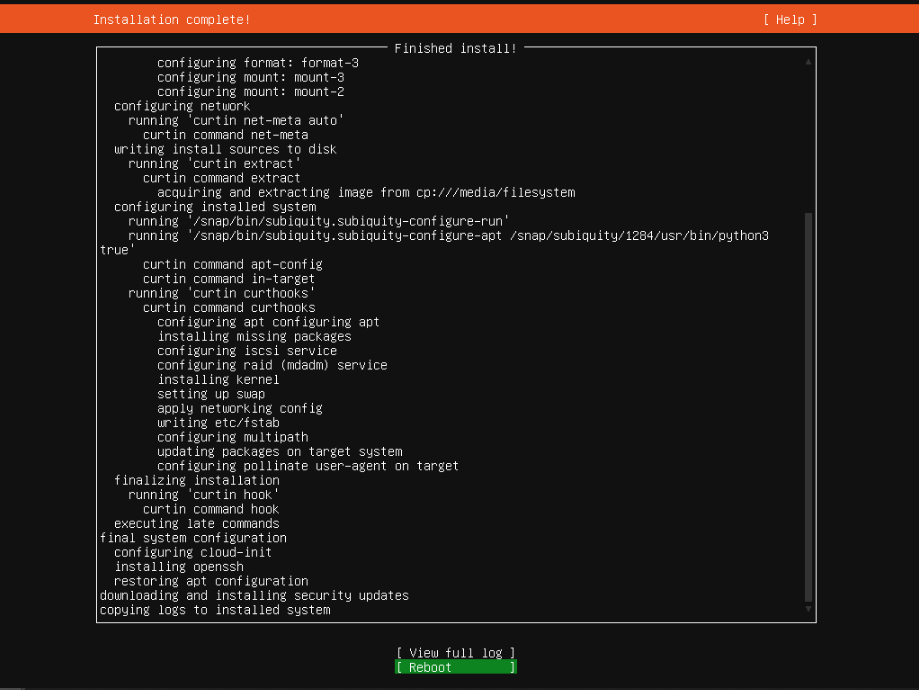
Ubuntu will now be installed on your VPS. once it is complete, go ahead with the reboot.
After the reboot, ubuntu will prompt you to unmount the installation medium. Where you can just click on unmount from the CD-Rom tab.

This completes the installation of Ubuntu 19.10 64-bit. You can now login to the server using the credentials that was set earlier.
CrownCloud - Get a SSD powered KVM VPS at $4.5/month!
Use the code WELCOME for 10% off!
1 GB RAM / 25 GB SSD / 1 CPU Core / 1 TB Bandwidth per month
Available Locations: LAX | MIA | ATL | FRA | AMS