Installing Windows Server 2019 using VirtIO
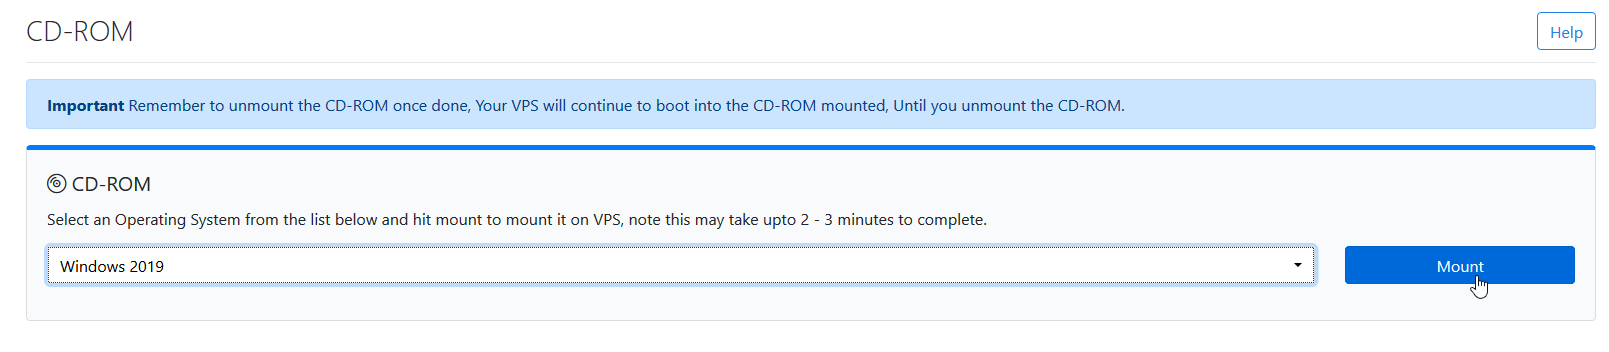
Mounting Windows 2019
Login into CrownPanel to manage the VPS.
Mount the Windows 2019 ISO from the CD-ROM tab, select "Windows 2019" from the dropdown list and then click on mount.
Once the ISO has mounted (Task Log tab will show the status of the task), navigate to "Power Control" tab and then perform a Reboot task on the server.
This can be done from the Panel or from the VNC by clicking on "send Ctrl+Alt+Del".
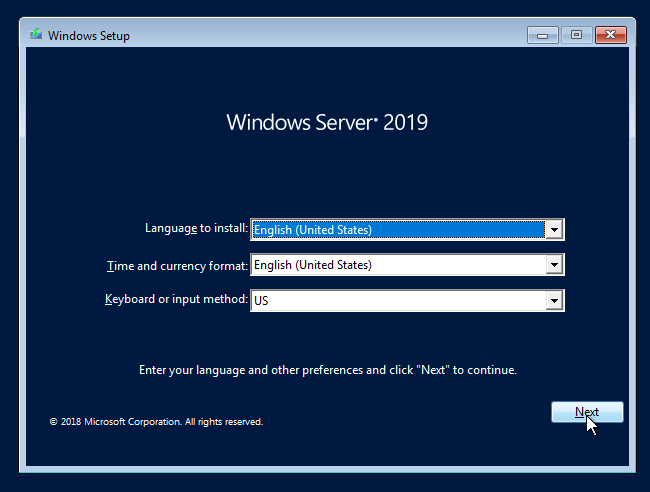
Installing Windows
The Windows logo appears and starts to load the contents. Select the required language and keyboard type and click on Next
Select the type of Operating System from the list. In our case, we're installing Windows 2019 Standard Evaluation with graphical interface.

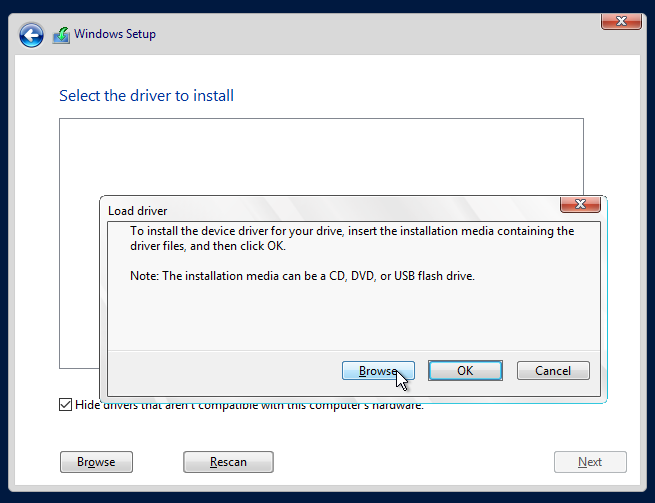
In Partitioning section, you will see a blank dialog with no disks. Here, we need to load VitIO driver so the disks can be found.
We will unmount the windows iso and mount the virtio drivers.
and no, the installation will not break.

Click on load drivers, Browse.
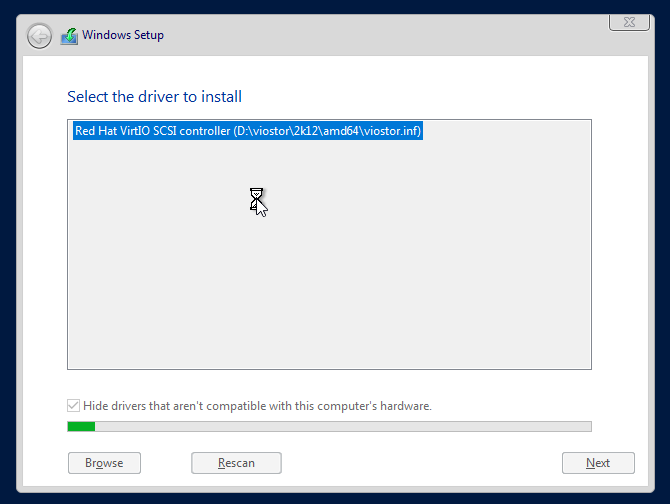
Here you'll have to navigate to CD Rom drive > viostor > 2k19 (or 2k16, 2k12) > amd64 and click on "Select".
Compatible driver will be selected, proceed to next.
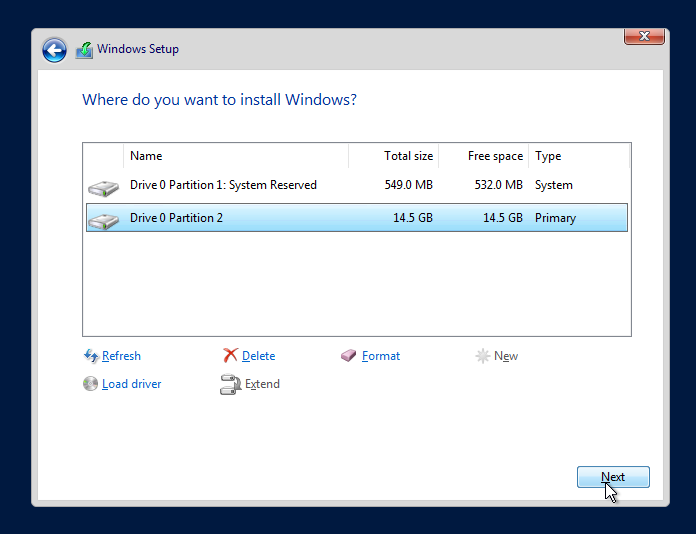
Delete all previous partitions here and create a new partition.
We will now unmout the VitIO drivers and mount windows 2019 ISO again from the CrownPanel.
Click on "Refresh" in windows setup and then click on "Next"
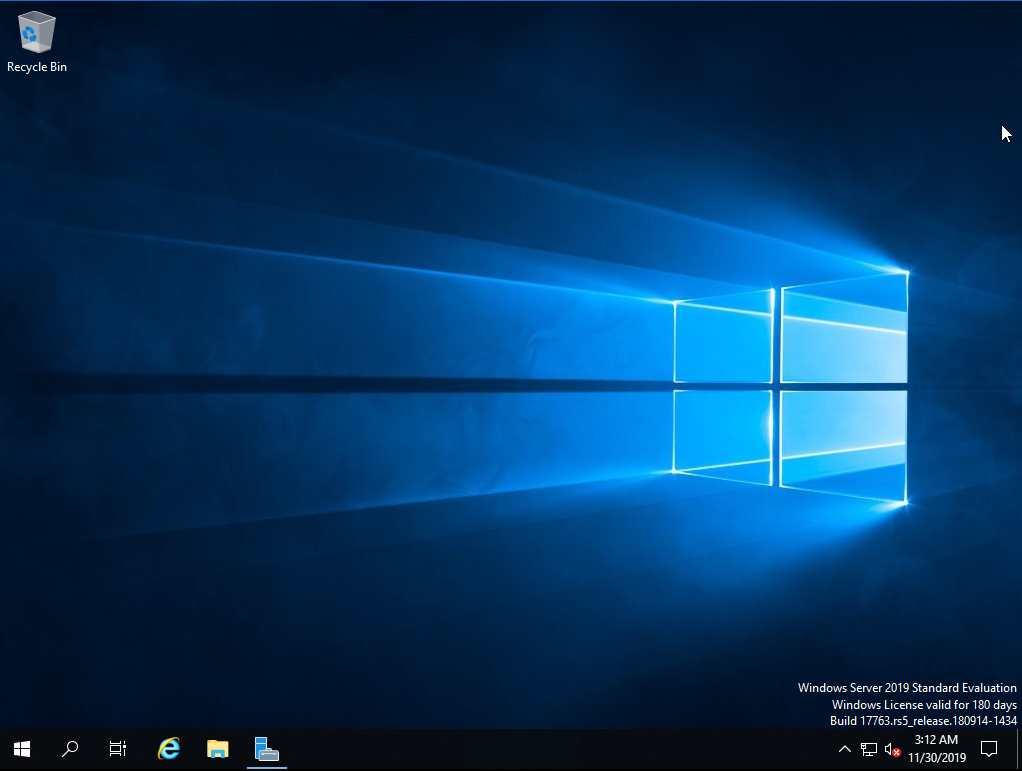
Windows will now start installing the server.
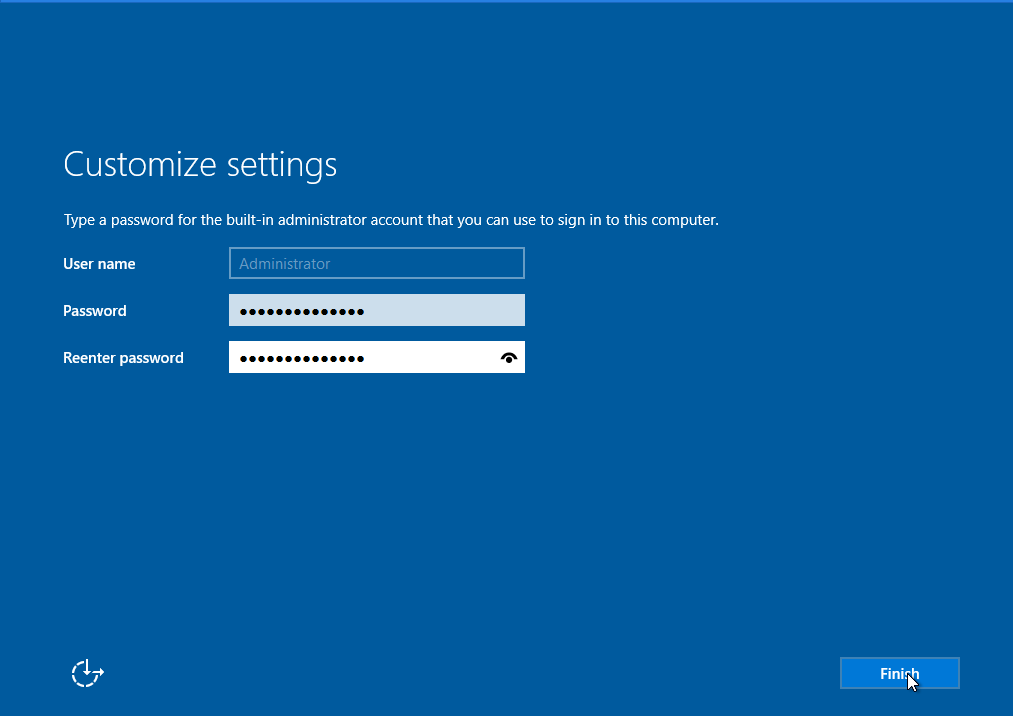
Enter a strong password when prompted.
And after several reboots, windows 2019 is now ready to use.
Enabling RDP
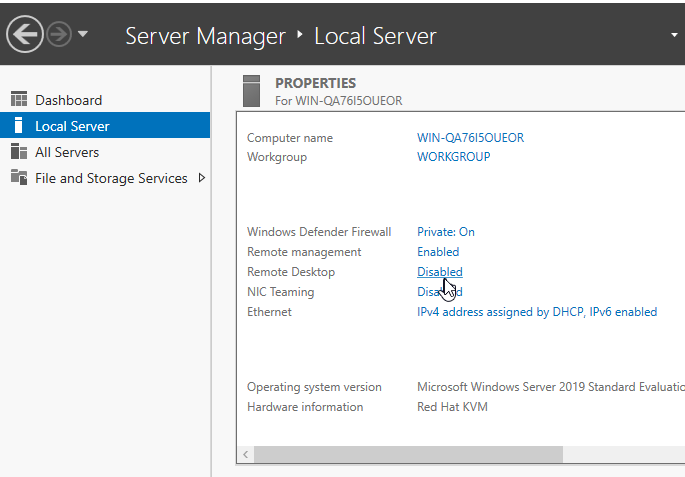
In Server Manager > Local server, enable "Remote Deskto" feature.
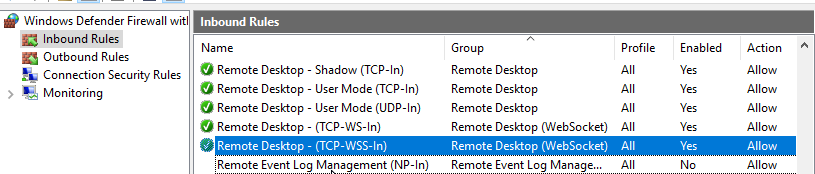
Open Firewall with Advanced security and select "Inbound Rules" to enable the following rules.
You should now be able to connect to your windows server using Remote Desktop.
CrownCloud - Get a SSD powered KVM VPS at $4.5/month!
Use the code WELCOME for 10% off!
1 GB RAM / 25 GB SSD / 1 CPU Core / 1 TB Bandwidth per month
Available Locations: LAX | MIA | ATL | FRA | AMS