Connecting your domain with your VPS using CloudFlare
First of all you will need to have a domain registered. Now we will quickly show you how to manage your DNS easily.
1. Create an account on CloudFlare.com
- Log in and select “add site”

After scanning, you will need to click “continue setup”. Select the free version.
- The DNS page is very clean and self explaining
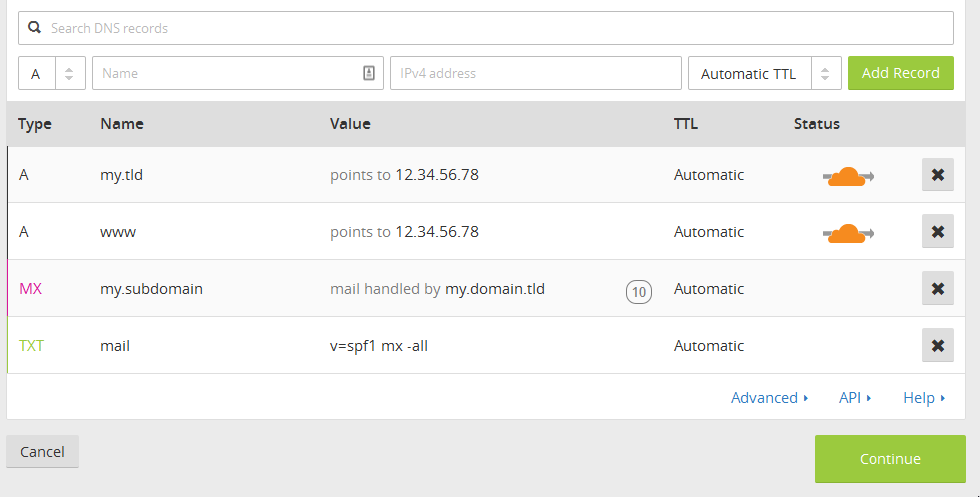
choose the type of record you want (for website, make an A record) and enter your IPv4 address as destination.
Tip: The Orange cloud is a free CDN and DDoS-protection offered by CloudFlare, so you can keep this enabled.
In the last step, CloudFlare will ask you to change your nameservers.
2. Changing the NameServers
- Log in to your domain registrar panel. Go the the domain list and click “manage” next to the domain

Look for the “Nameservers” section and set it to “custom DNS”.
Enter the nameservers which are provided by Cloudflare. eg:

Your registrar can take up to 24hours to propagate these changes, but usually this is done in a couple minutes.
3. You're good to go and can now easily use CloudFlare DNS with your domain!
CrownCloud - Get a SSD powered KVM VPS at $4.5/month!
Use the code WELCOME for 10% off!
1 GB RAM / 25 GB SSD / 1 CPU Core / 1 TB Bandwidth per month
Available Locations: LAX | MIA | ATL | FRA | AMS