How to Install Gitea on Ubuntu 23.10
Gitea is an open-source forge software package for hosting software development version control using Git as well as other collaborative features like bug tracking, wikis, and code review.
Prerequisites
- Full SSH root access or a user with Sudo privileges is required.
- Gitea supports the following databases.
- SQLite
- PostgreSQL
- MySQL
- MariaDB
In our guide below, we’ll use SQLite as the database for Gitea. You can pick any of the supported databases in your installation as needed.
Install SQLite use the following command,
apt install sqlite3To check the version,
sqlite3 --versionOutput:
root@ubuntu23:~# sqlite3 --version
3.42.0 2023-05-16 12:36:15 831d0fb2836b71c9bc51067c49fee4b8f18047814f2ff22d817d25195cf3alt1
Install Git
Gitea is a painless self-hosted Git service. With features similar to ones in GitHub, Bitbucket, or GitLab.
Git is the standard for distributed version control systems and can be installed on Ubuntu systems using apt.
Check for system updates and install them.
apt update

apt upgrade
Install the Git package using the following command,
apt install gitYou can check the version of Git installed with the following command,
git --versionOutput:
root@crown:~# git --version
git version 2.40.1
Create a Git user,
We're going to create a Git user with username as git with limited privileges.
adduser --system --shell /bin/bash --gecos 'Git Version Control' --group --disabled-password --home /home/git git Download the Gitea binary
Download the Gitea binary from download page and make it executable.
wget -O /tmp/gitea https://dl.gitea.com/gitea/1.21/gitea-1.21-linux-amd64Move the Gitea binary file to '/usr/local/bin'.
mv /tmp/gitea /usr/local/binMake the binary executable.
chmod +x /usr/local/bin/giteaCreate the directory structure and set the required permissions and ownership.
mkdir -p /var/lib/gitea/{custom,data,indexers,public,log}

chown git: /var/lib/gitea/{data,indexers,log}

chmod 750 /var/lib/gitea/{data,indexers,log}

mkdir /etc/gitea

chown root:git /etc/gitea

chmod 770 /etc/gitea
Create a Systemd Unit File, which we can use to run the gitea in background and control with systemctl.
Download the file to the "/etc/systemd/system/" directory using the following command.
wget https://raw.githubusercontent.com/go-gitea/gitea/main/contrib/systemd/gitea.service -P /etc/systemd/system/ Reload and enable the Gitea service,
systemctl daemon-reload

systemctl enable gitea
Check the status of the Gitea service,
systemctl status gitea Configure Gitea
If you're running ufw firewall on your server, allow the port 3000
ufw allow 3000/tcpNavigate to your browser. http://yourserver-ip-address:3000 to access the Gitea dashboard.
Follow the on-screen instructions to complete the Gitea setup. Click on Register to start the database initialization.
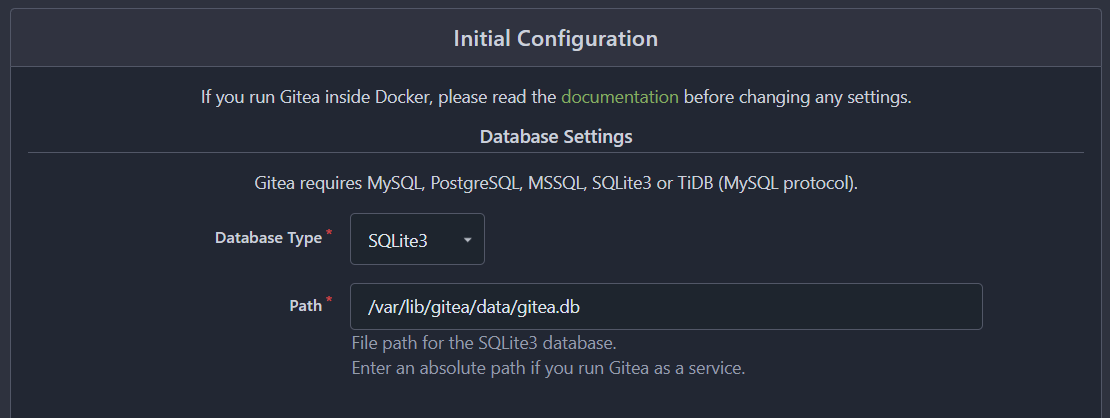
Database Settings:
- Database Type: SQLite3
- Path: Use an absolute path,
/var/lib/gitea/data/gitea.db
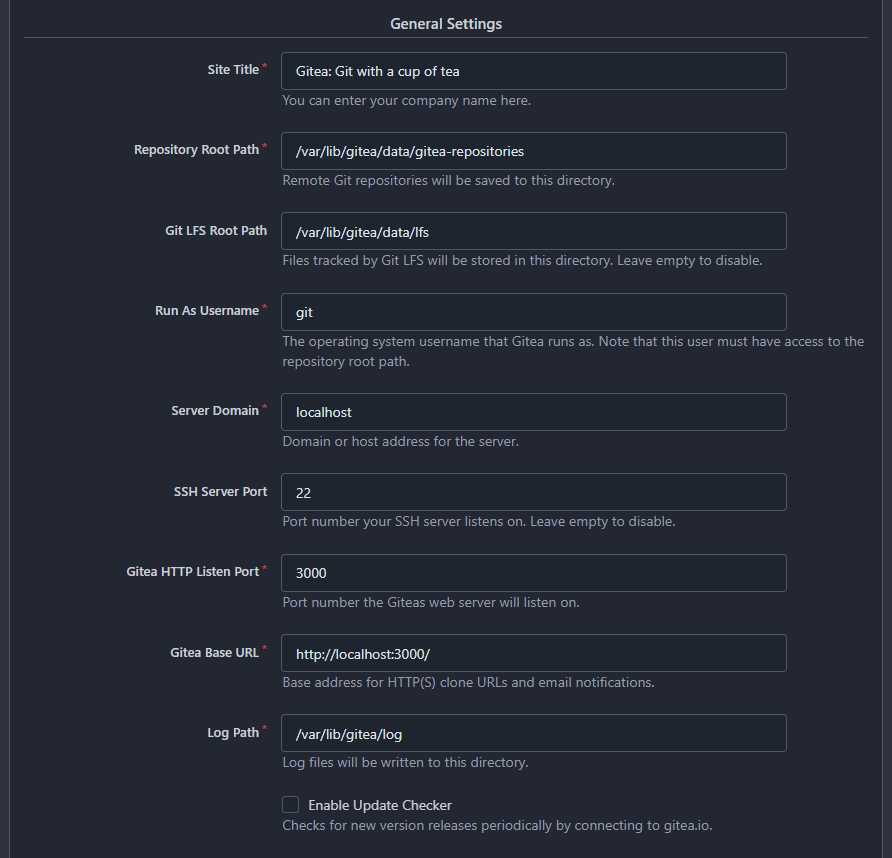
Application General Settings:
- Site Title: Enter your preferred site name here.
- Repository Root Path: keep the default /home/git/gitea-repositories.
- Git LFS Root Path: keep the default /var/lib/gitea/data/lfs.
- Run As Username: git (the git user that was created earlier on).
- Server Domain: Enter your domain name or the IP address of the server.
- SSH Port: 22, change it if SSH is listening on other Port.
- Gitea HTTP Listen Port: 3000
- Gitea Base URL: Use http with your domain name or server IP address (example: http://example.com:3000 or http://192.168.0.2:3000).
- Log Path: Leave it as default /var/lib/gitea/log
Replace localhost with either your server's IP address or with your domain name.
Do not leave it with localhost.
Optional Settings:
Create a Administrator user account.
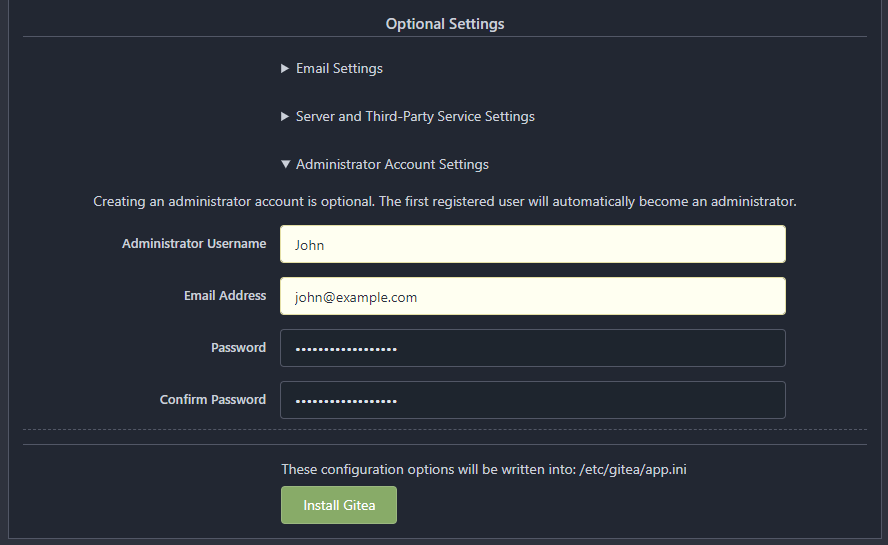
Click on Install button to Install and Configure Gitea.
Once the installation completes, you will be logged in as the Administrator and navigated to dashboard.
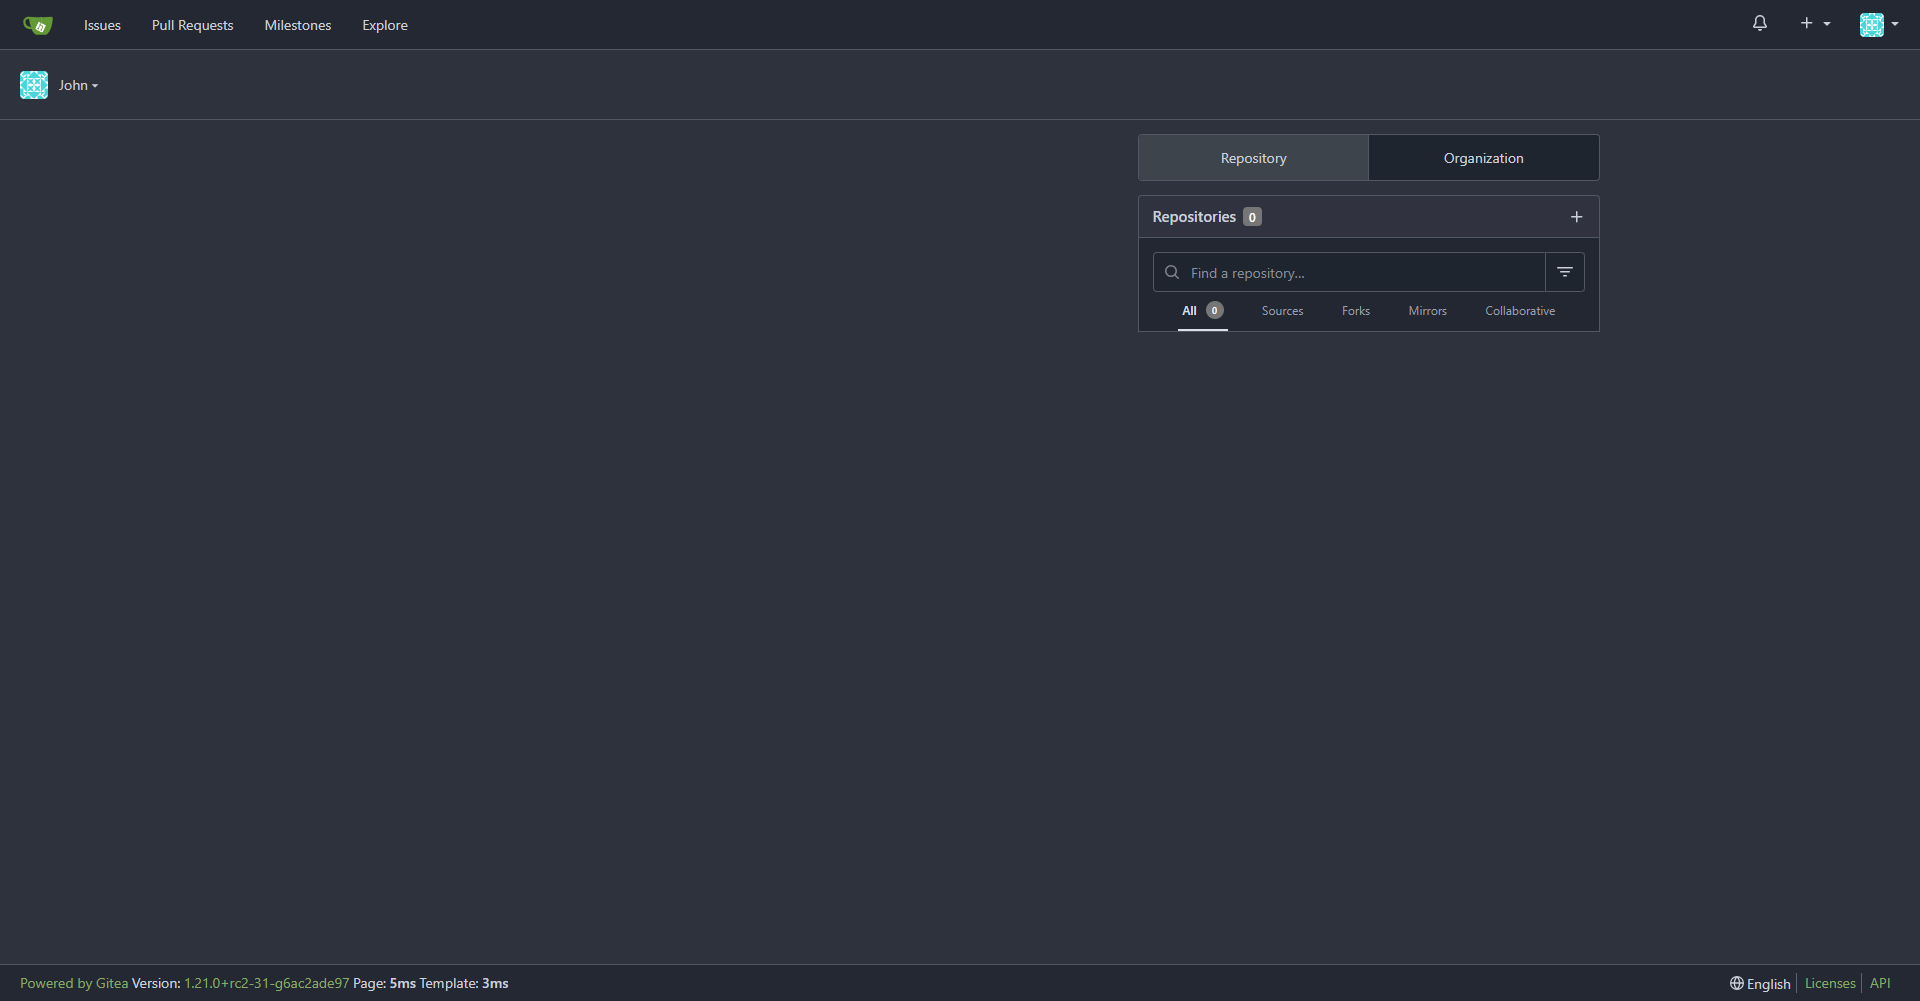
Now, you can create your first Gitea Repository with a cup of tea.
Upgrading Gitea
Below steps will show you how to upgrade to a newer version of Gitea when it is available.
To upgrade to a new version, first, stop the Gitea service.
Stop the Gitea service.
systemctl stop giteaDownload the Gitea binary from download page.
At the time of writing this article, the latest Gitea version is 1.21. If there is a newer version available on the link above, change the VERSION variable before using the following command.
VERSION=<THE_LATEST_GITEA_VERSION>

wget -O /tmp/gitea https://dl.gitea.io/gitea/${VERSION}/gitea-${VERSION}-linux-amd64
Move the Gitea binary file to /usr/local/bin and make the binary executable.
mv /tmp/gitea /usr/local/bin

chmod +x /usr/local/bin/gitea
To restart the Gitea service,
systemctl restart giteaThis concludes the topic of installing Gitea also also upgrading when newer version is available.