How to Install Ubuntu 24.04
Ubuntu is one of the most popular Linux distributions out there that is based on Debian and composed mostly of free and open-source software.
In this article, we will learn how to install Ubuntu 24.04 on a server. However the Ubuntu 24.04 has not been released yet, it's anticipated to be launched in April 2024.
Login to Crownpanel
Login to your CrownPanel account.
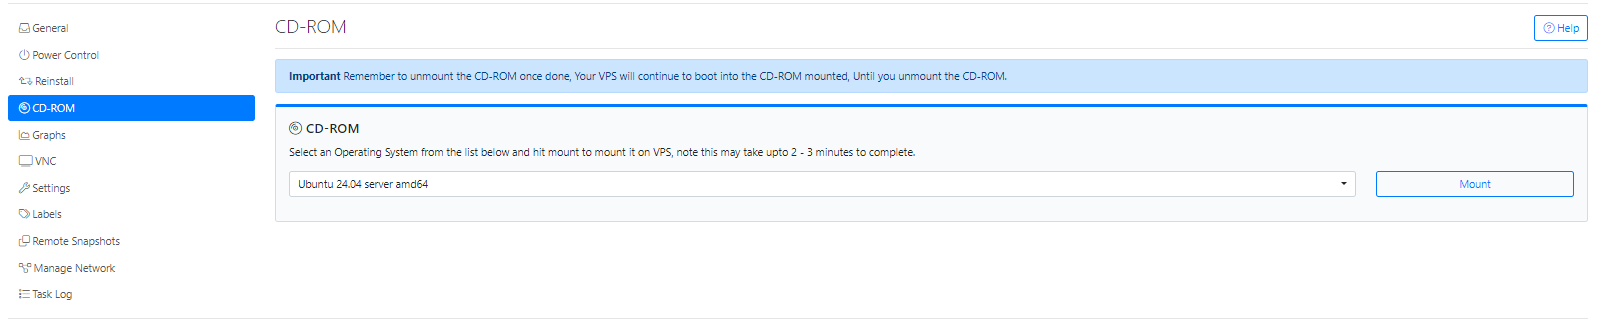
To start the installation, First, mount the Ubuntu 24.04 ISO.
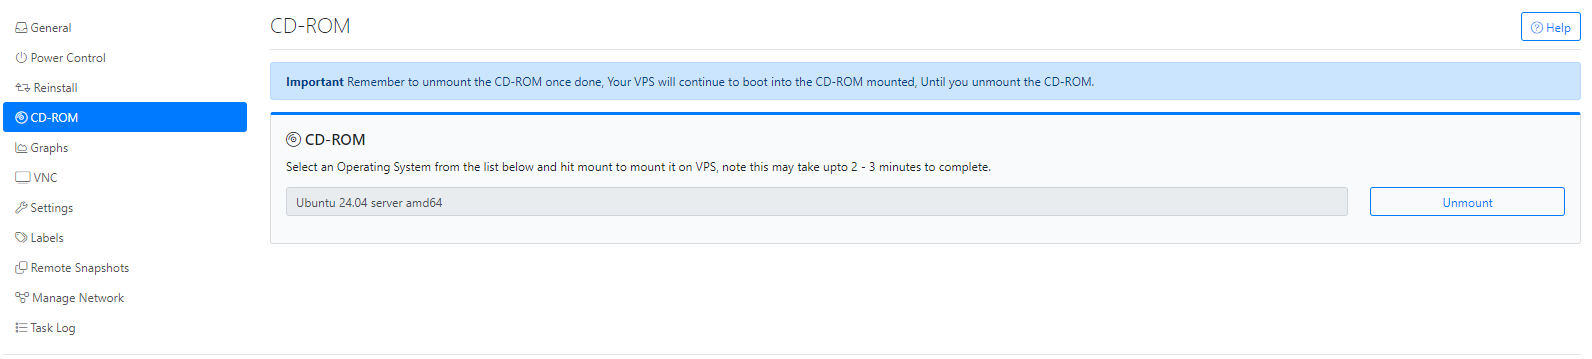
To mount the ISO, click on CD-ROM and then select the "Ubuntu 24.04" ISO from the drop-down menu and click on the Mount button (It will take 2-3 minutes).
Once the ISO has mounted (the Task Log tab will show the status of the task), navigate to the Power Control tab and then perform a Reboot task on the server.
Next, Switch to the VNC Tab, Launch VNC to start the installation.
If VNC doesn't show the Ubuntu 24.04 installer, please click on
CTRL+ALT+DELfrom the VNC console to send a reboot.
Start the Installation
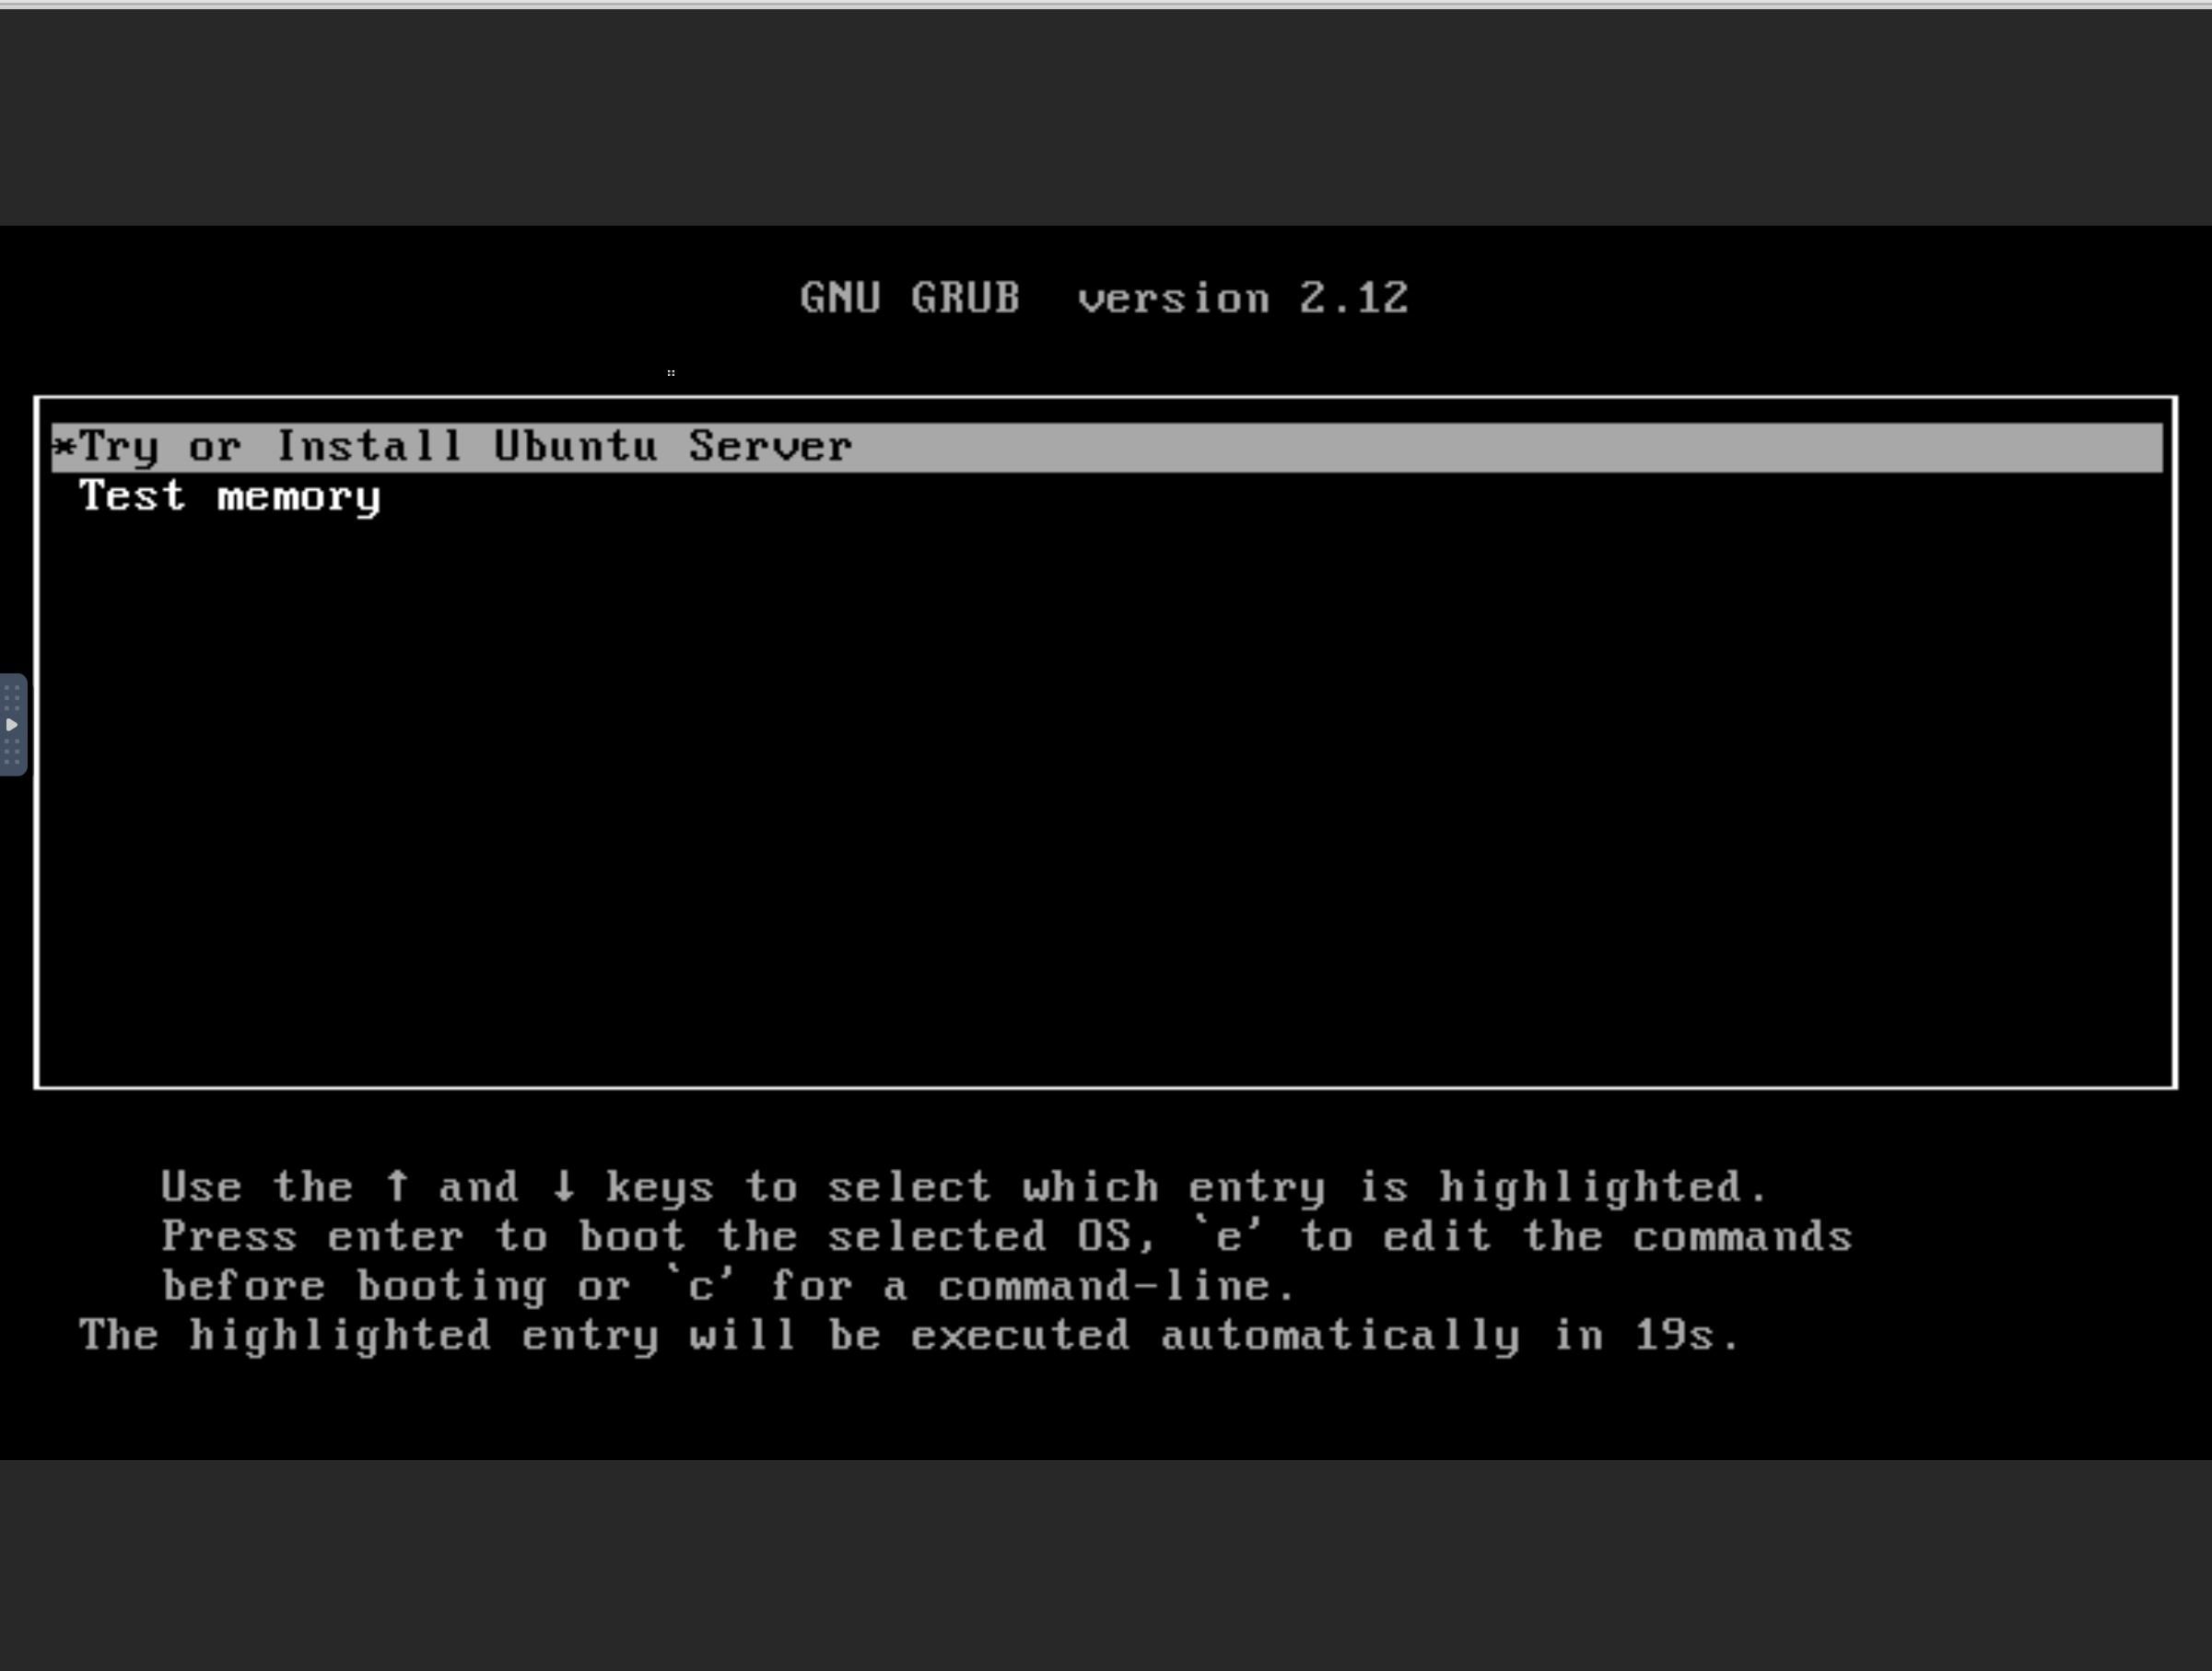
When the server boots from the mounted ubuntu ISO, you'll see the Ubuntu installer. Choose the Try or Install Ubuntu Server option to start the installation process.
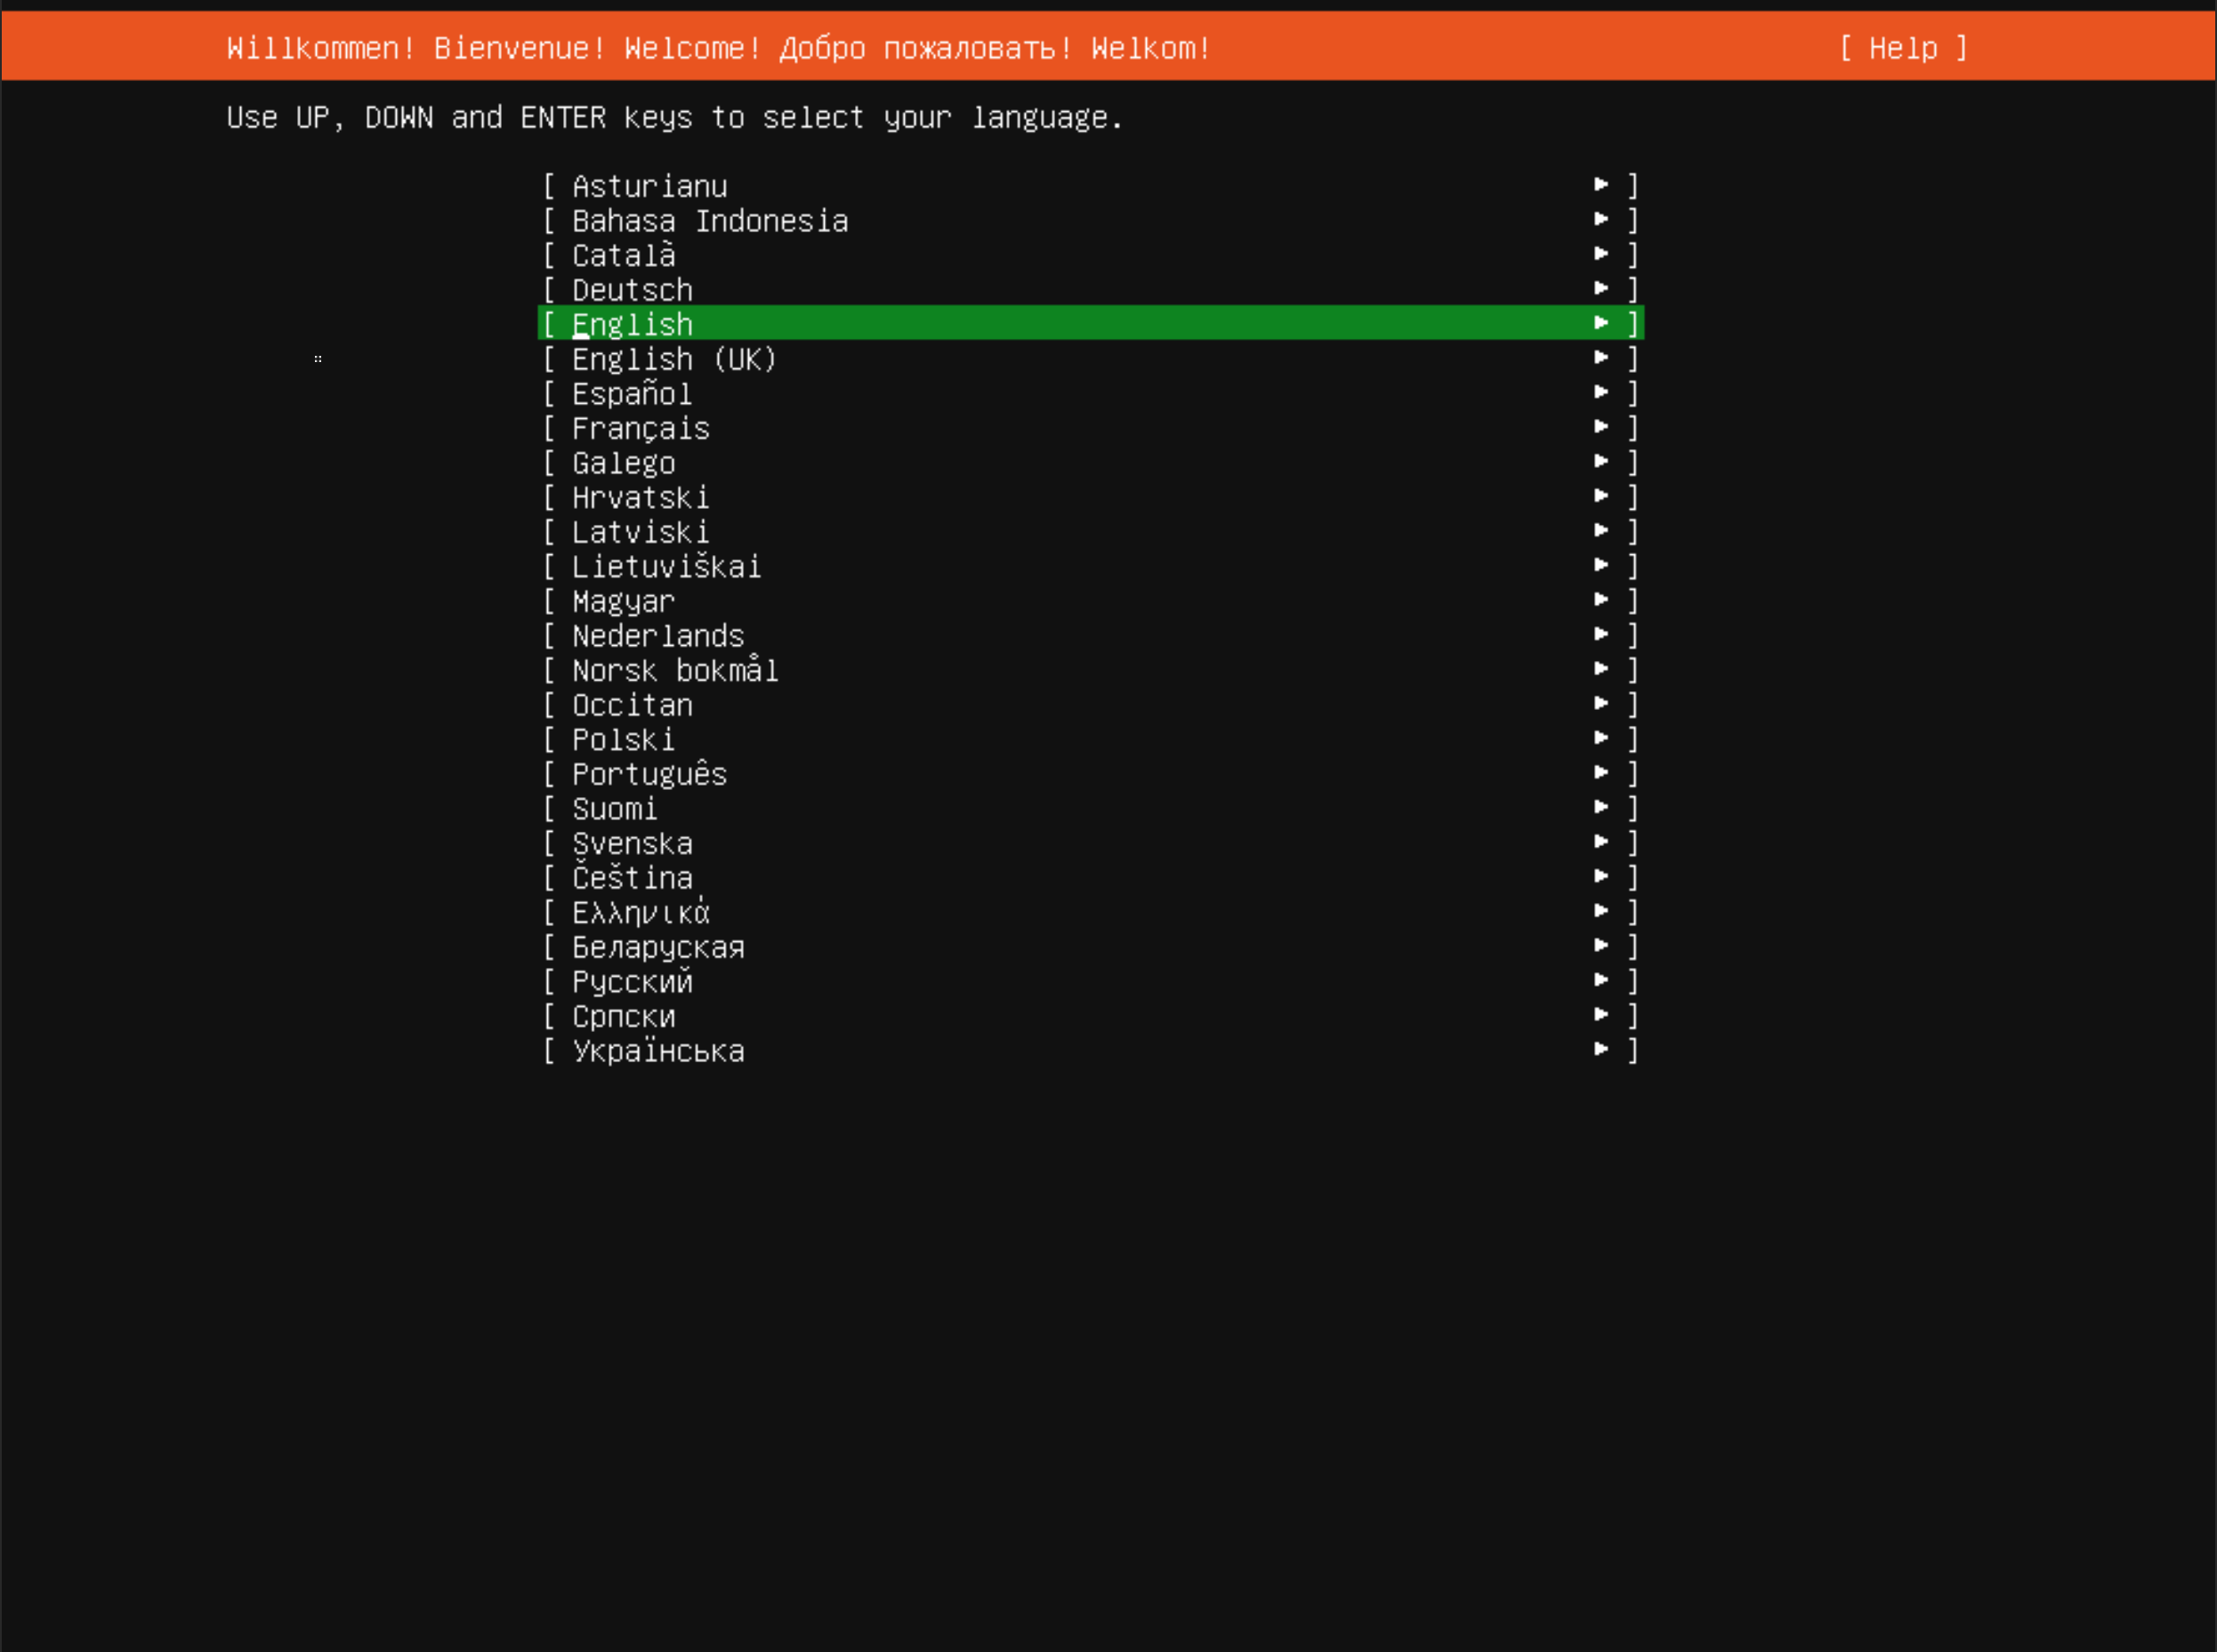
Select the desired language and click on continue.
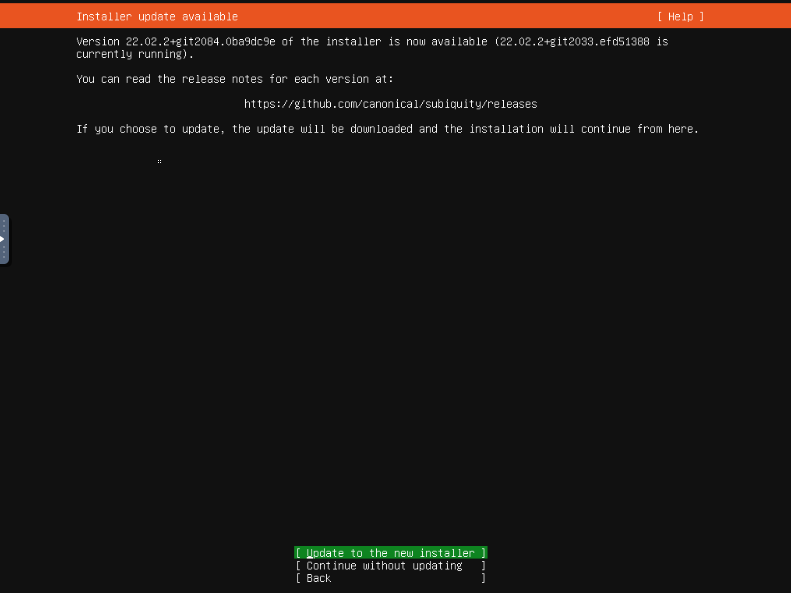
You may be prompted to update the installer in case there is a new version available. This is a recommended option to update it.
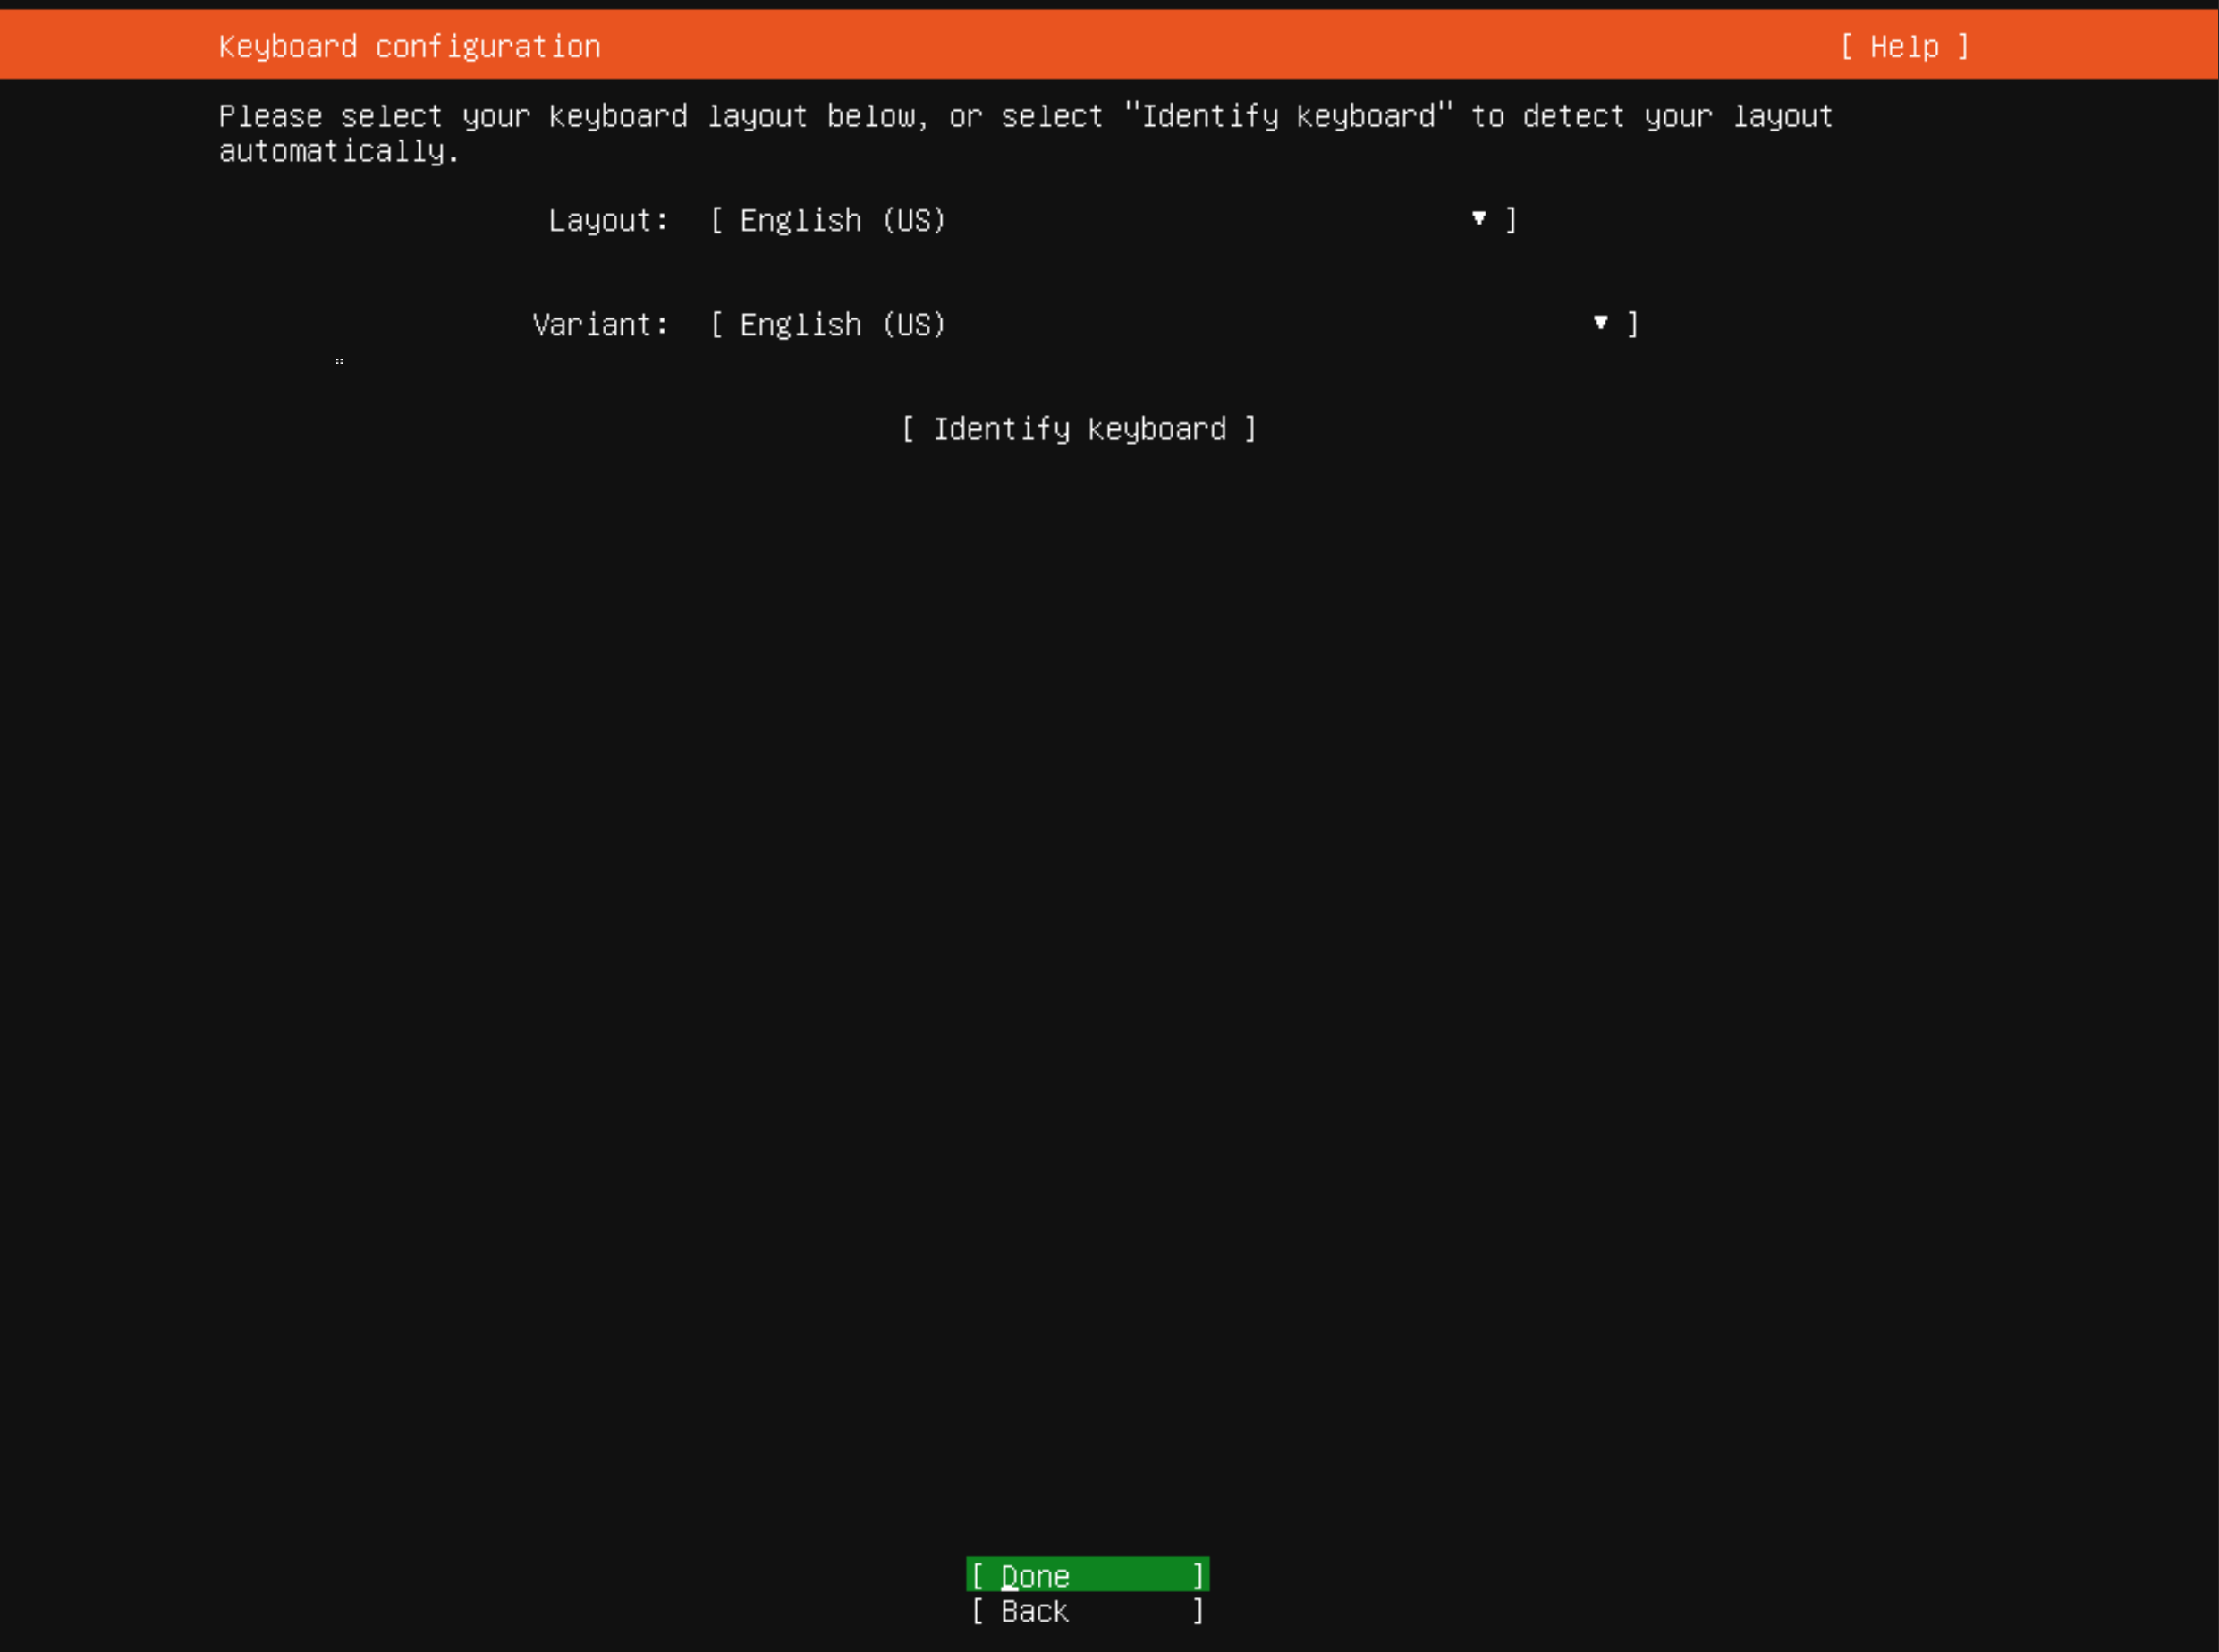
Select the desired keyboard layout and click on done.
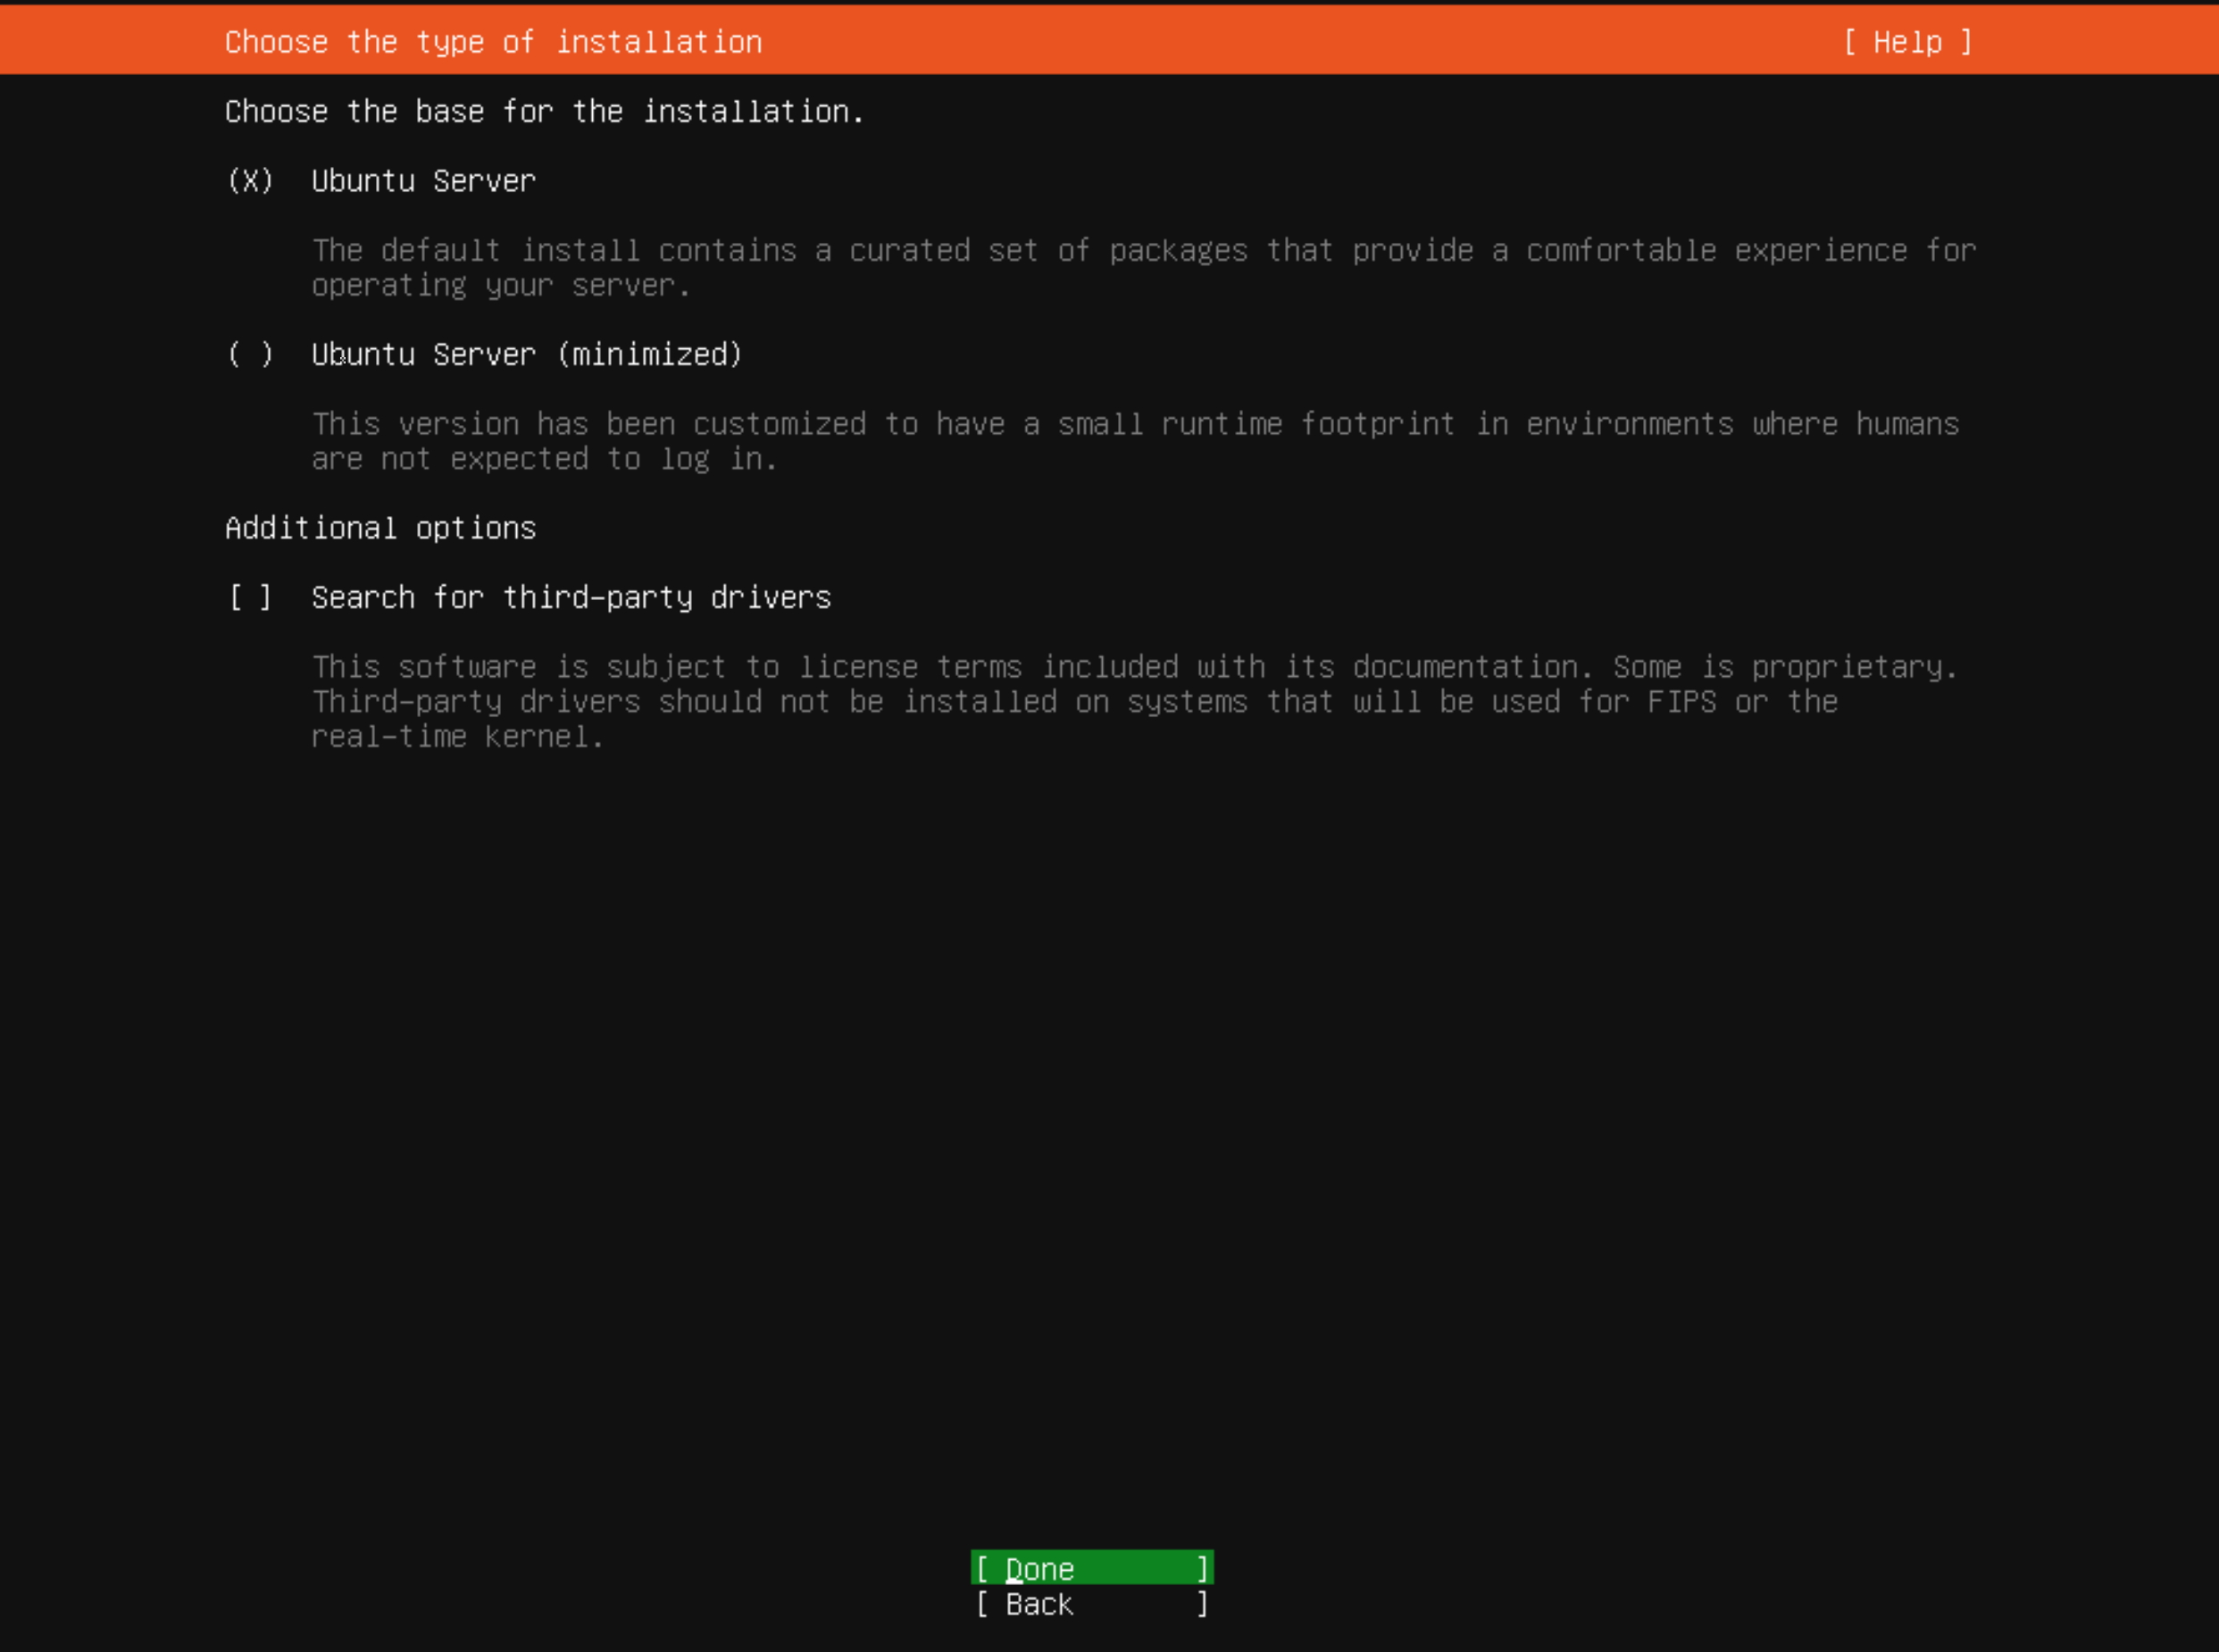
Select the type of installation and click on done.
Select the Network configuration and click done.
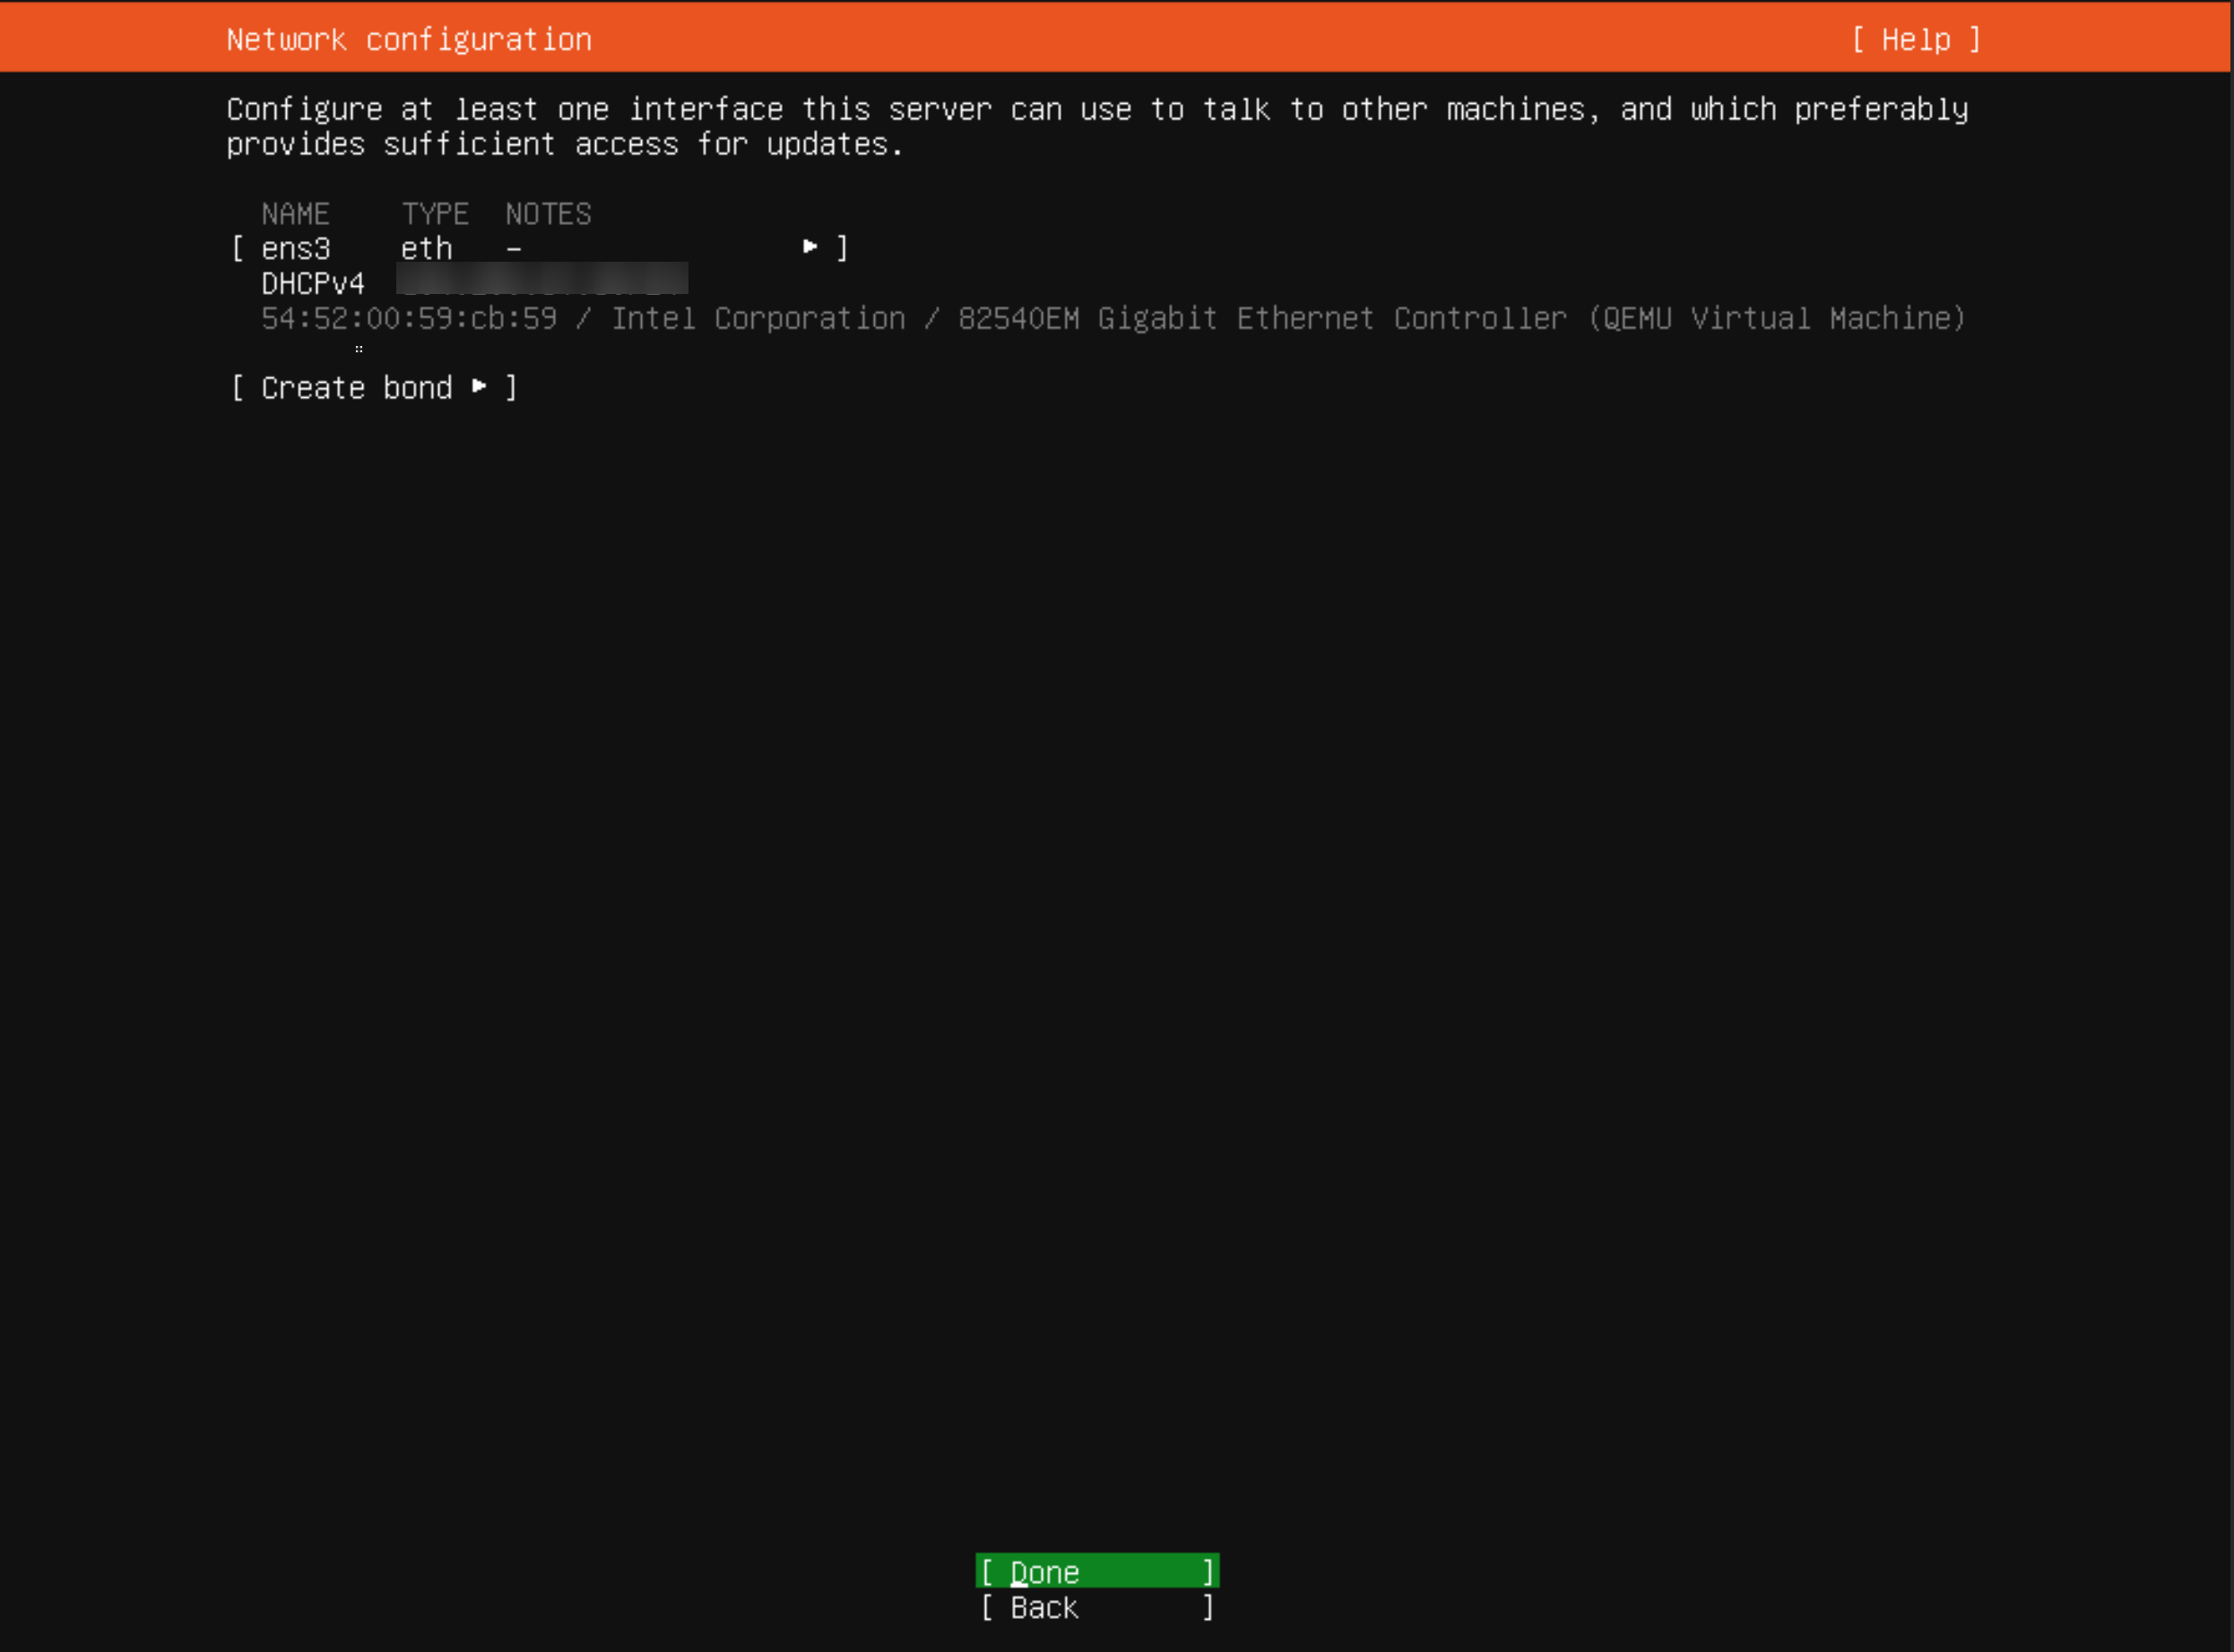
You can either set up a static network configuration or simply go ahead with DHCP (Simply press ENTER here).
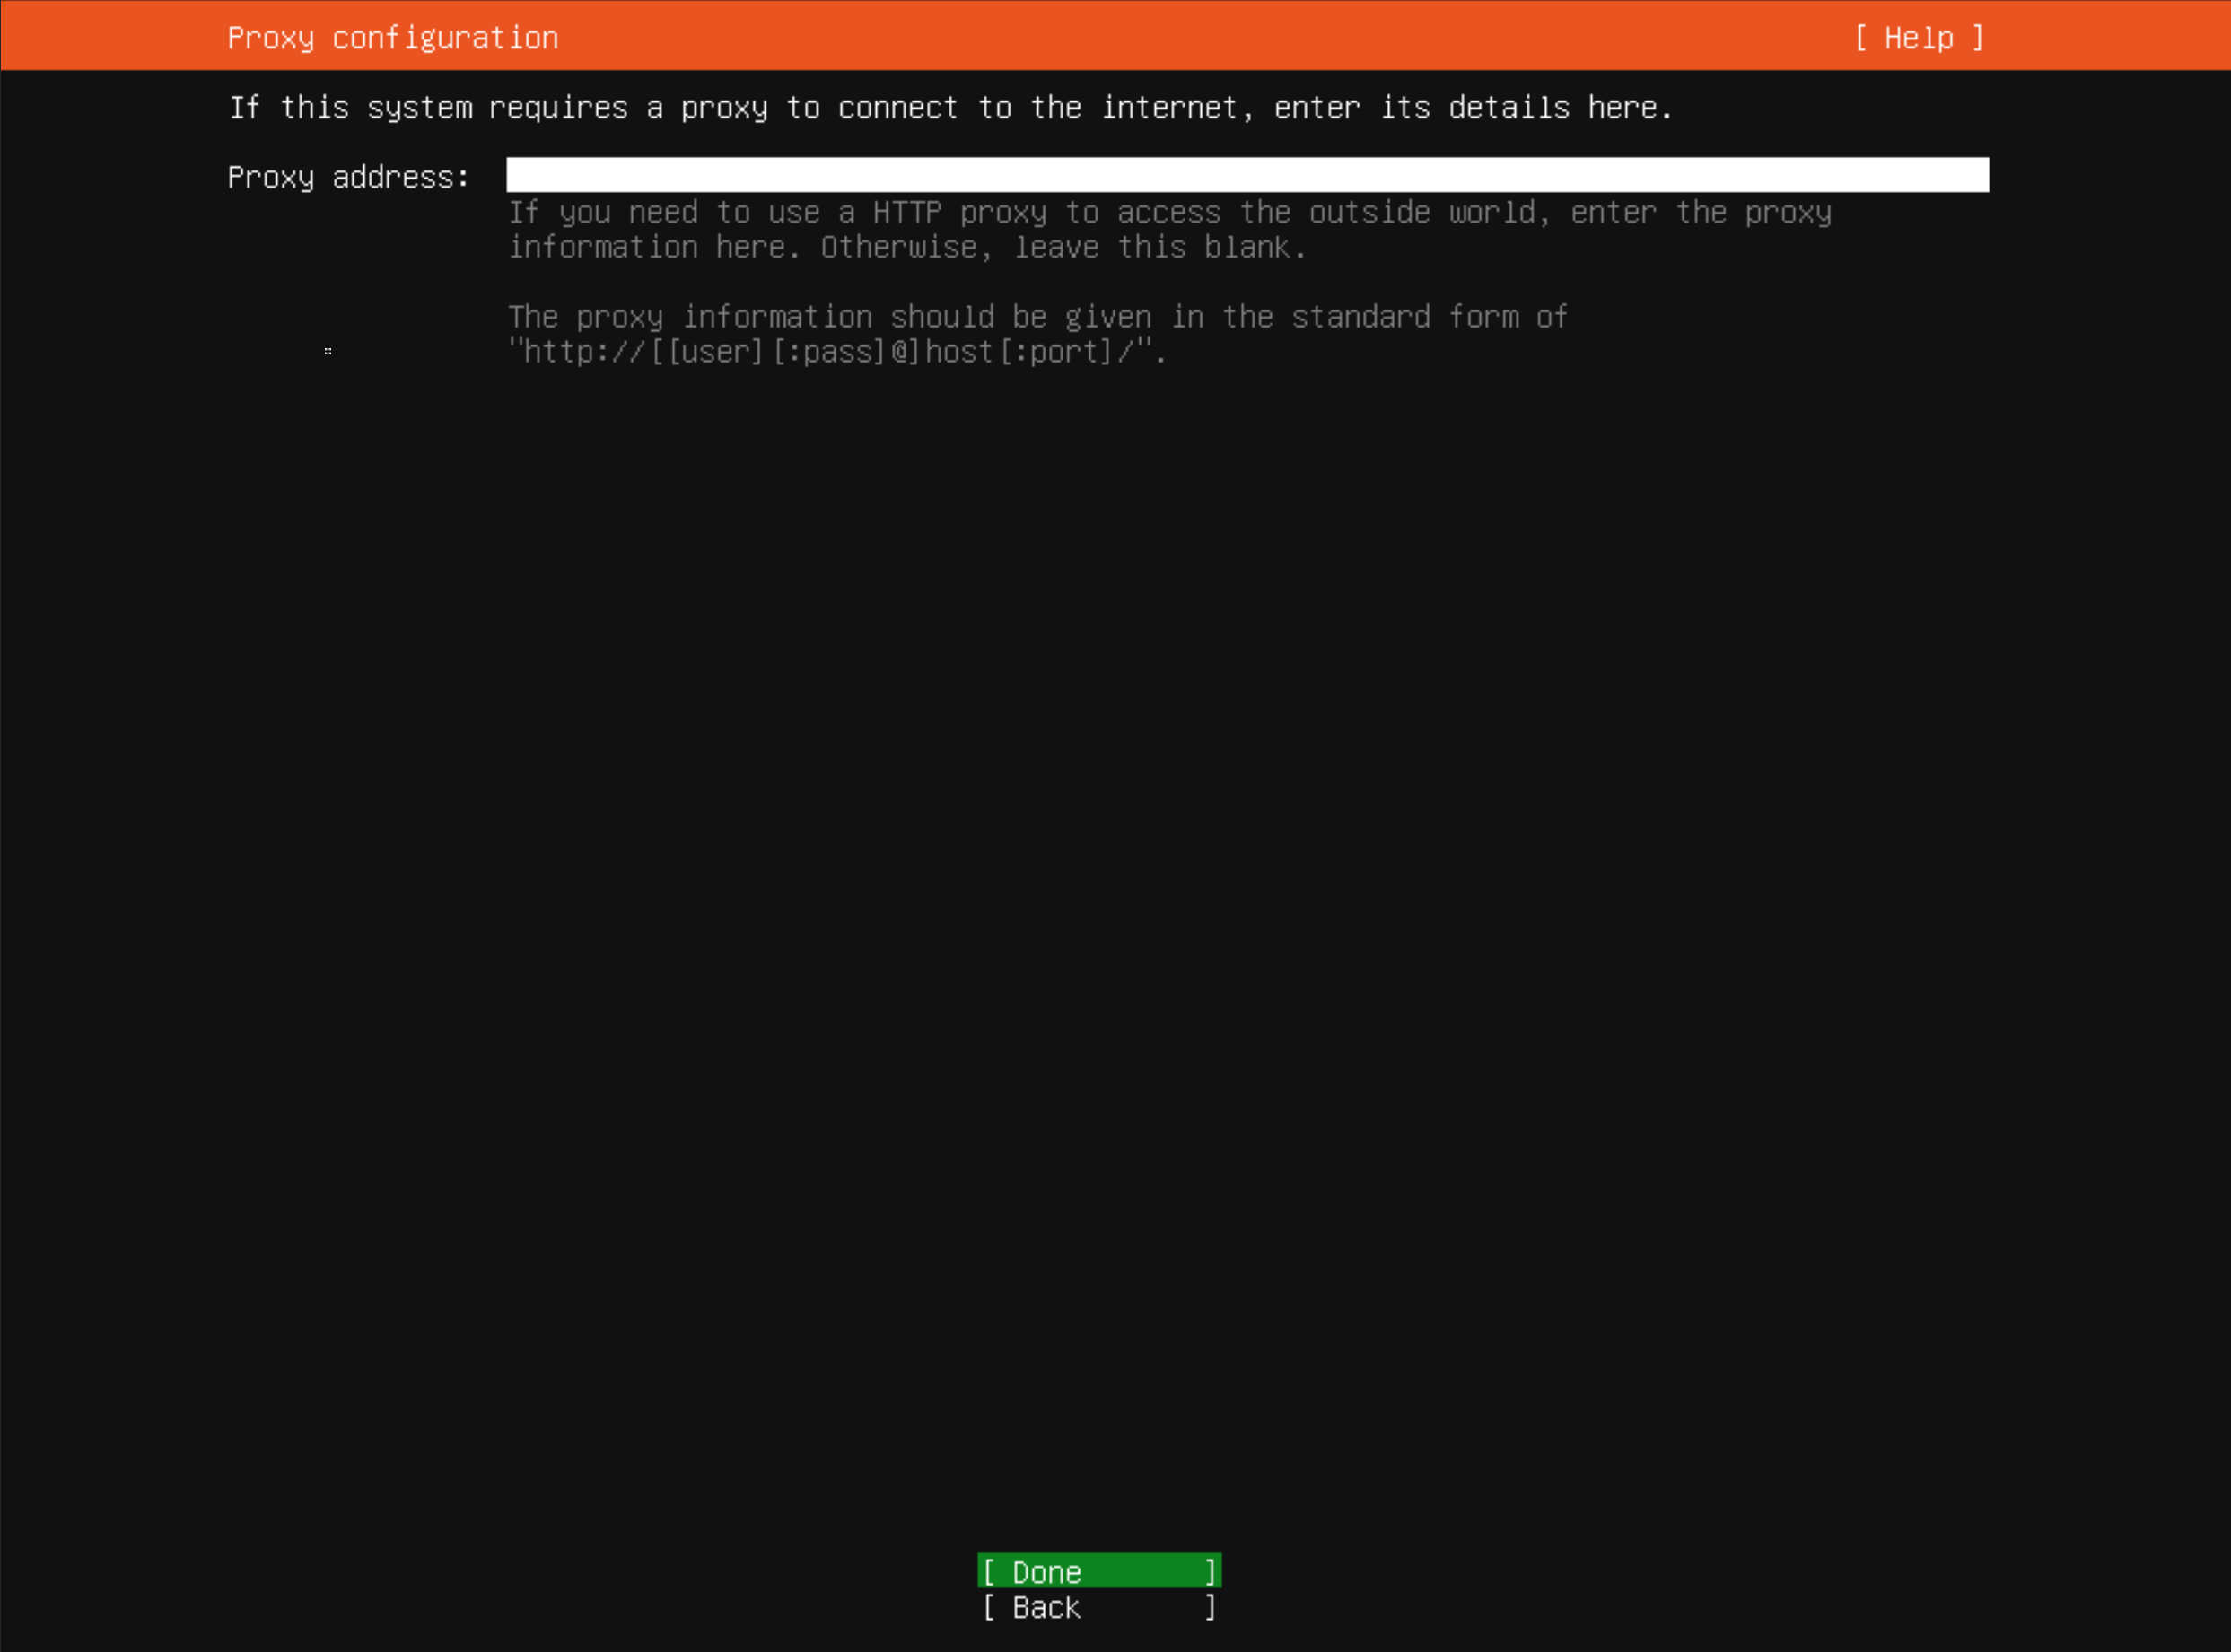
You can configure a proxy for the server in this part of the process if needed. Ideally, in most cases you don't need to, just leave it blank and proceed.
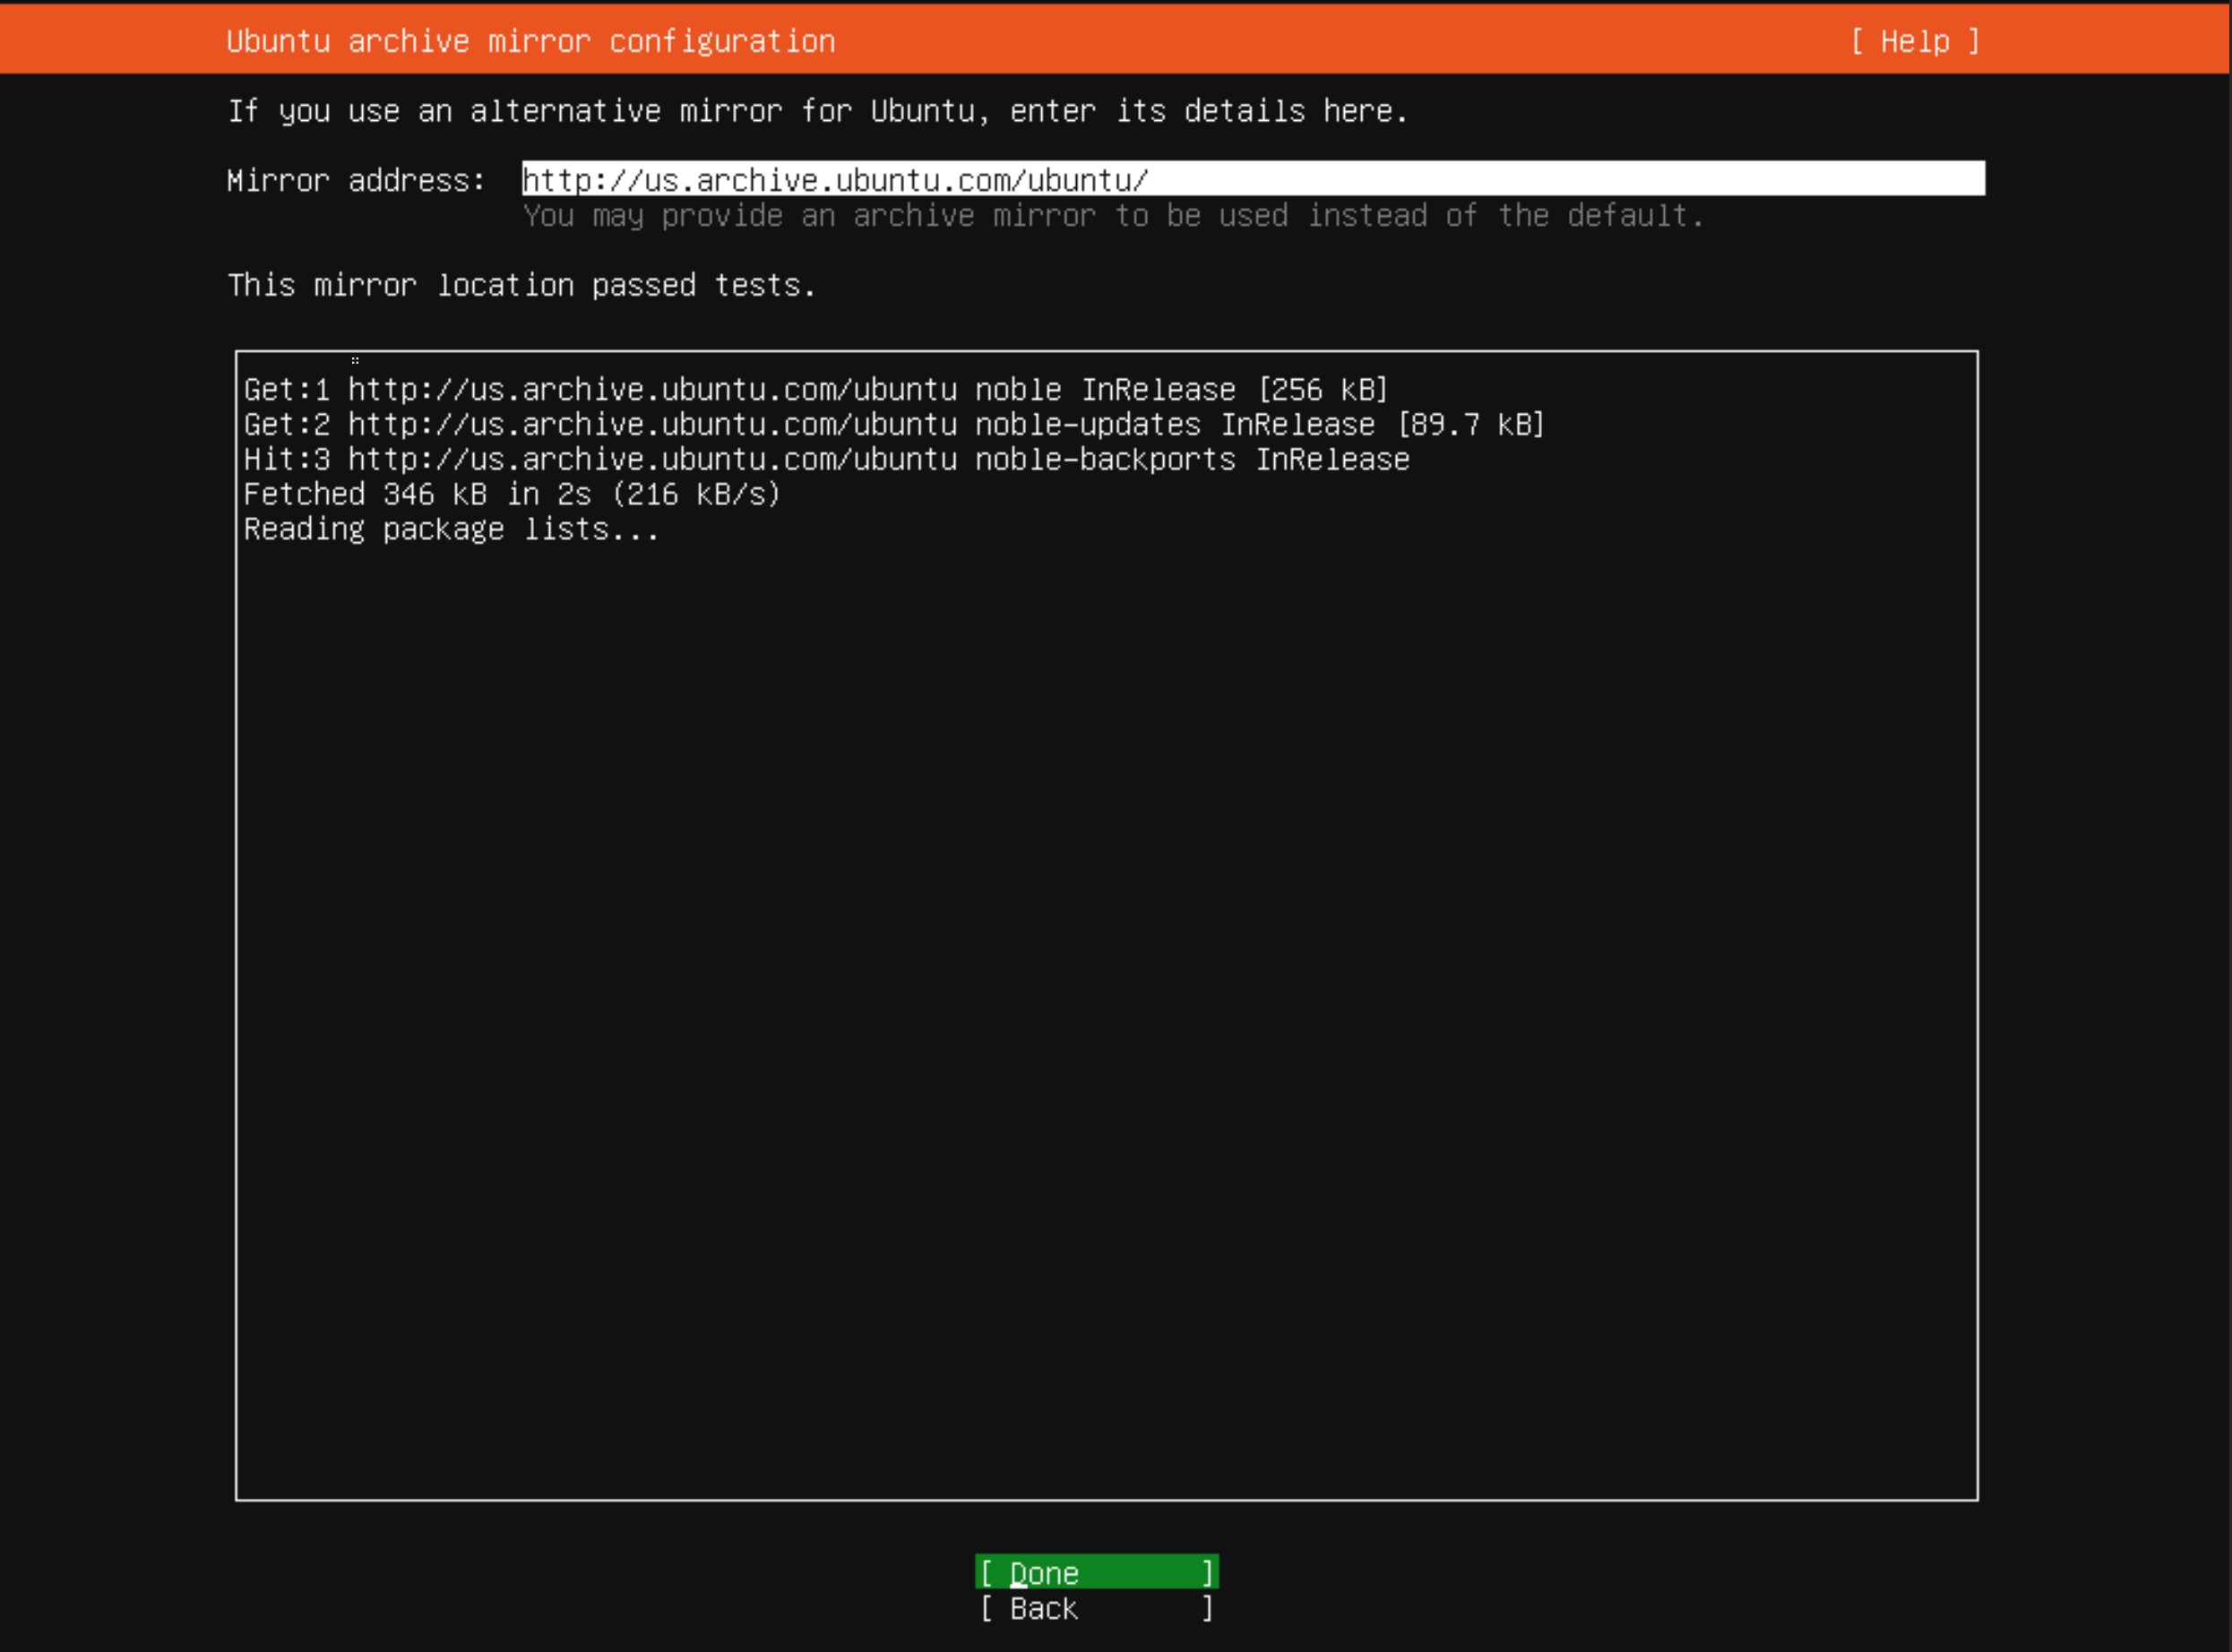
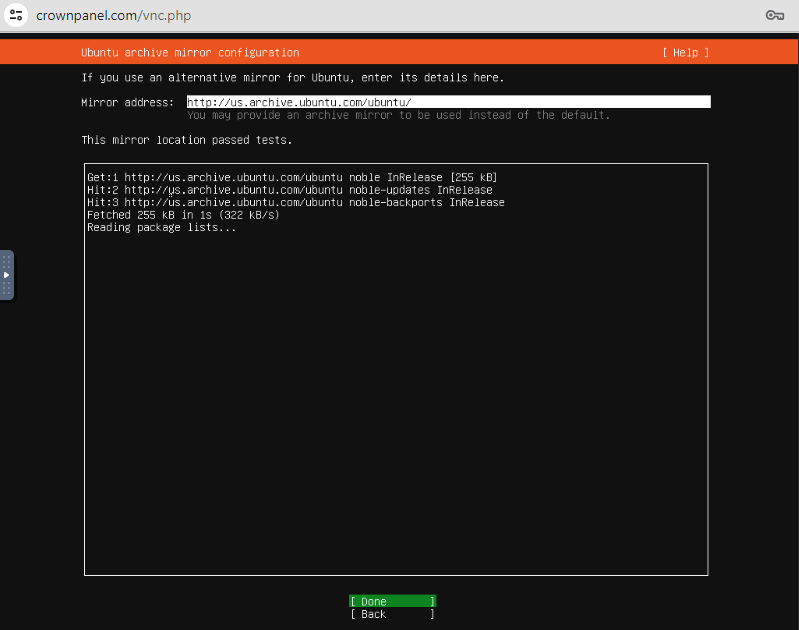
Next, in the mirror selection, we keep the default mirror address that Ubuntu detects for us,
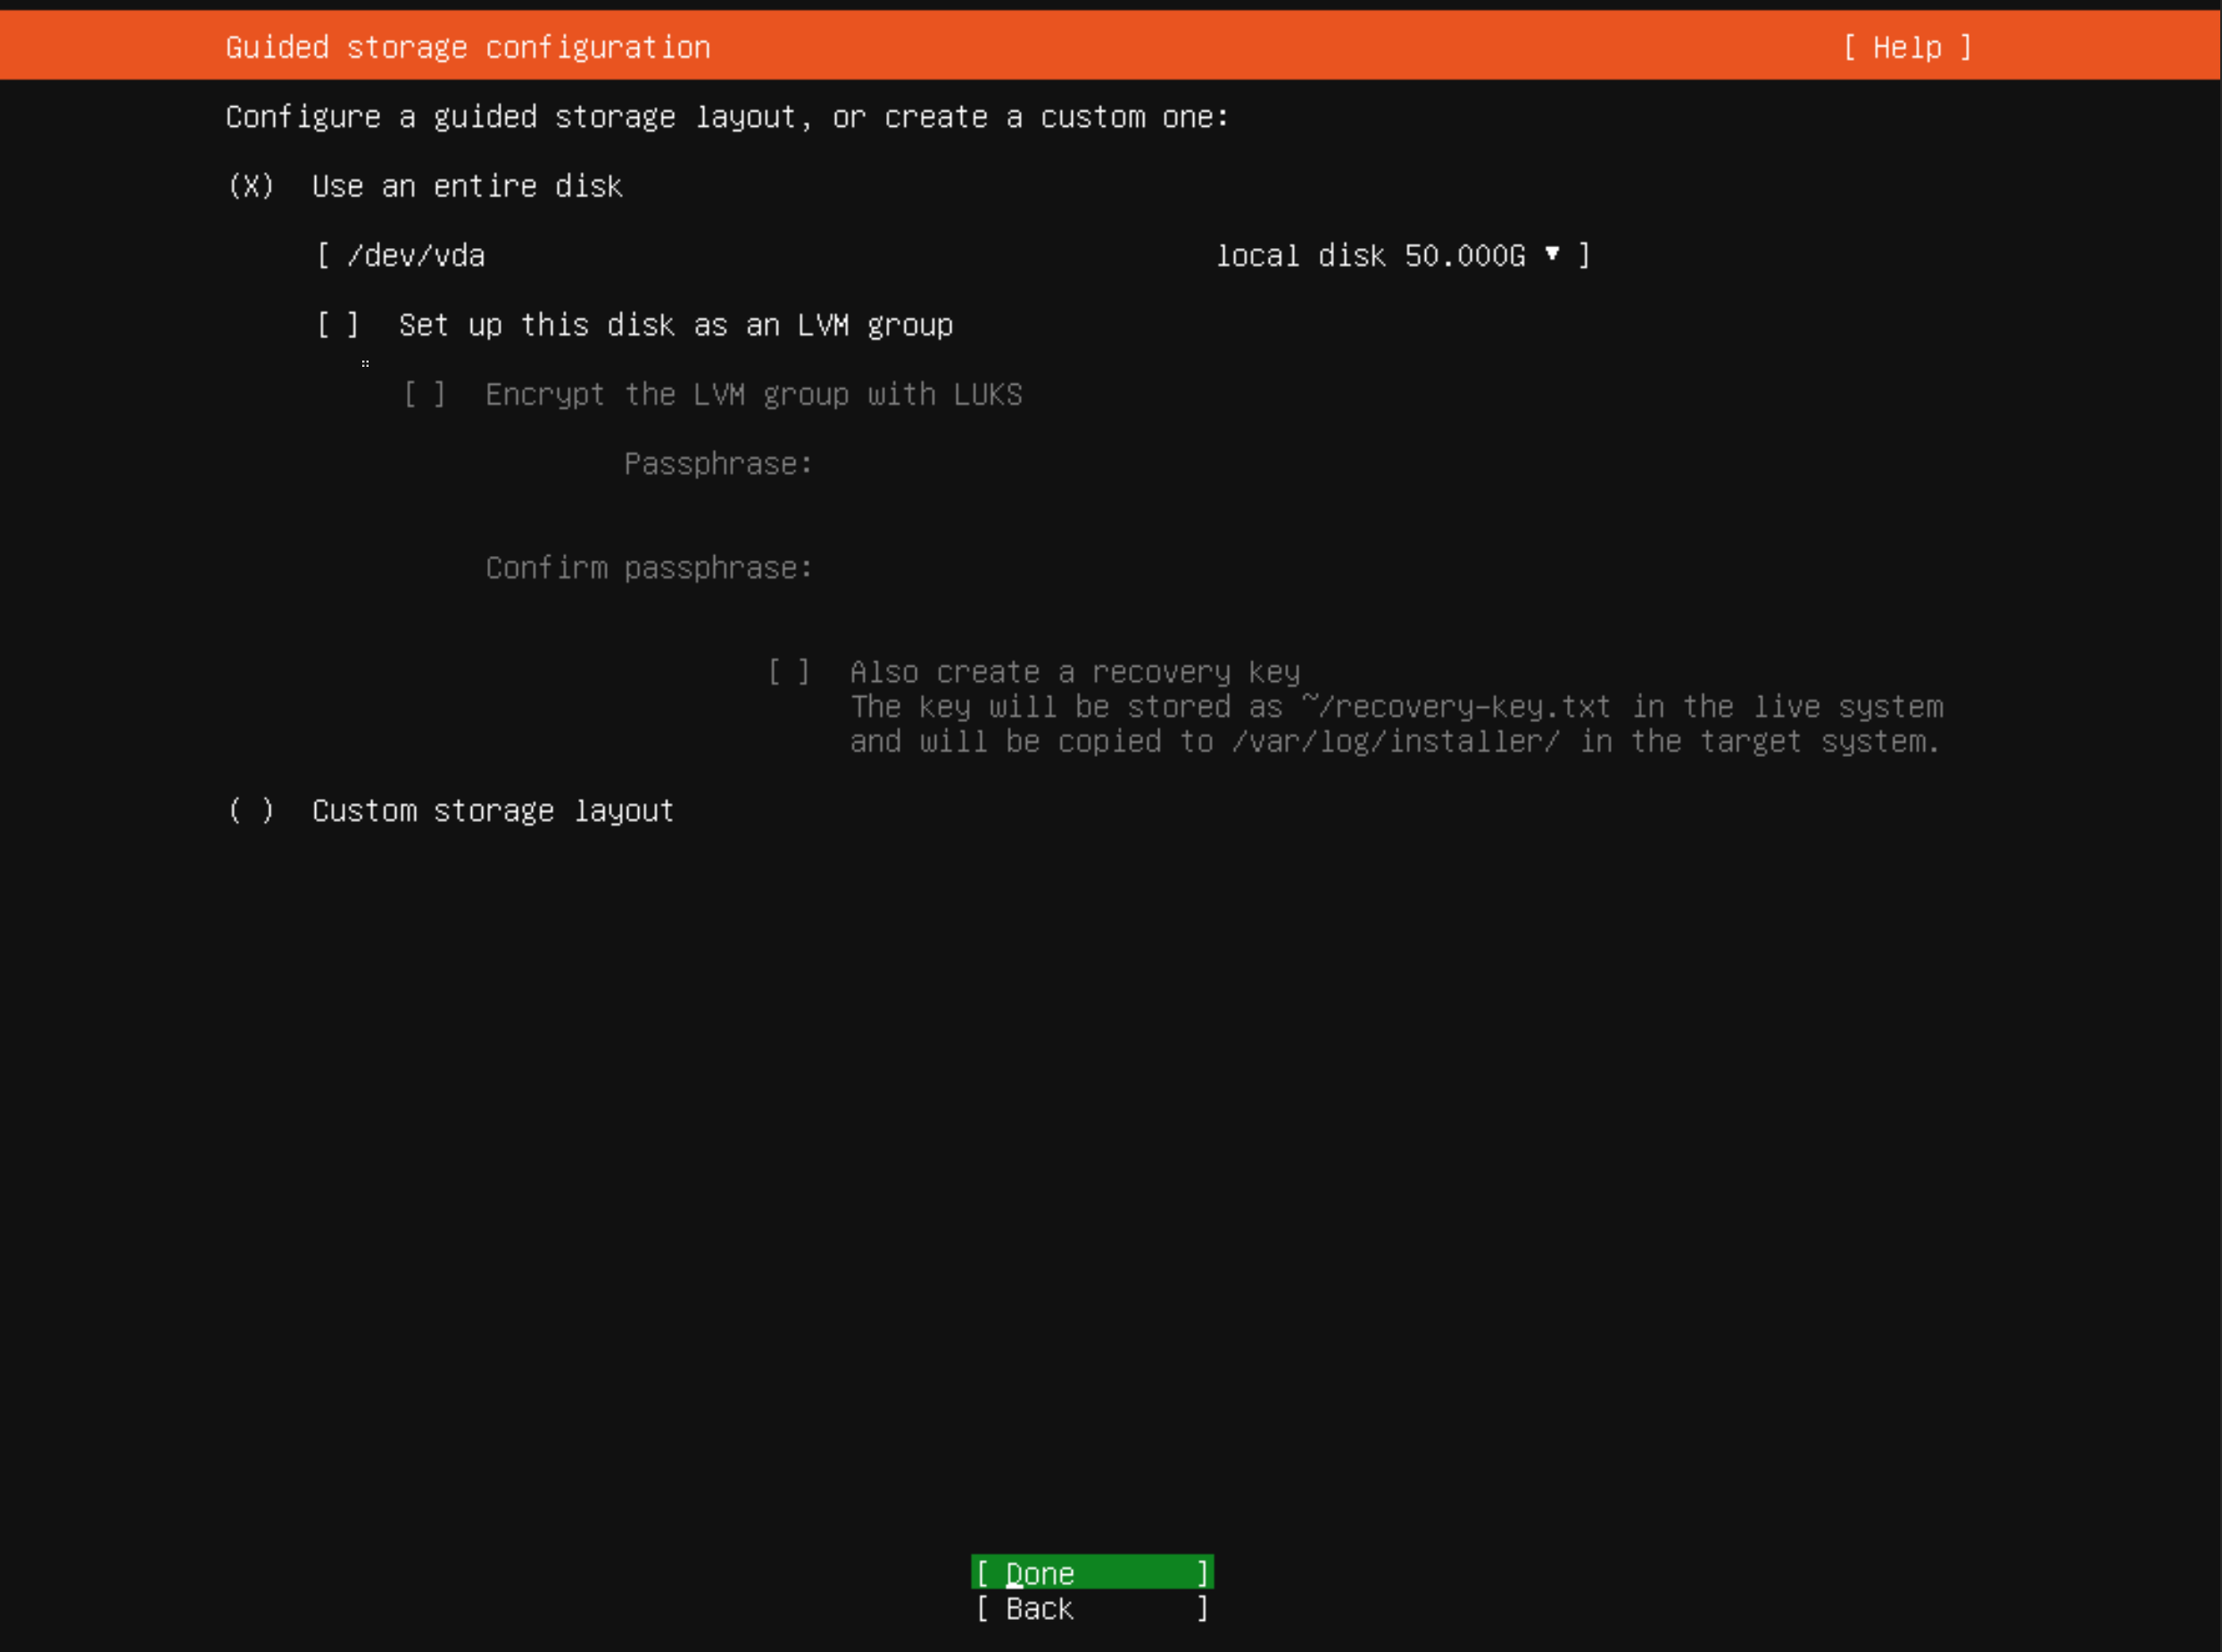
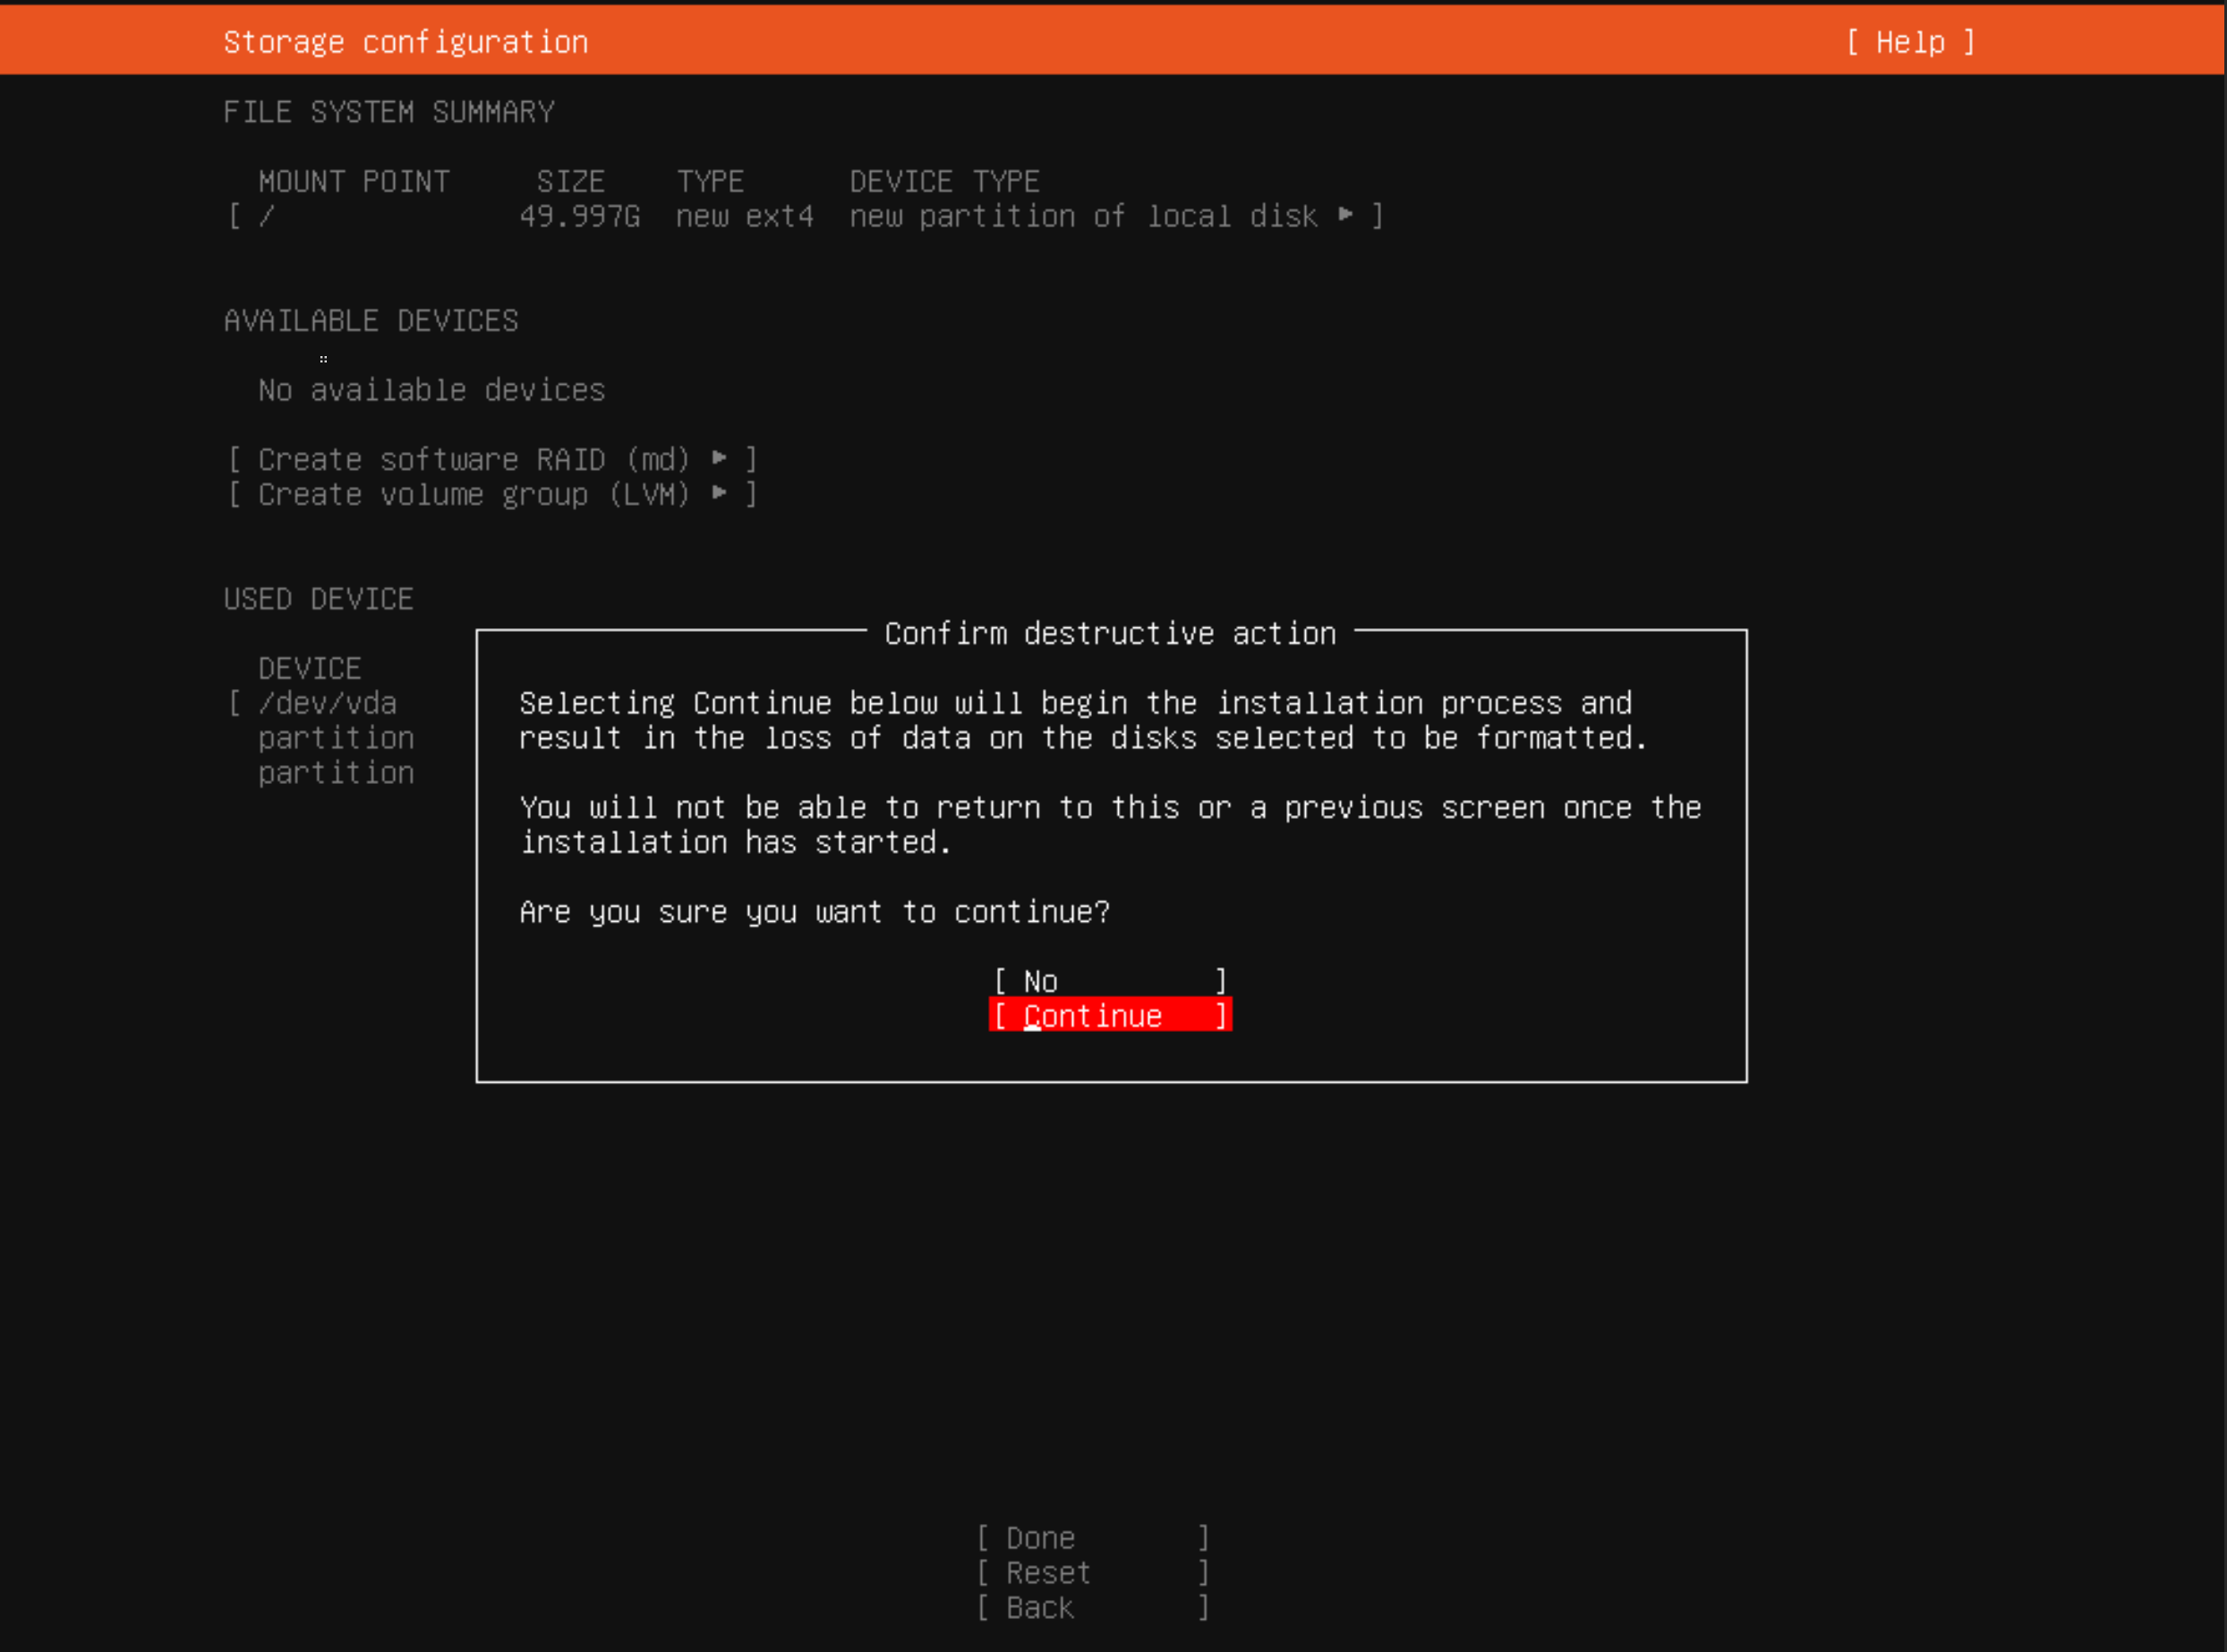
Disk partitioning, we will keep it simple and go with automatic partitioning. Select the "Use an entire disk" option and continue.
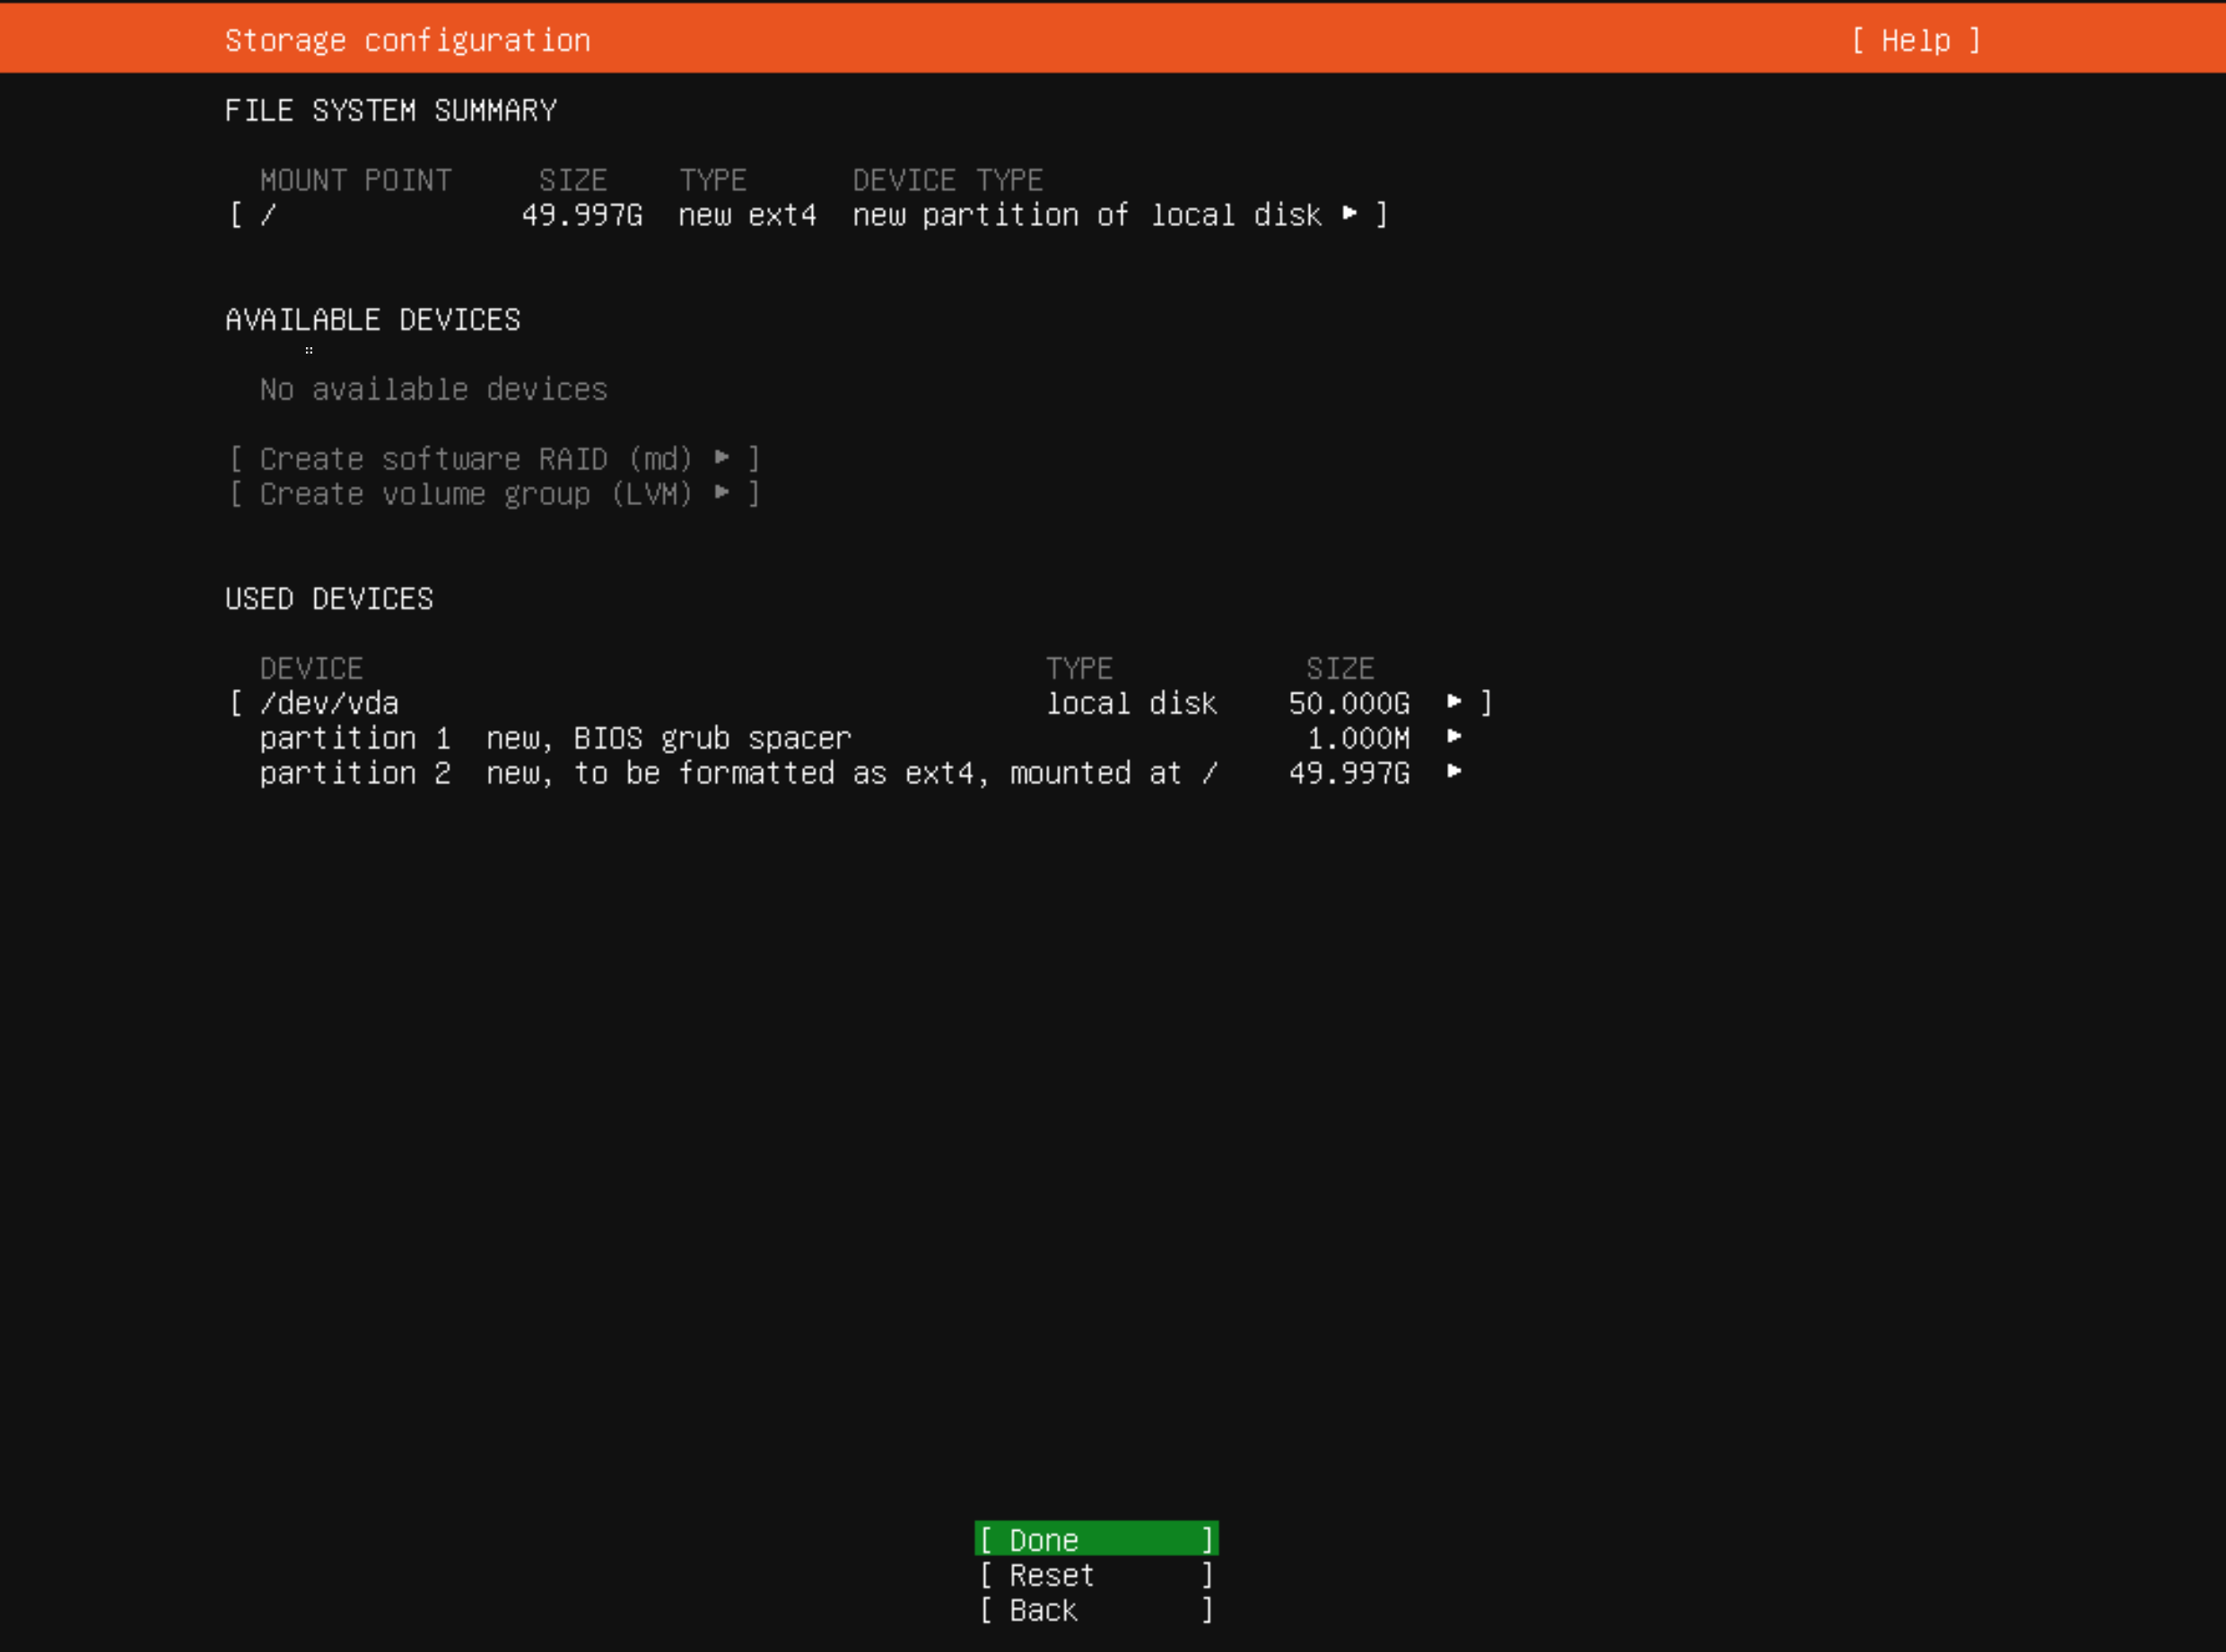
Review the "partitions" and then proceed.
Since we're installing a new Operating System on the existing disk you will be prompted to lose data on the selected disk, confirm and select "Continue".
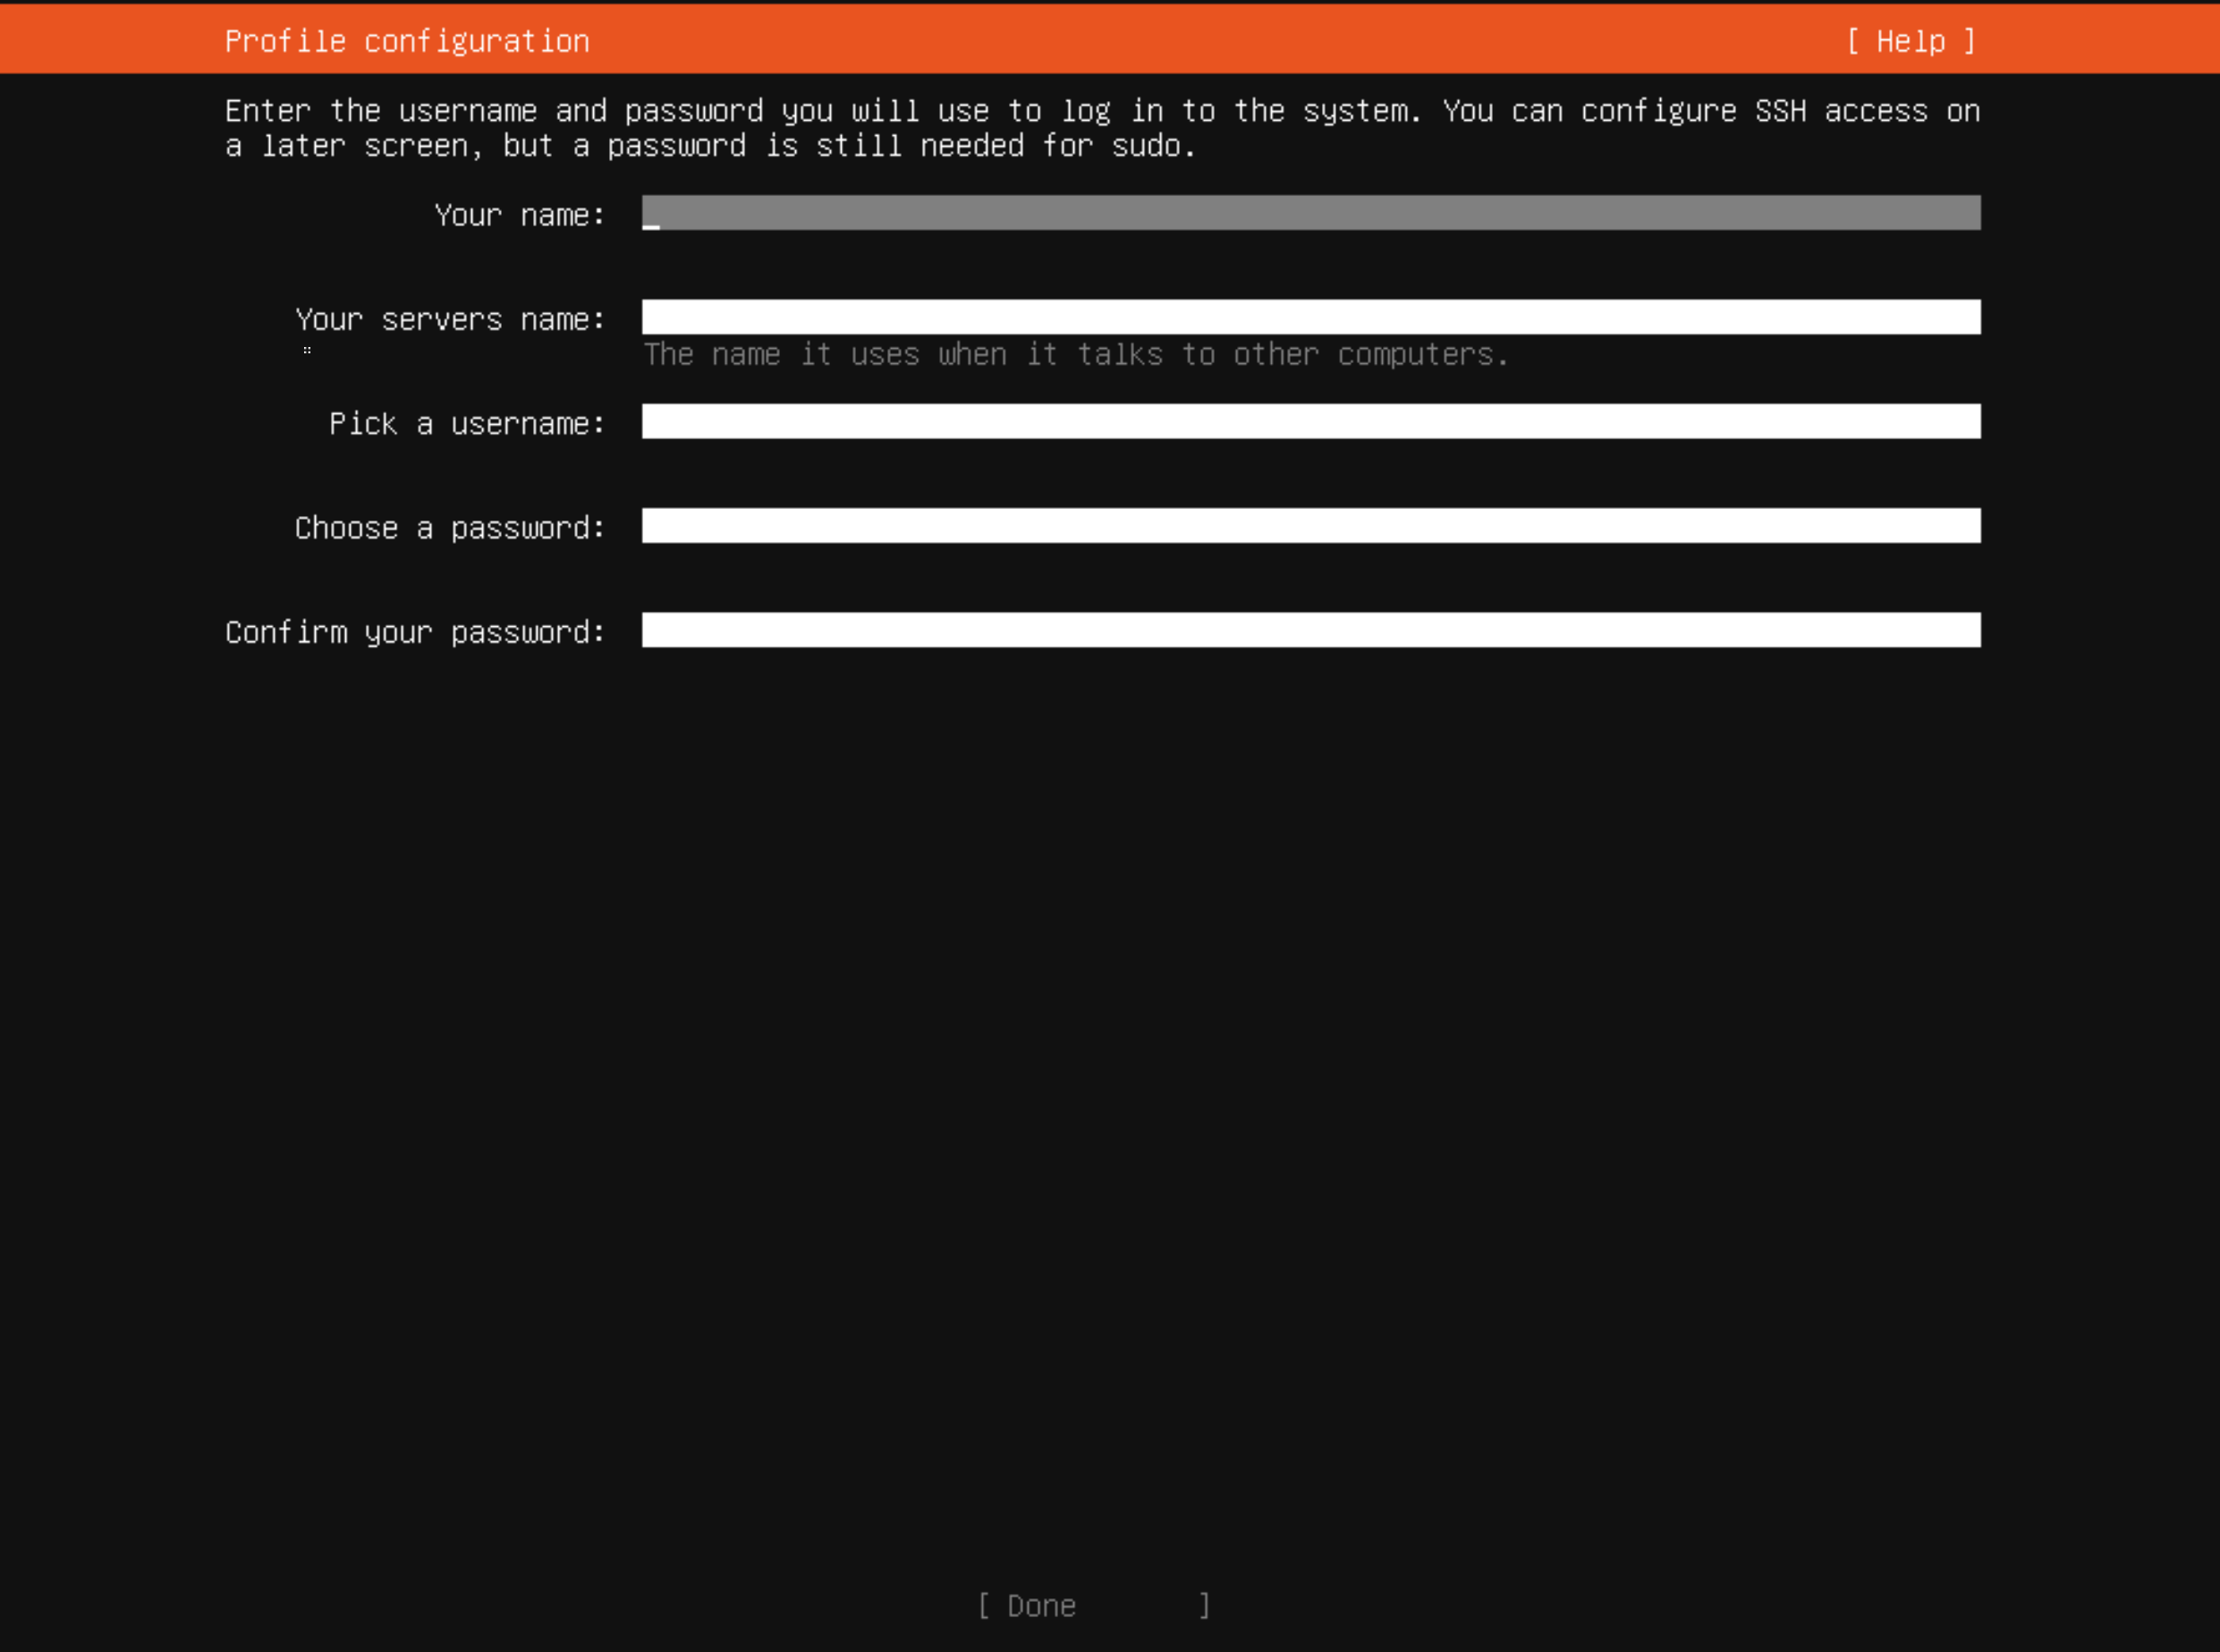
Profile setup, You will be provided a form to enter user information. These will be the login details that we'll use later to connect the server.
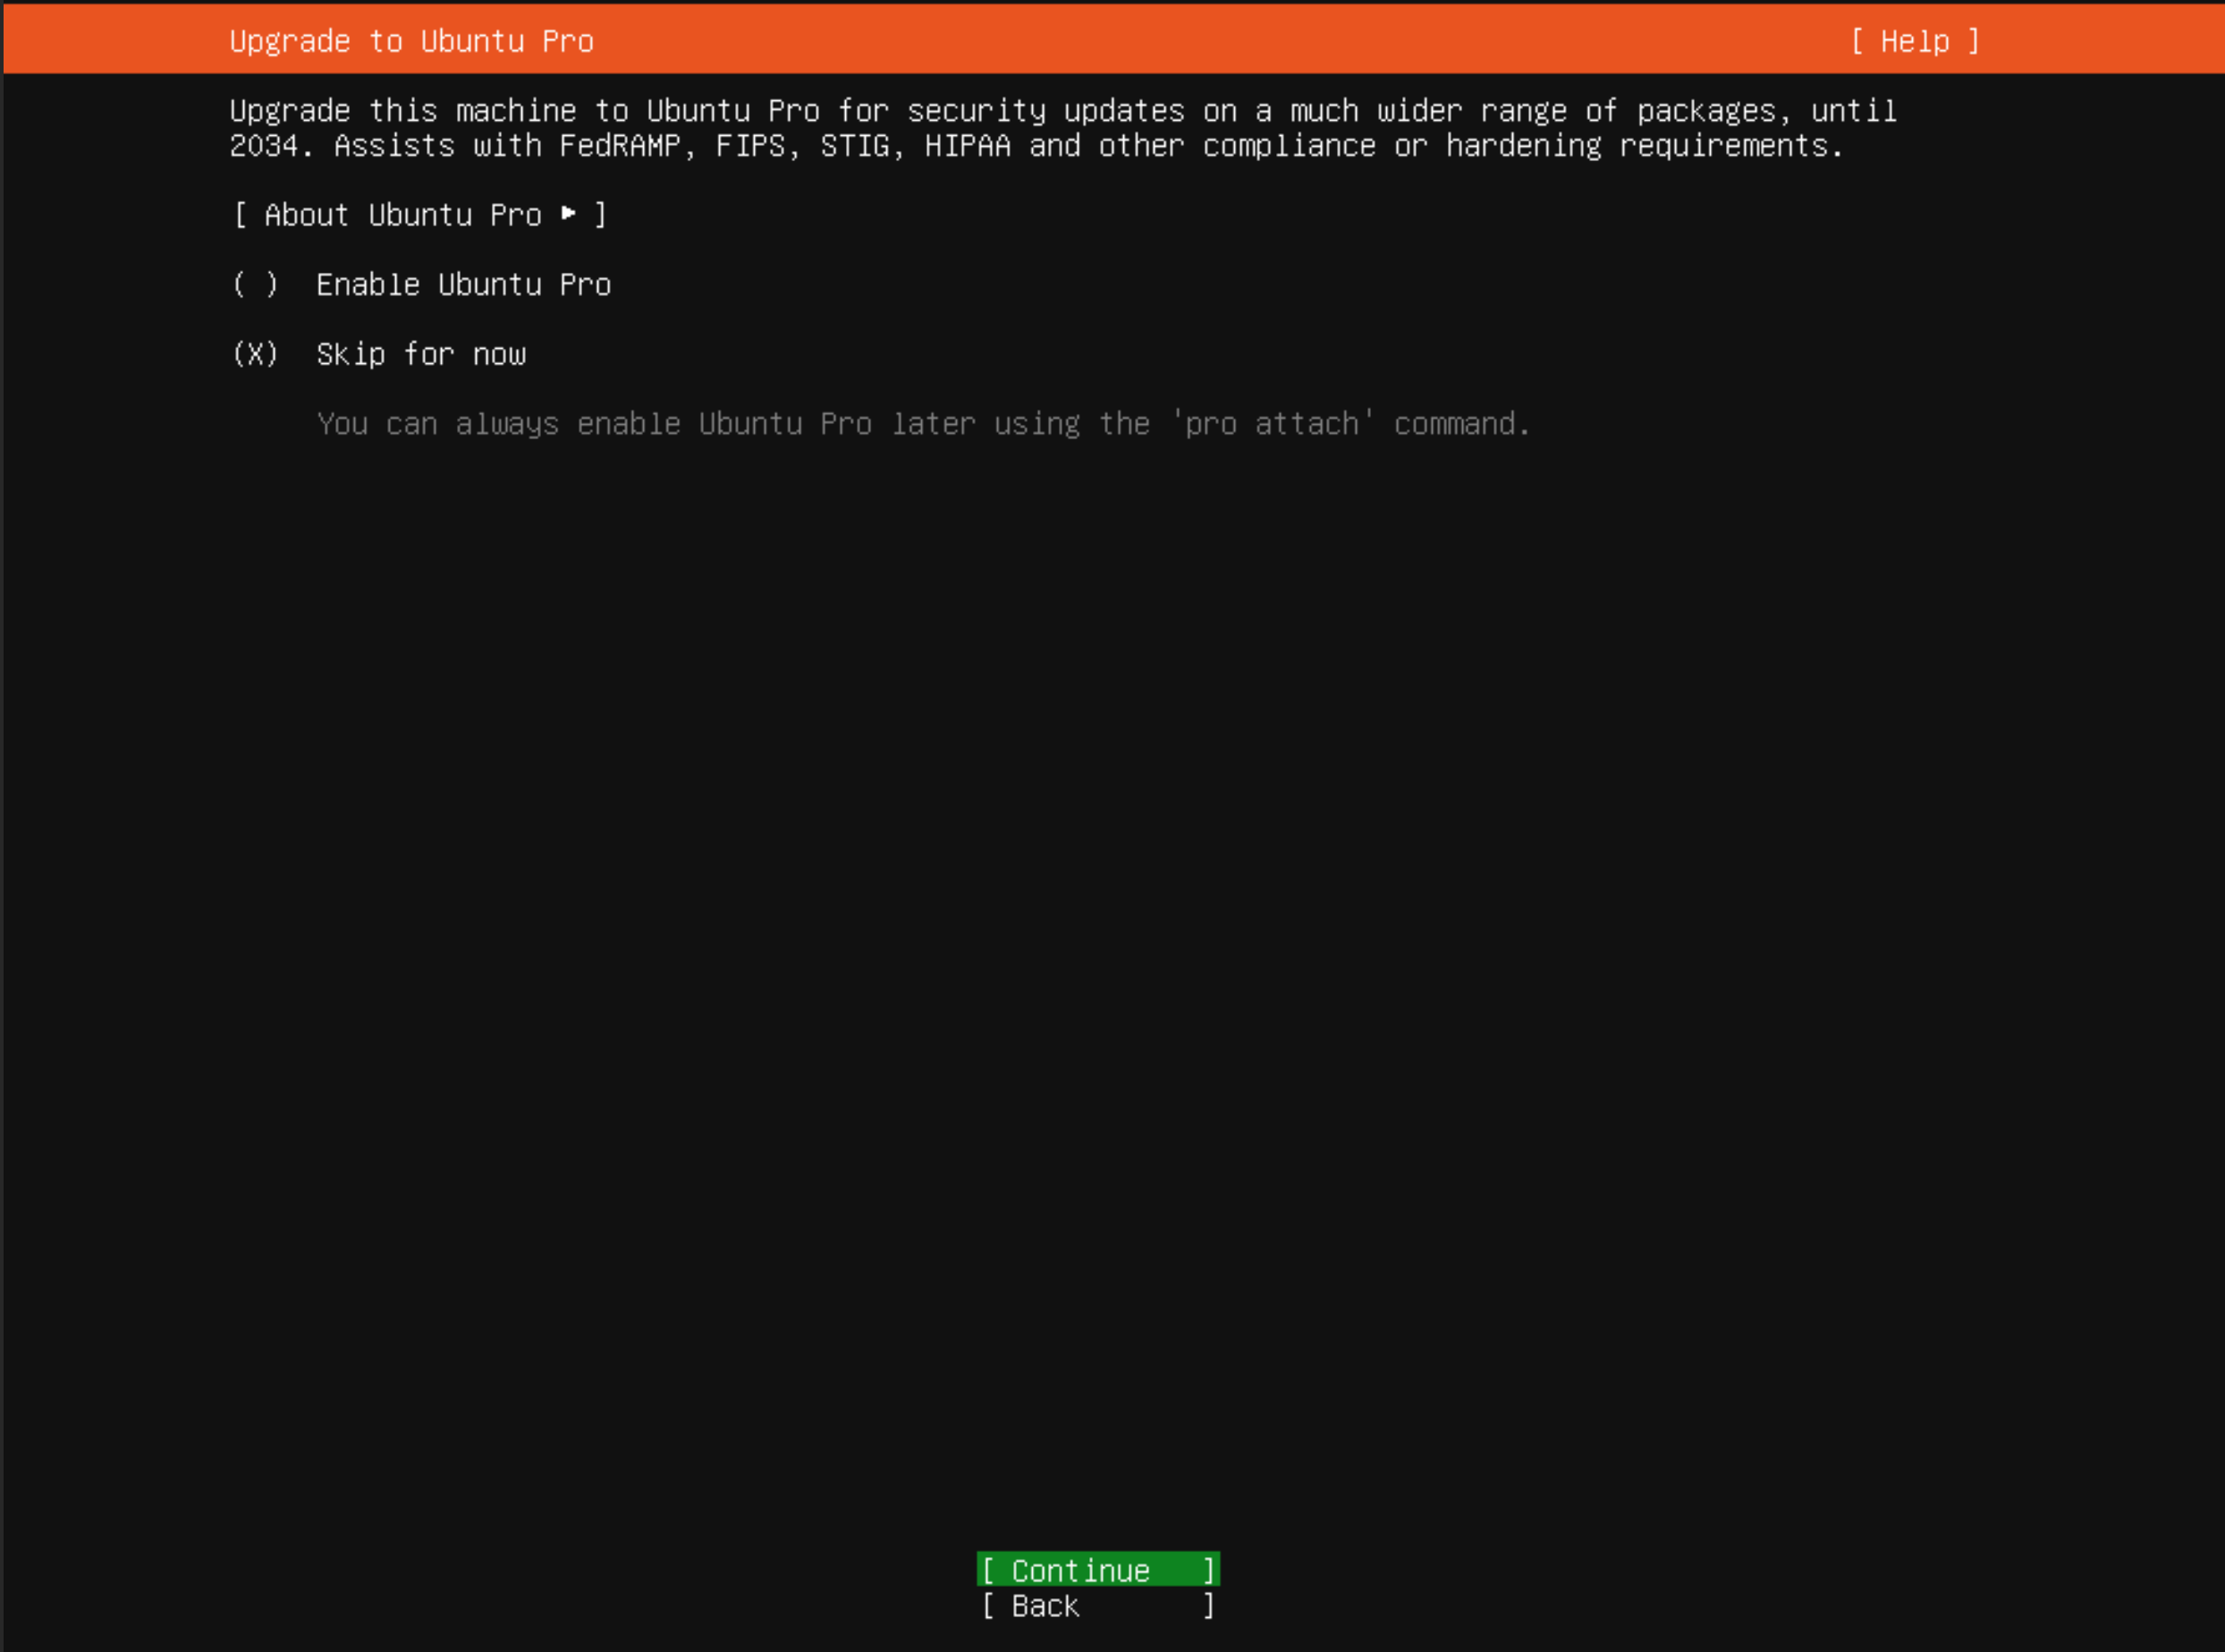
On next, It will be prompted for upgrade the OS with Ubuntu Pro, select the option to skip or defer the upgrade.
If you choose to skip the OS upgrade during installation, you can always perform the upgrade later. This might be useful if you want to complete the installation quickly or if you prefer to upgrade the OS at a later time for specific reasons.
We will choose the package OpenSSH server to be installed as it is essential if you need to connect remotely after the installation.
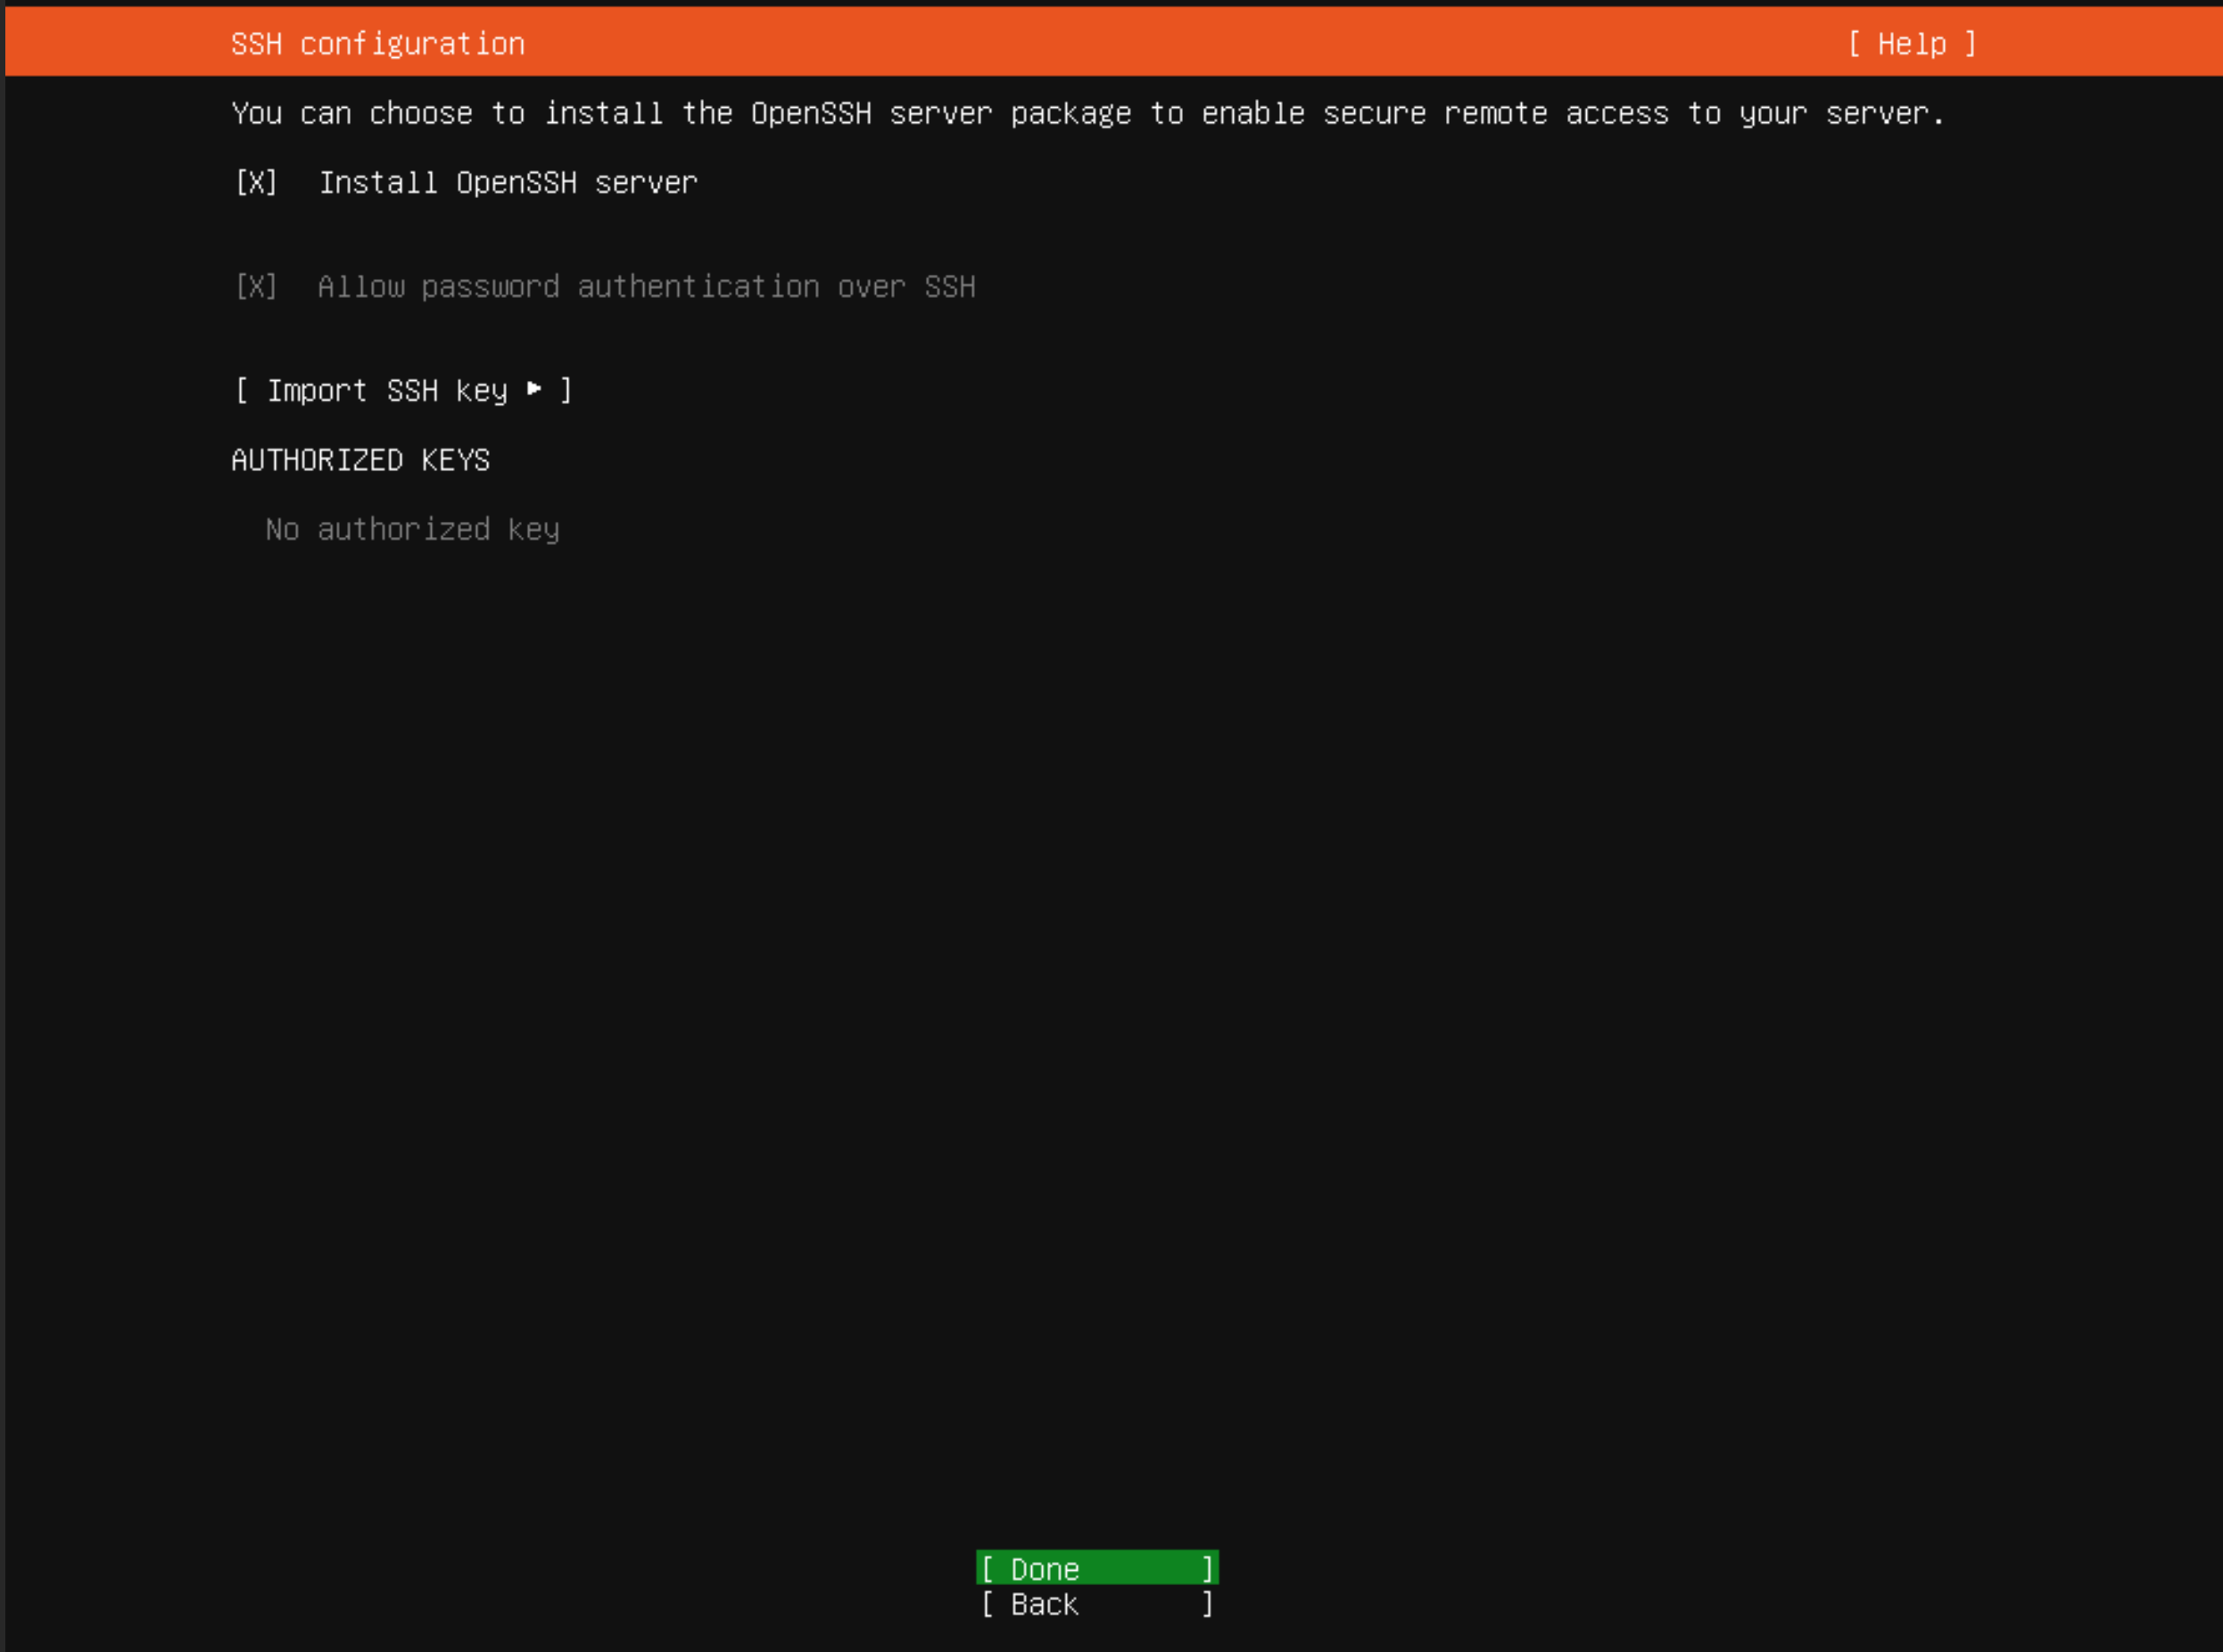
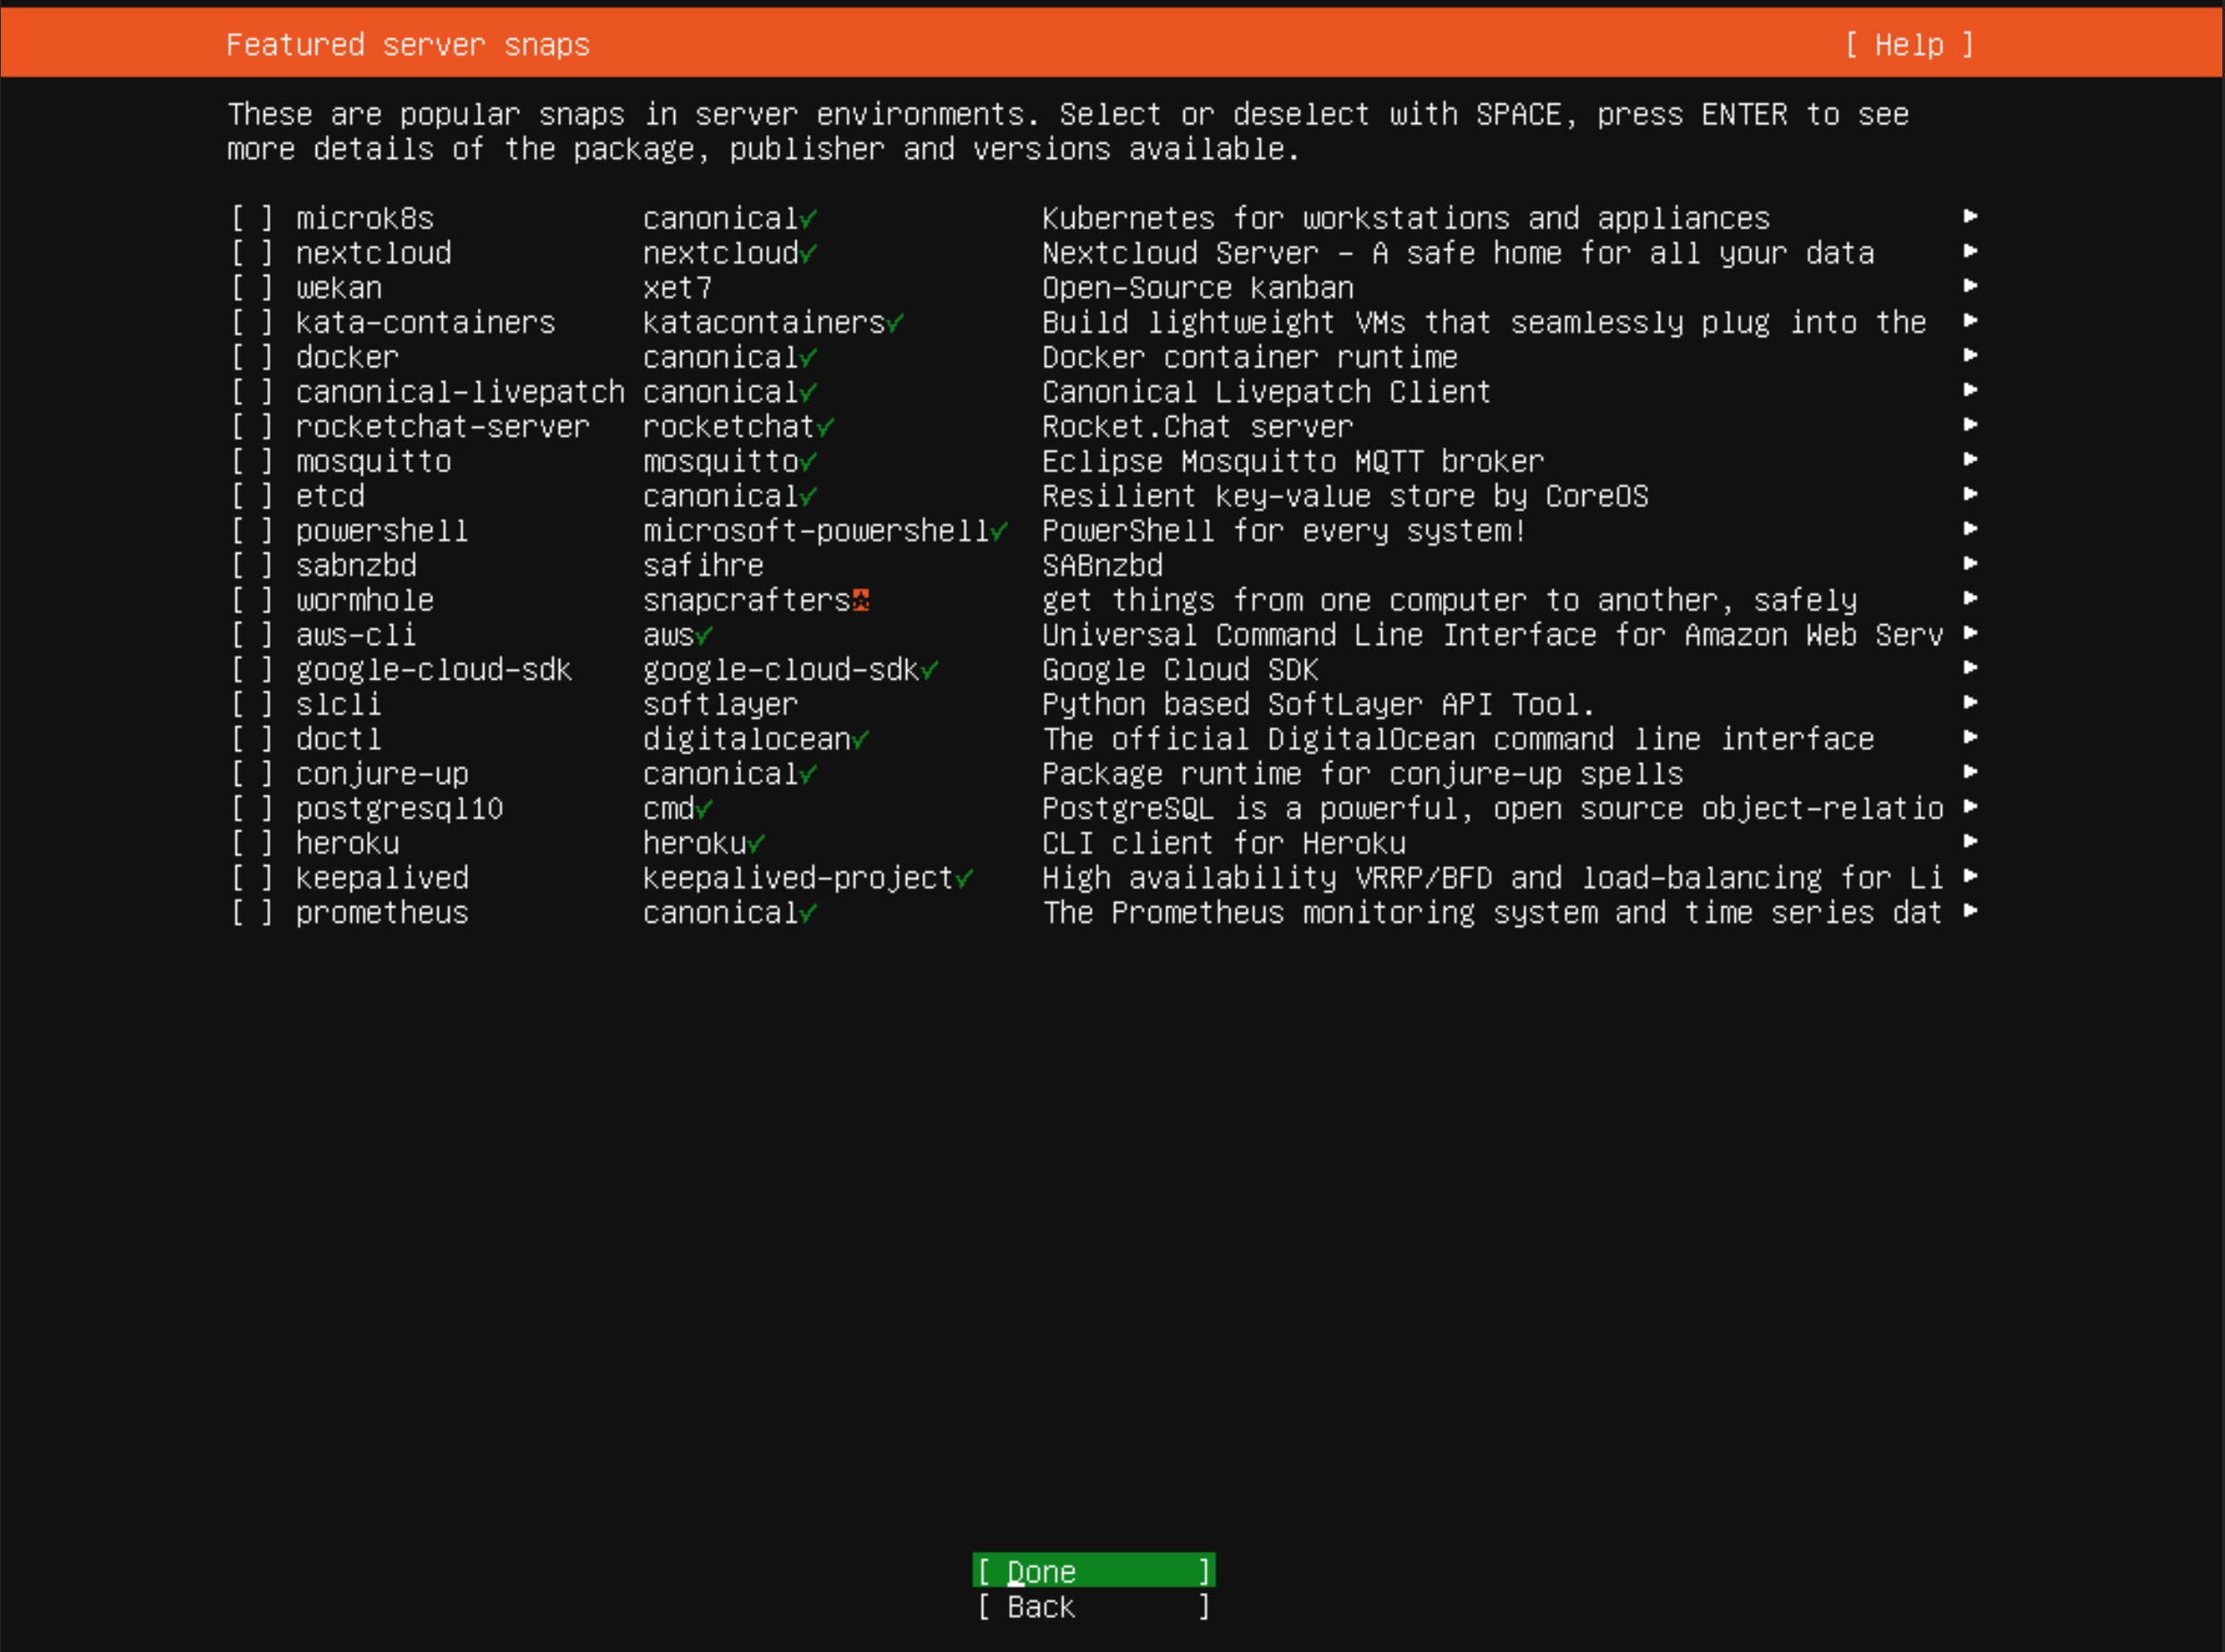
The Ubuntu 24.04 installer also has other packages available for pre-install, you can pick any you wish to pre-install on your server, in this guide we will keep it at a bare minimal (ie, no extra packages selected),
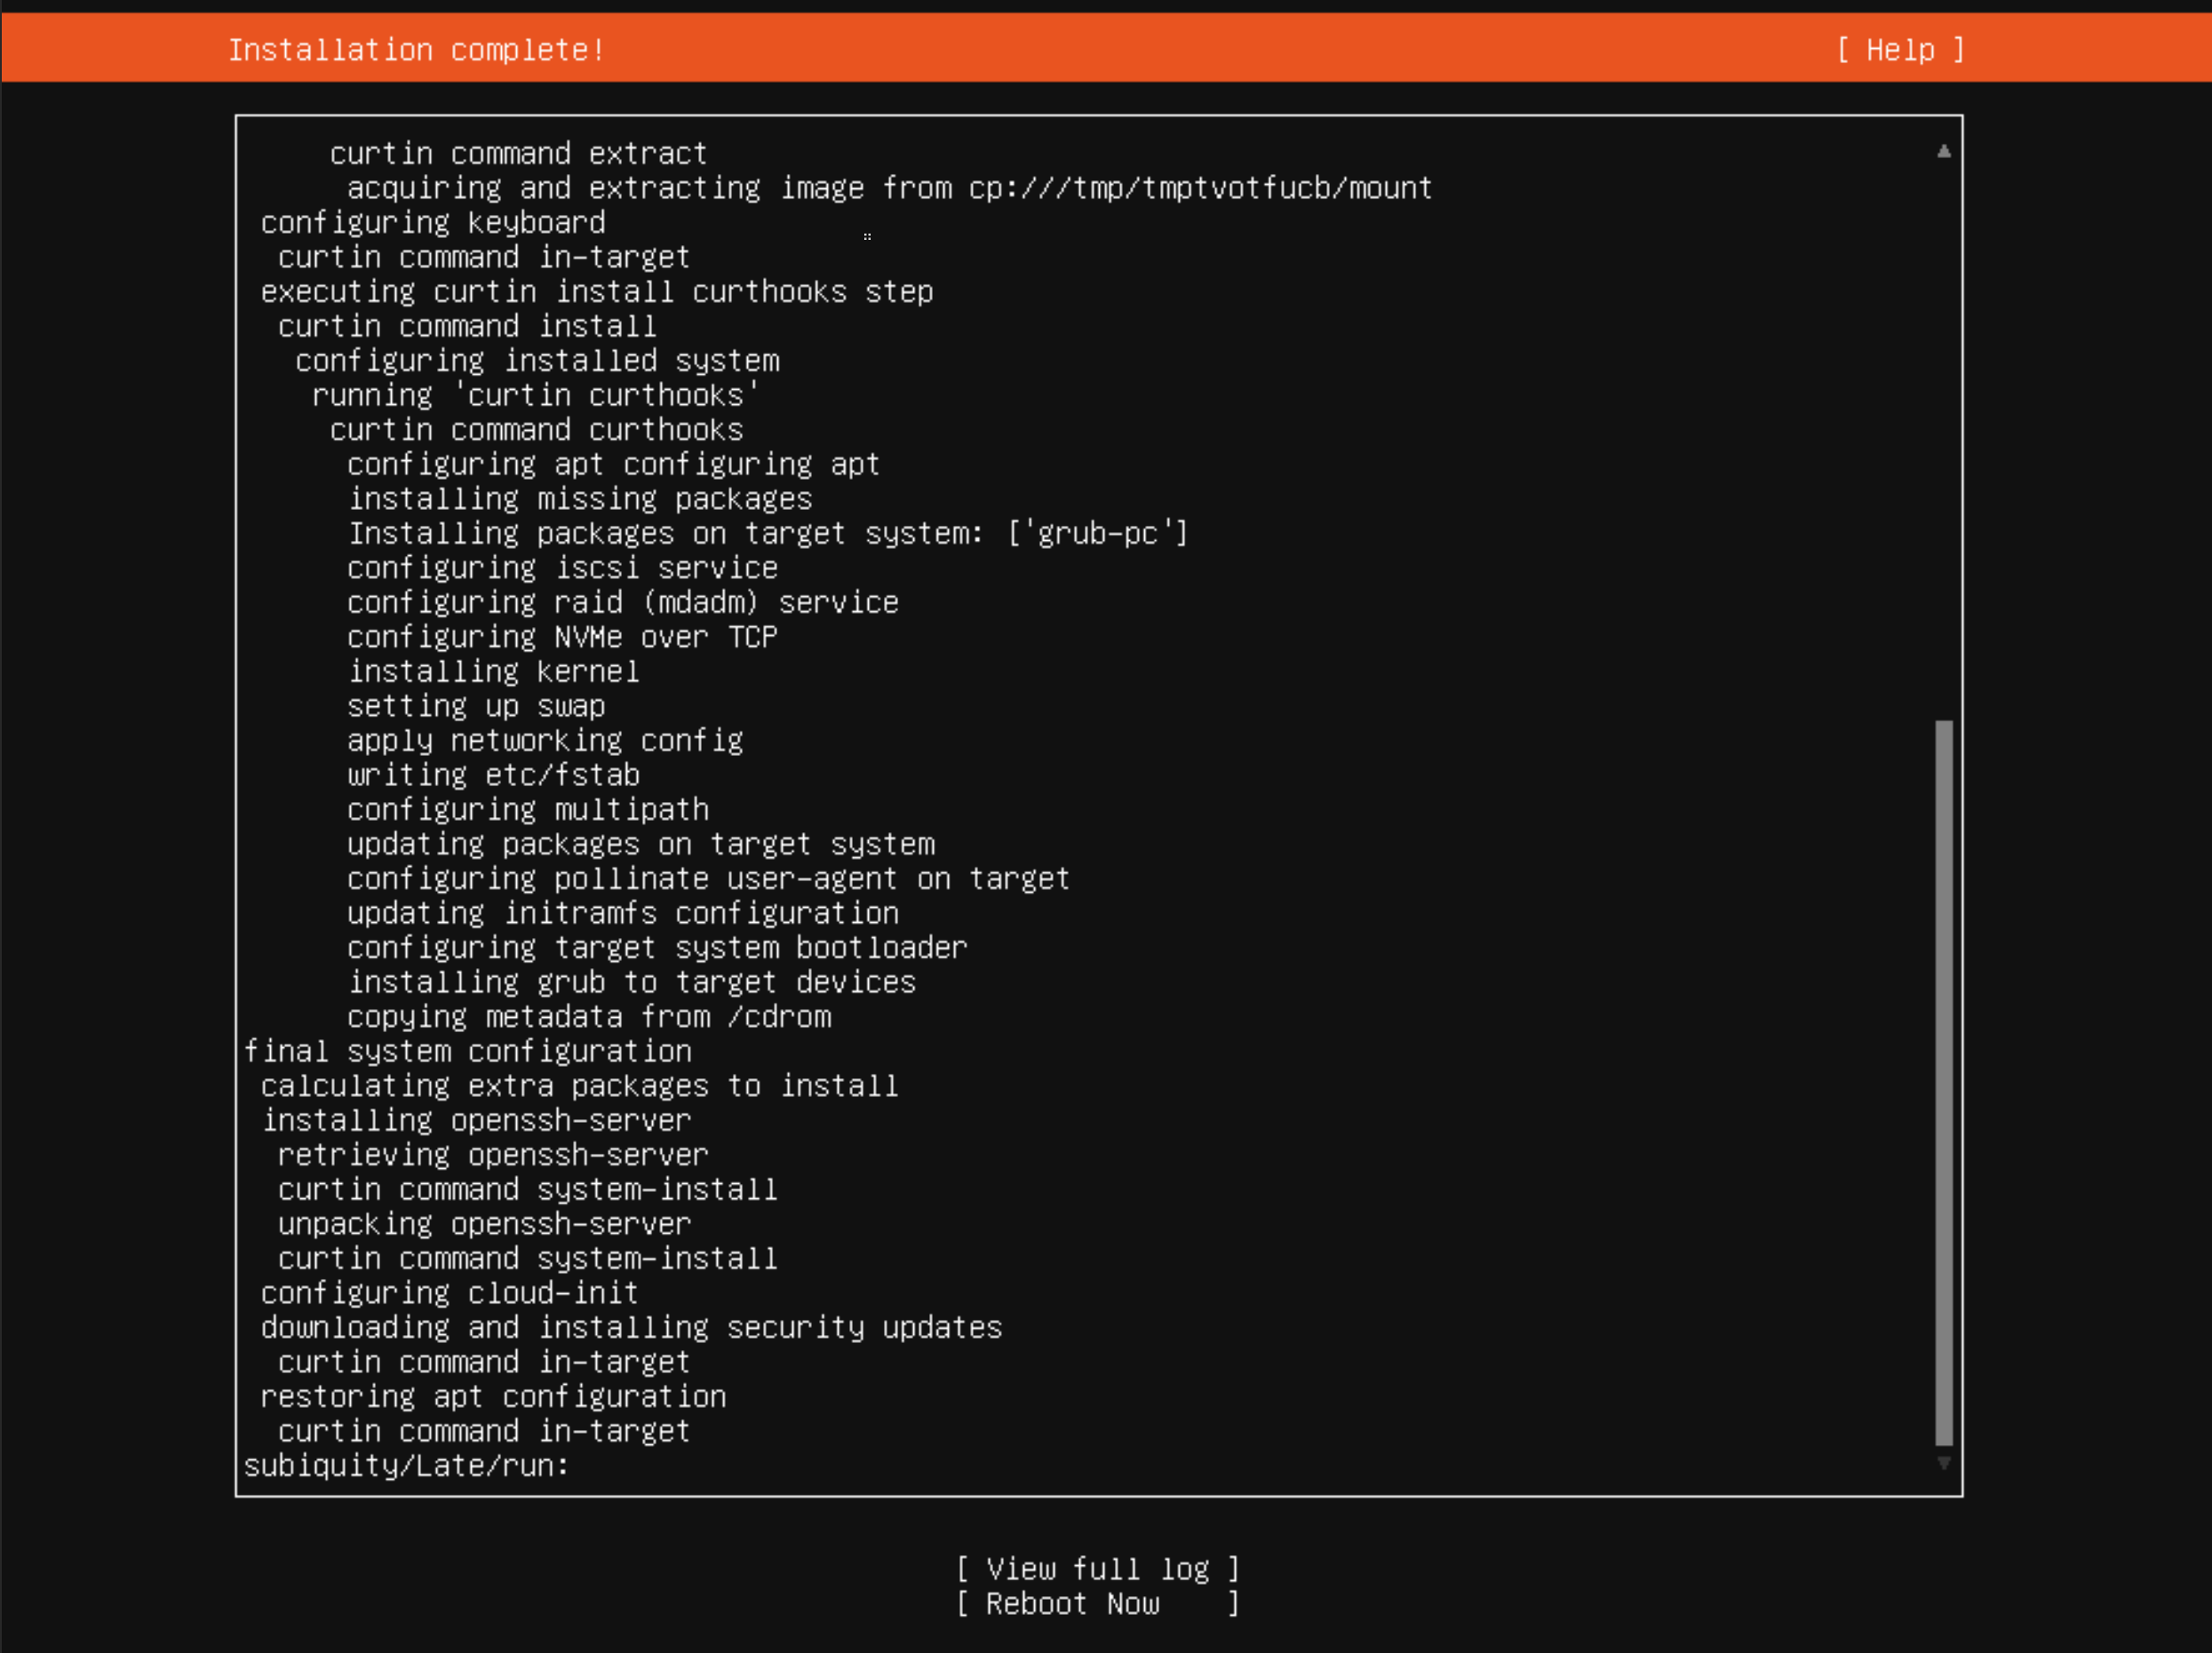
At this stage, Ubuntu will start the installation of the disk.
Once the install is complete, go ahead with the reboot.
After you select to reboot the VPS, Ubuntu will prompt you to unmount the installation medium.
To unmount the ISO, switch back to CrownPanel, Select the "CD-ROM" tab and click on "Unmount".
Next, switch back to the VNC Window, and press ENTER to reboot the VPS,
The VPS will then reboot into your installation of Ubuntu 24.04
You can now login to the server using the credentials that were set earlier (under the "Profile setup" part of this guide)
Done! You are now ready to use the Ubuntu 24.04 server as you like.