How to Install MediaWiki on Ubuntu 23.10
MediaWiki is the free open-source wiki software used to power Wikipedia and thousands of other wikis. The contributions of hundreds of individual developers have helped make it a feature-rich, secure and scalable platform capable of powering some of the largest collaboratively edited reference projects in the world.
Update the System
apt update -y

apt upgrade -y
Install LAMP Stack
Install Linux(Apache, PHP, and MySQL) on system using below command,
apt-get install apache2 mariadb-server php php-mysql libapache2-mod-php php-xml php-mbstring php-intlOnce the installation is complete, enable Apache, (to start automatically upon system boot), start the webserver, and verify the status using the commands below.
systemctl enable apache2

systemctl start apache2

systemctl status apache2
also, Enable the MariaDB server using below command,
systemctl enable mariadb

systemctl start mariadb

systemctl status mariadb
Download the MediaWiki
Check out MediaWiki's Official Site to download the latest version,
cd /tmp/

wget https://releases.wikimedia.org/mediawiki/1.40/mediawiki-1.40.1.tar.gz
Extract the file in your Web Directory,
tar -xvzf /tmp/mediawiki-*.tar.gz

mkdir /var/lib/mediawiki

mv mediawiki-*/* /var/lib/mediawiki
Configuring Apache vHost
Now, create a new Apache configuration file dev.domainhere.info.conf for MediaWiki with the following command.
Replace dev.domainhere.info with the domain name of your own for all the below code examples:
vi /etc/apache2/sites-available/dev.domainhere.info.confNow, press i to go to INSERT mode and add the following configuration in the dev.domainhere.info.conf file.
<VirtualHost *:80>

    ServerName dev.domainhere.info
    ServerAlias dev.domainhere.info
    ServerAdmin admin@dev.domainhere.info
    DocumentRoot /var/www/html/mediawiki

    ErrorLog ${APACHE_LOG_DIR}/dev.domainhere.info_error.log
    CustomLog ${APACHE_LOG_DIR}/dev.domainhere.info_access.log combined

    <Directory /var/www/html/mediawiki/>
        Options FollowSymlinks
        AllowOverride All
        Require all granted
    </Directory>

</VirtualHost>
Enable SSL and Rewrite:
a2enmod rewrite

a2ensite dev.domainhere.info

a2enmod rewrite ssl
Restart Apache:
systemctl restart apache2Enable http and https ( 80/443 )
To enable http and https connection through the firewall, follow the commands:
ufw allow 80/tcp

ufw allow 443/tcp
Configure MySQL
Create the MySQL user, database using below command,
mysql -u root -p

CREATE DATABASE my_wiki;

CREATE USER 'mysql_user'@'localhost' IDENTIFIED BY 'Strong_Password';

GRANT ALL ON my_wiki.* TO 'mysql_user'@'localhost';

FLUSH PRIVILEGES;

EXIT
Replace Strong_Password with an actual password.
Configure PHP
Edit the PHP configuration file, php.ini. It is located at /etc/php/8.*/apache2/php.ini, depending on exact version of PHP,
Change the Maximum Upload File Size to 20 M
upload_max_filesize = 20MTo run the PHP script without errors change the Memory Limit to 128M,
memory_limit = 128MIf it is already set to 128M or more, Save the file and exit.
Configure MediaWiki
Create a symlink on /var/lib/mediawiki with the following command,
ln -s /var/lib/mediawiki /var/www/html/mediawikiIt will give you the issue like mbstring and xml are missing even you have to installed them, activate them using below command,
phpenmod mbstring

phpenmod xml
Restart the Apache Service using below command,
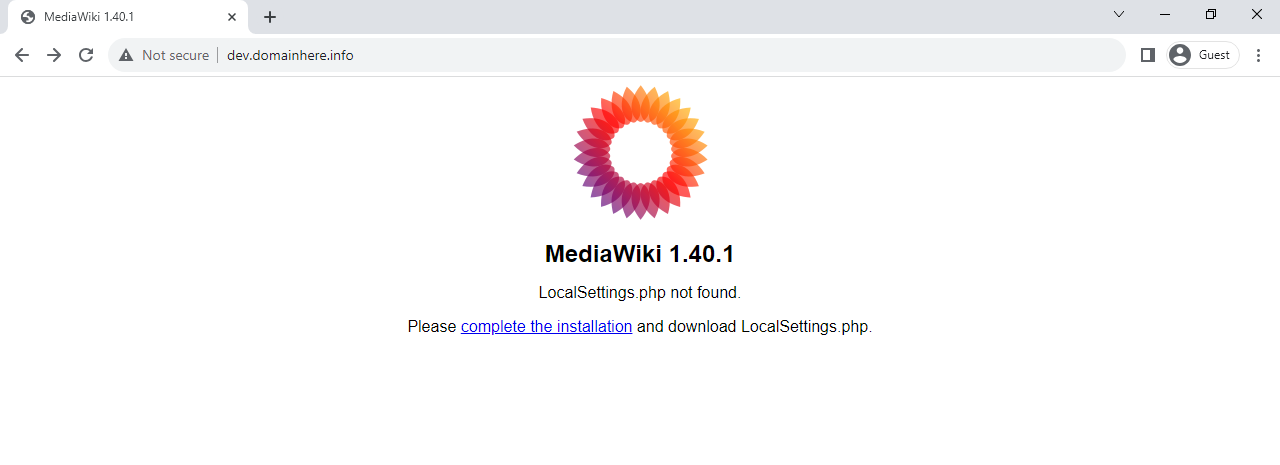
systemctl restart apache2.serviceNavigate your browser to http://dev.domainhere.info, you'll get the installation screen like below,
Replace dev.domainhere.info with your actual domain name
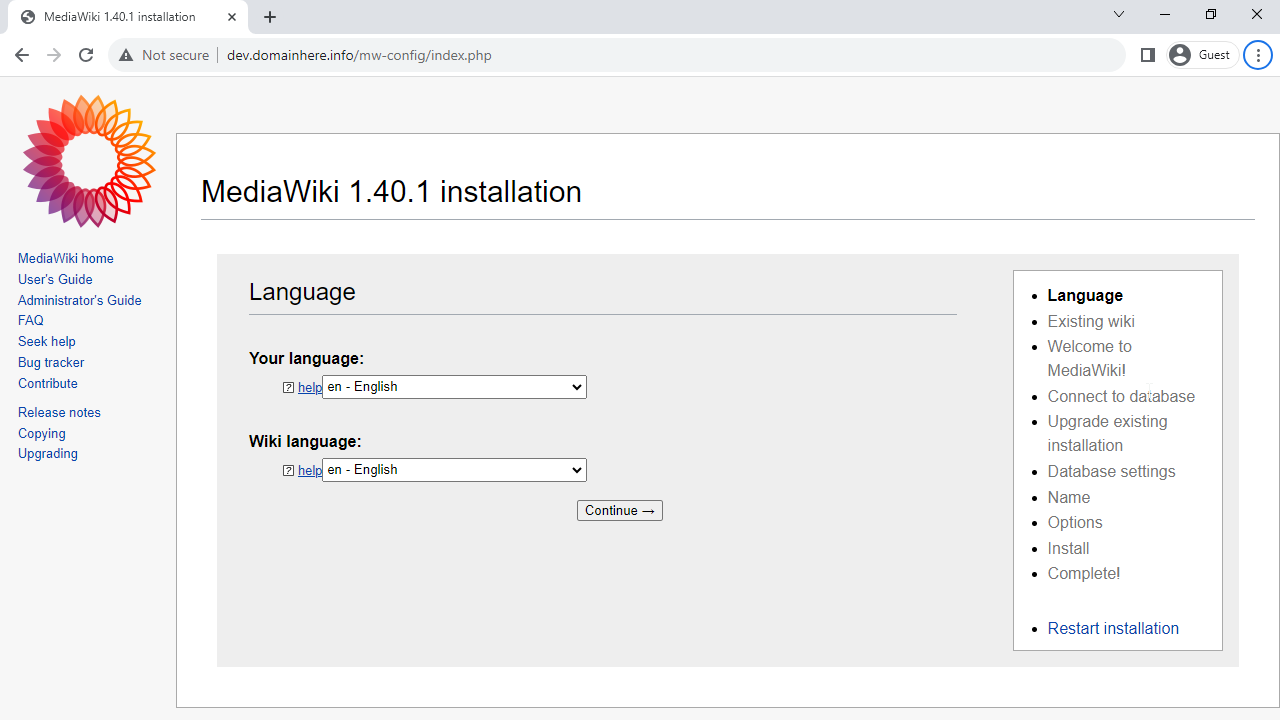
Select your language and click on continue,
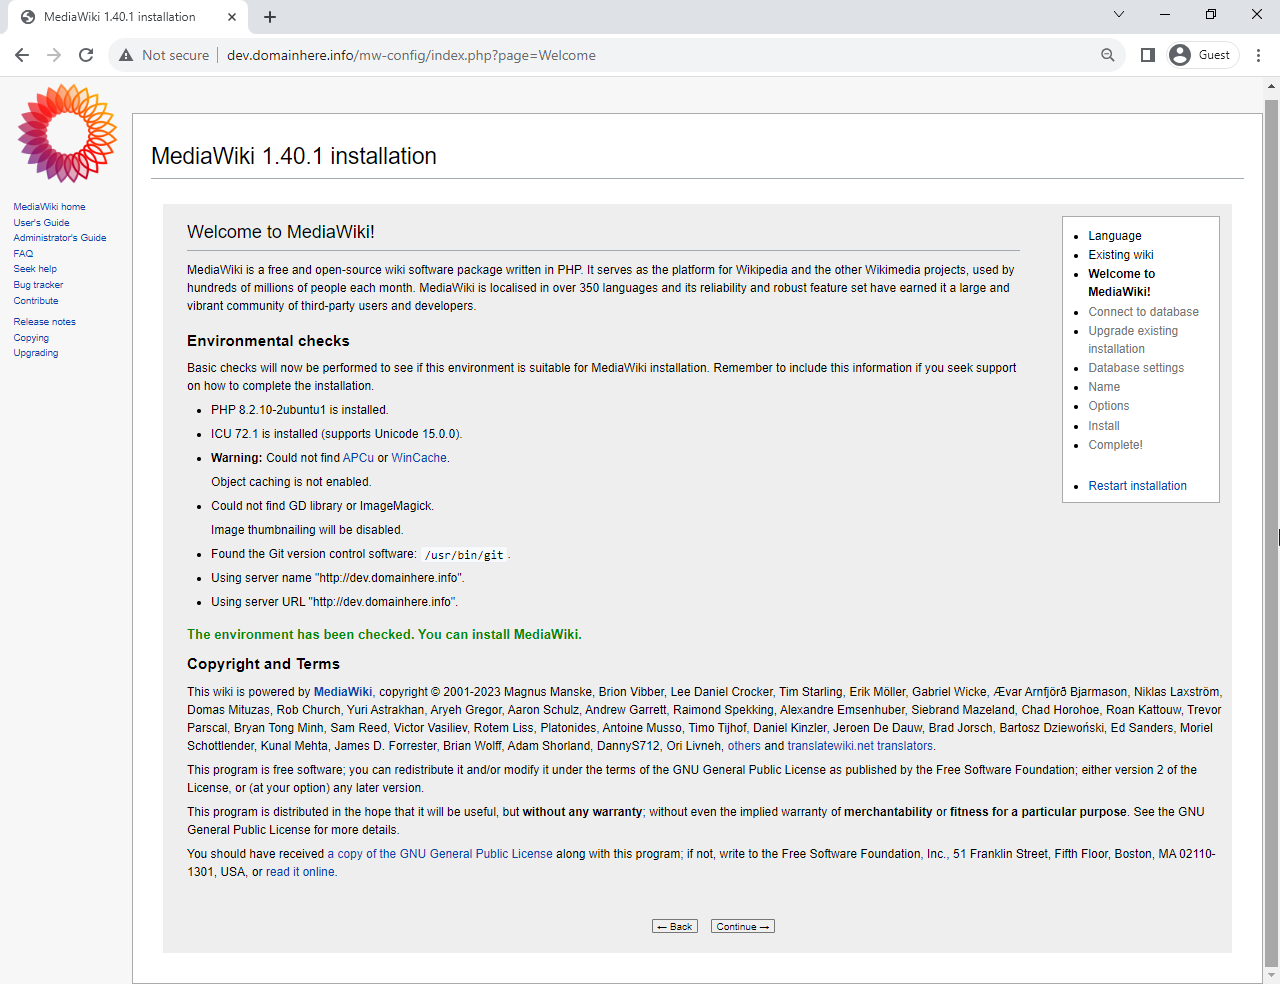
Click on Continue to proceed to next,
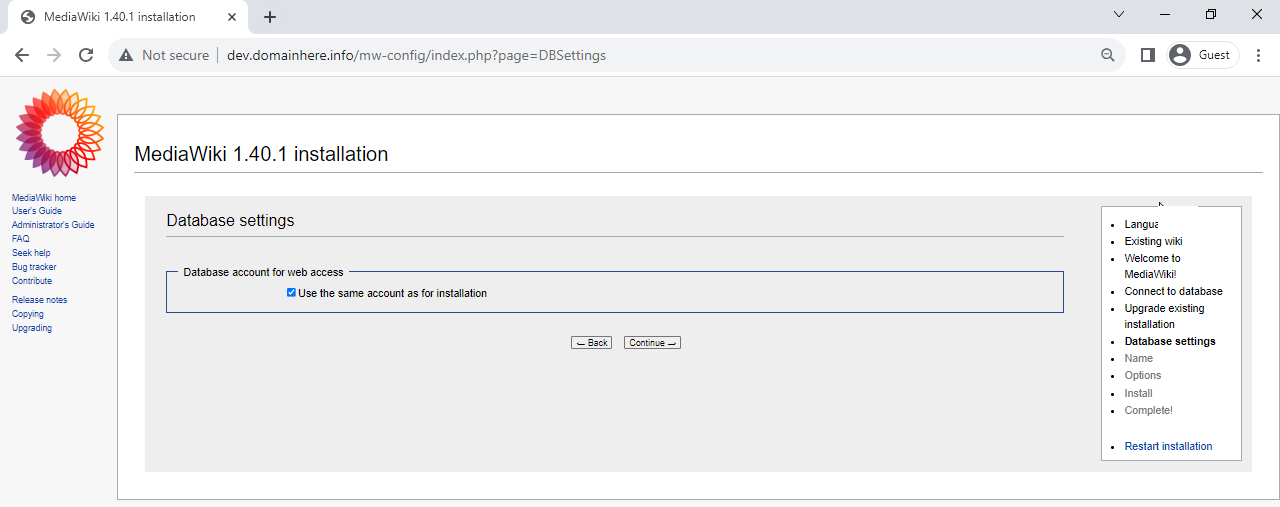
Enter the Database information that was setup earlier on, Database name, username and password.

In this case, we want to use the same Database account for the installation, tick the checkbox and click on Continue.
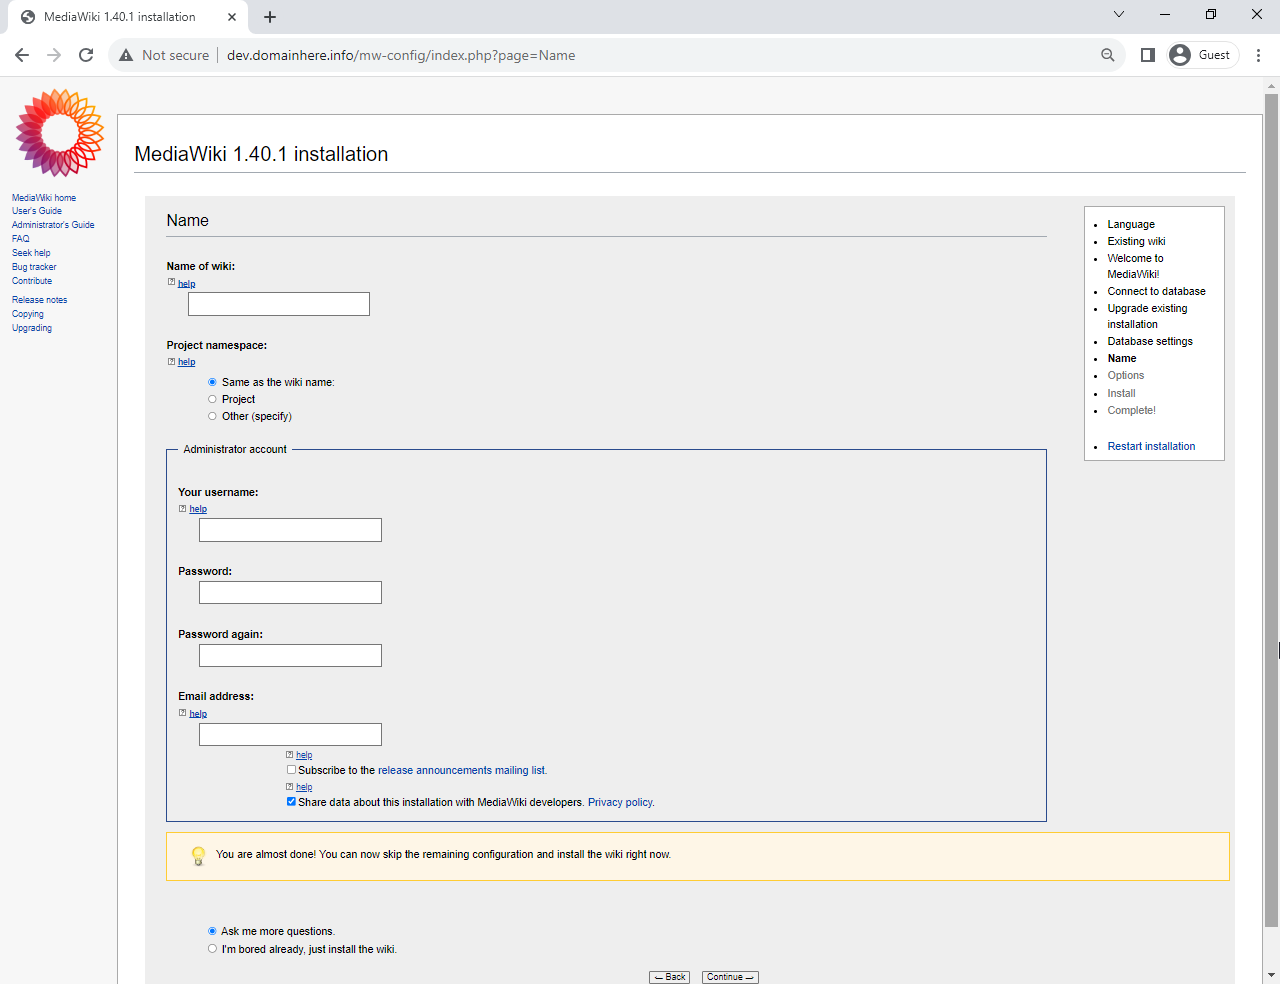
Enter the Name of the Wiki site, followed by creating a new Administratot account.
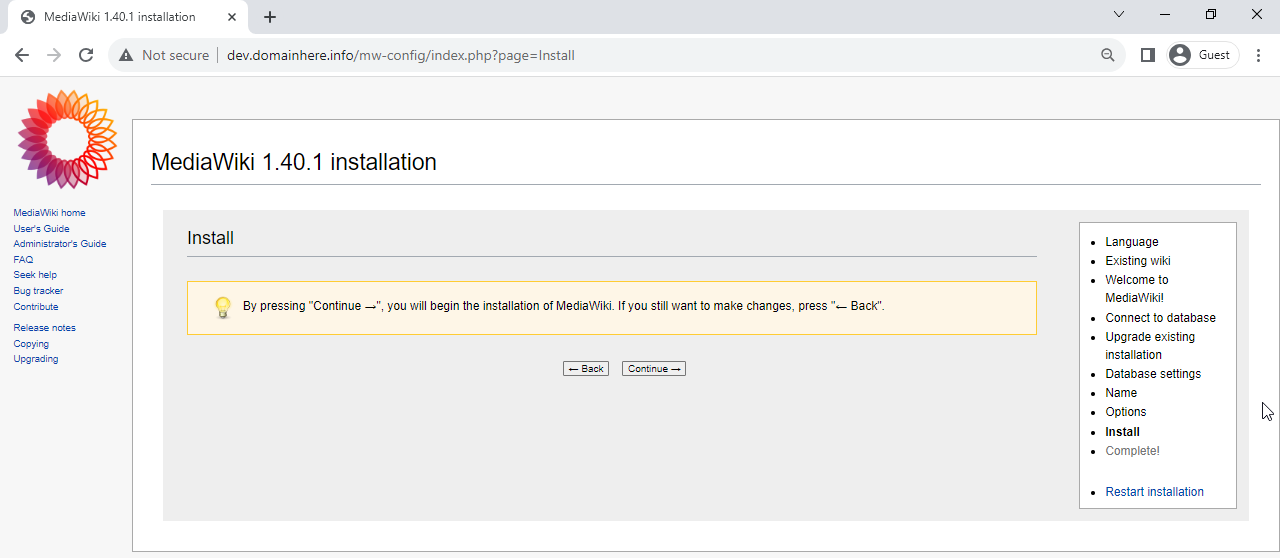
Click on Continue to install MediaWiki,

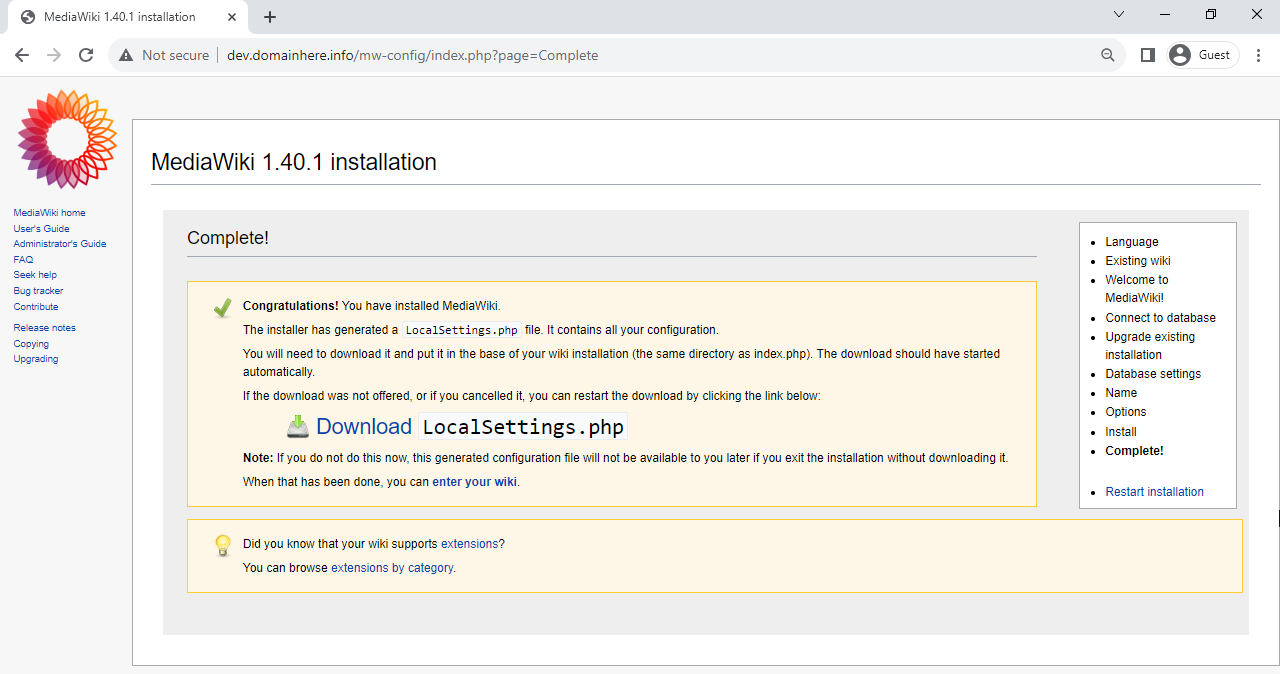
Next, MediaWiki will provide the settings that was configured so far in the form of a php file.
The file with settings should be placed into the web root directory, /var/www/html/meddiawiki/.
Click on the Download LocalSettings.php link, a file will be downloaded to your local system.
Open it with a notepad or similar application.
Copy the contents of the file and Switch over to the server, paste the contents into the file mentioned below:
nano /var/www/html/mediawiki/LocalSettings.phpAfter pasting the contents to the file, save and exit.
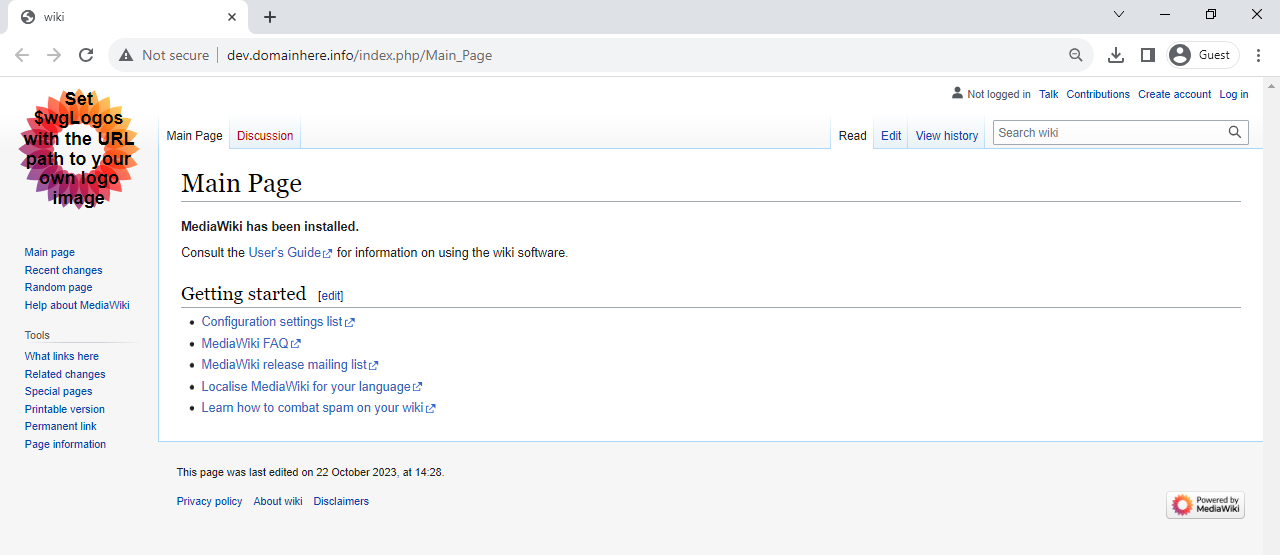
Once completed, Click on Enter your Wiki and you will get the MediaWiki Dashboard Page,
This concludes the topic of installing MediaWiki on the latest Ubuntu 23.10.