How to Install Ubuntu 23.04
Ubuntu is one of the most popular Linux distributions out there that is based on Debian and composed mostly of free and open-source software.
In this article, we will learn how to install Ubuntu 23.04 on a server.
Login to Crownpanel
Login to your CrownPanel account.
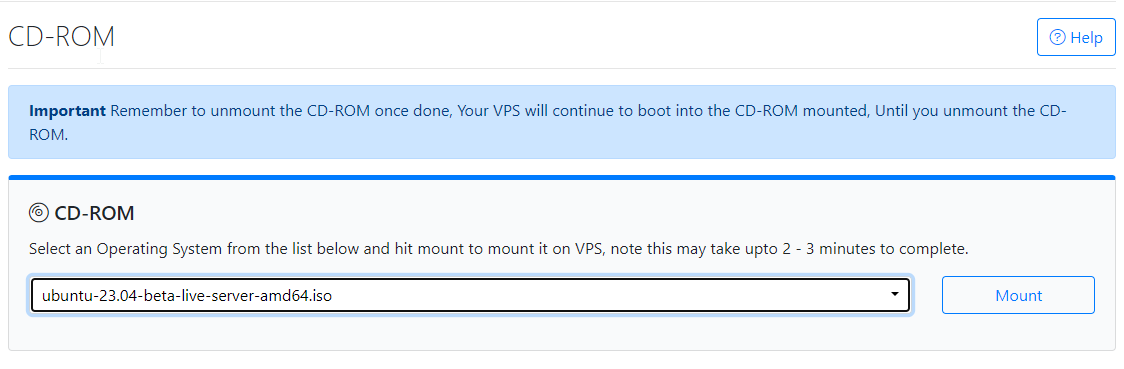
To start the installation, First, mount the Ubuntu 23.04 ISO.
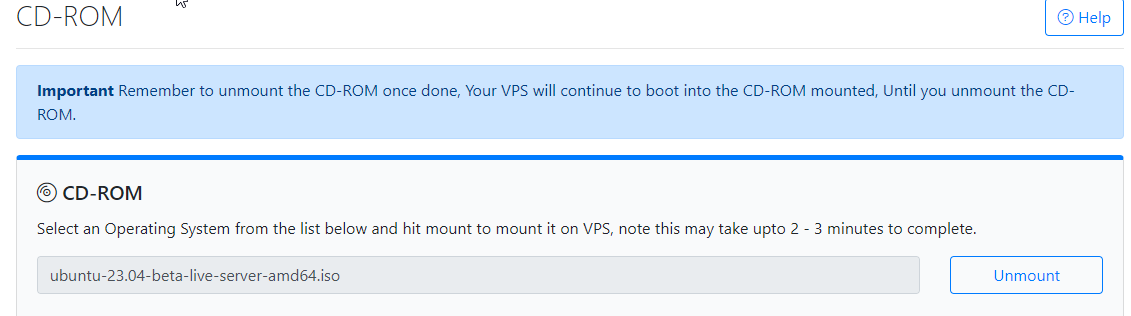
To mount the ISO, click on CD-ROM and then select the "ubuntu 22.04 server amd64" ISO from the drop-down menu and click on the "Mount" button (It will take 2-3 minutes).
Once the ISO has mounted (the Task Log tab will show the status of the task), navigate to the "Power Control" tab and then perform a Reboot task on the server.
Next, Switch to the "VNC" Tab, Launch VNC to start the installation.
If VNC doesn't show the Ubuntu 23.04 installer, please click on CTRL+ALT+DEL from the VNC console to send a reboot.
Start the Installation
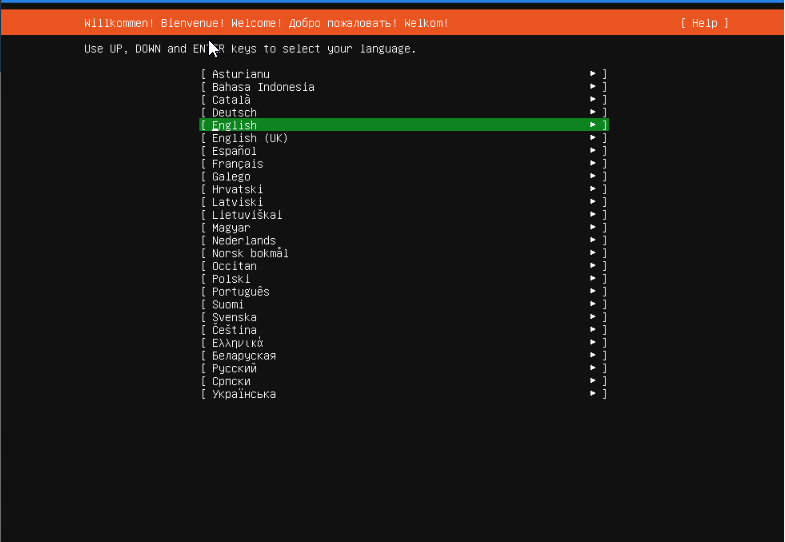
Select the desired language and click on continue.
At the time of writing this article, there were no updates on the installer but later on, you may be prompted to update the installer in case there is a new version available. This is a recommended option to update it.
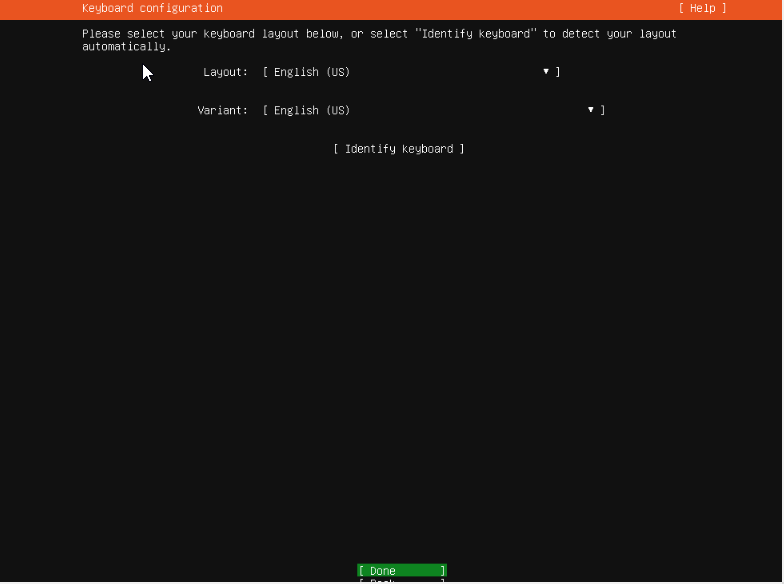
Select the desired keyboard layout and click on done.
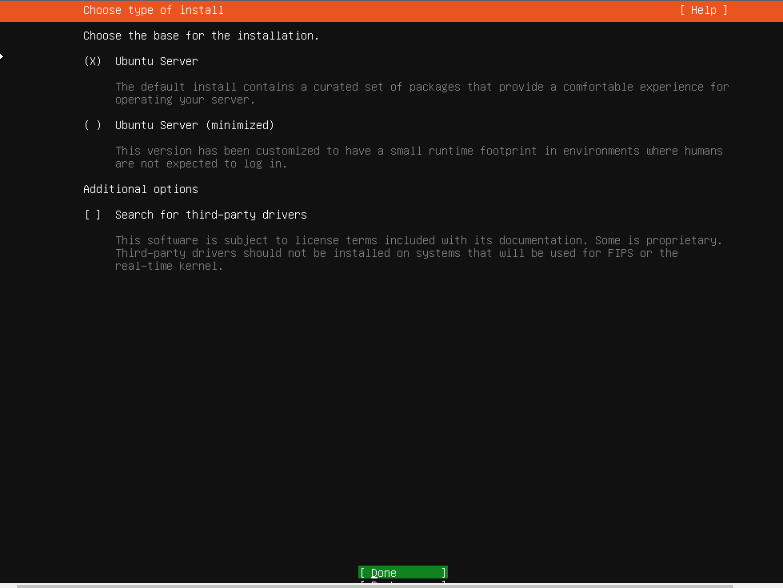
Select the type of installation and click on done.
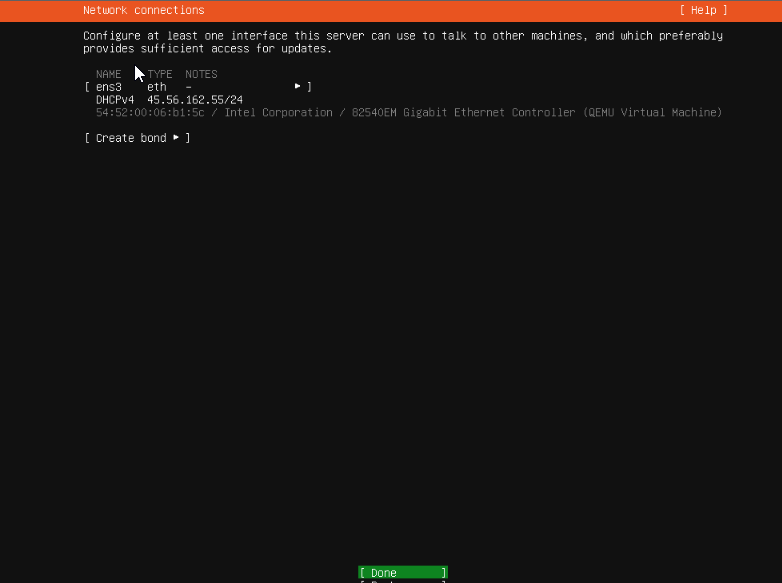
Select the Network configuration and click done.
You can either set up a static network configuration or simply go ahead with DHCP (Simply press ENTER here).
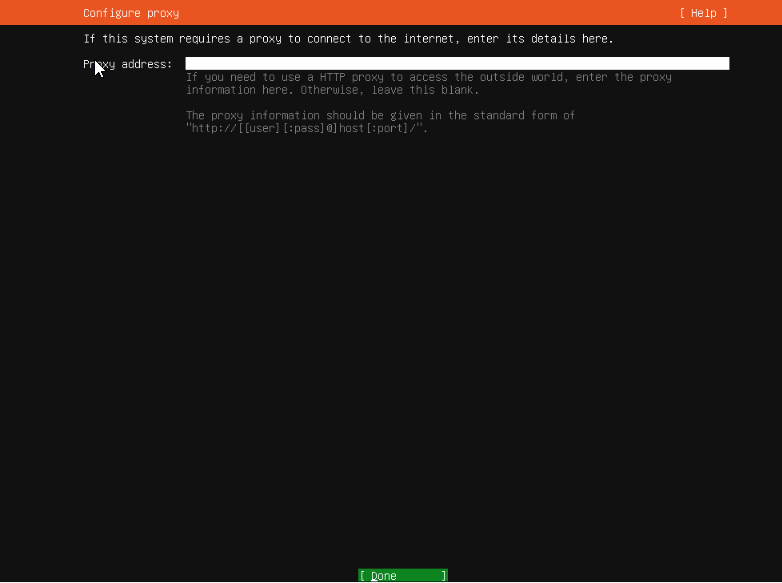
You can configure a proxy for the server in this part of the process if needed. Ideally, in most cases you don't need to, just leave it blank and proceed.
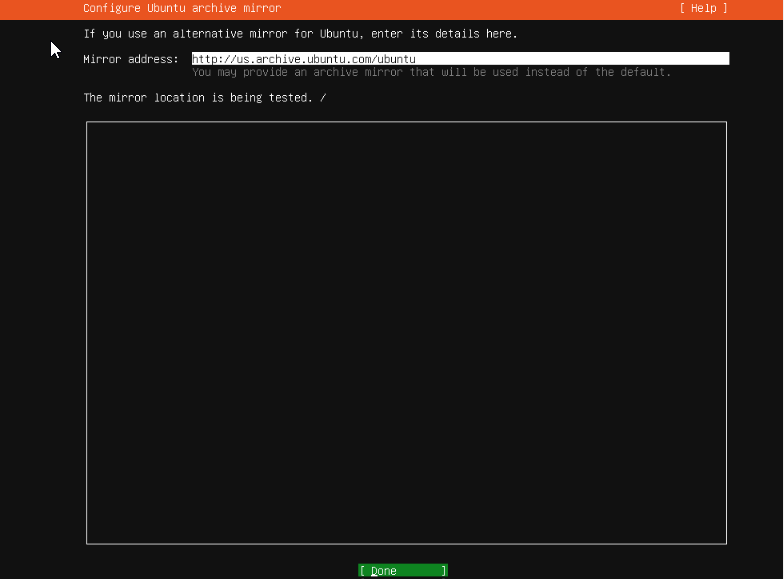
Next, in the mirror selection, we keep the default mirror address that Ubuntu detects for us,
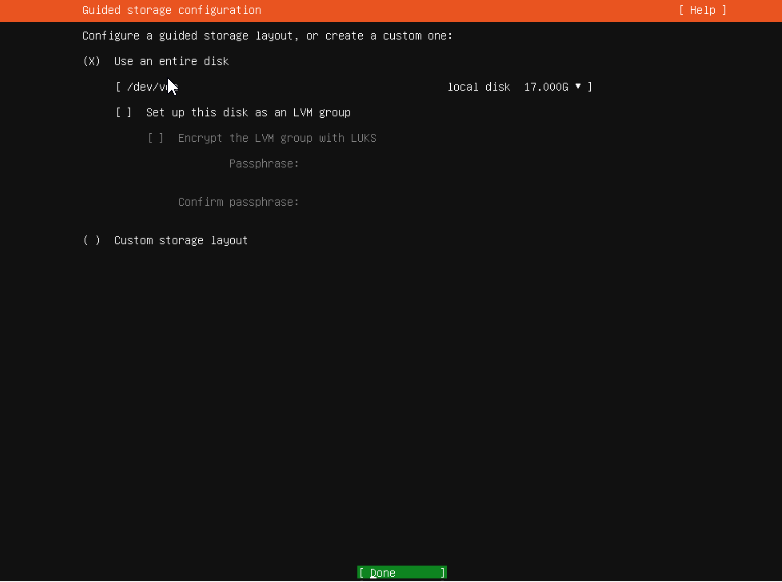
Disk partitioning, we will keep it simple and go with automatic partitioning. Select the "Use an entire disk" option and continue.
Review the "partitions" and then proceed.
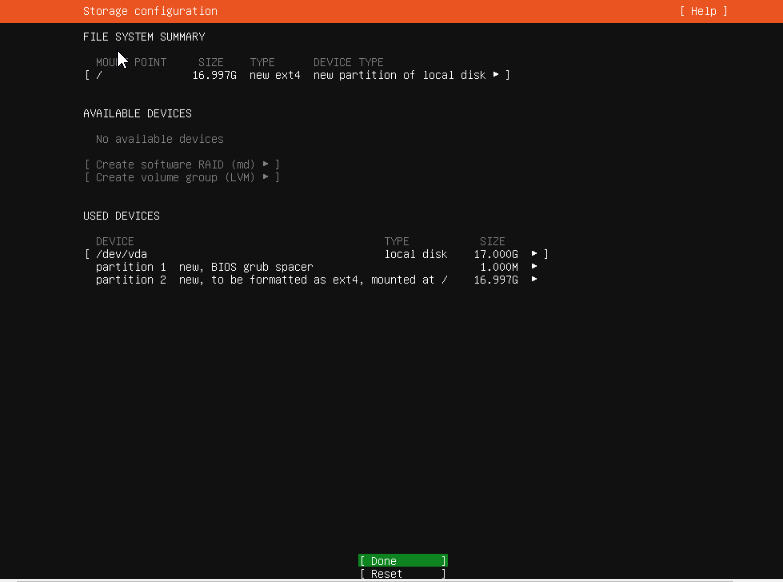
Since we're installing a new operating system on the existing disk, you will be prompted to lose data on the selected disk. Confirm and select "Continue".
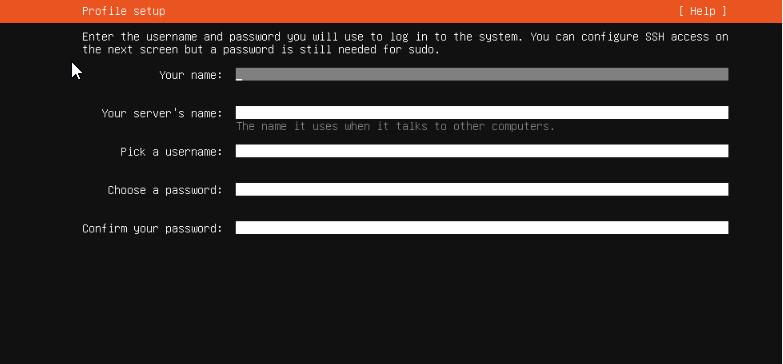
Profile setup, You will be provided a form to enter your user information. These will be the login details that we'll use later to connect to the server.
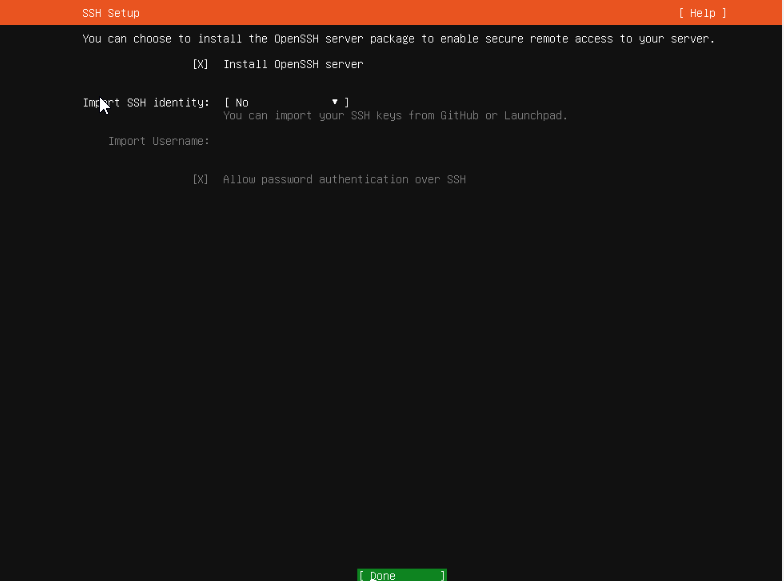
We will choose the package OpenSSH server to be installed as it is essential if you need to connect remotely after the installation.
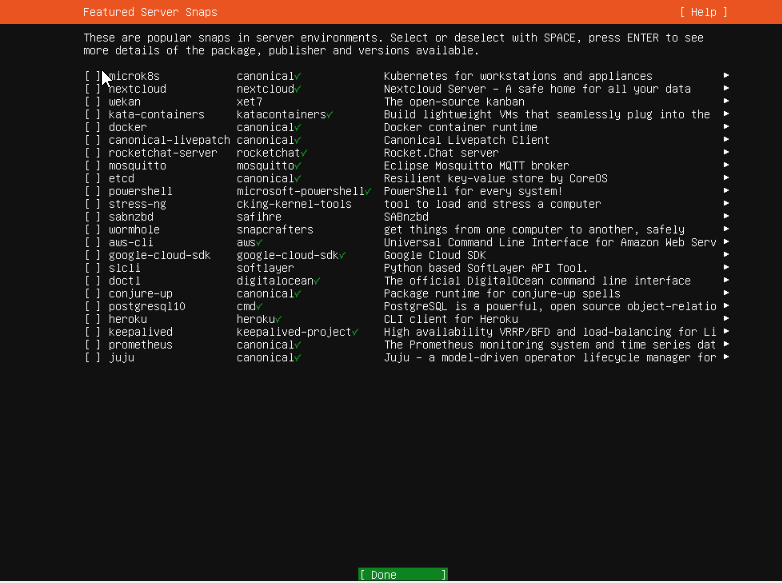
The Ubuntu 23.04 installer also has other packages available for pre-install, you can pick any you wish to pre-install on your server, in this guide we will keep it at a bare minimal (ie, no extra packages selected),
At this stage, Ubuntu will start the installation of the disk.
Once the installation is complete, go ahead with the reboot.
After you select to reboot the VPS, Ubuntu will prompt you to unmount the installation medium.
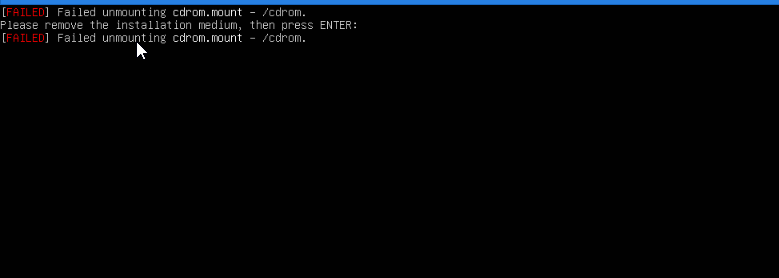
To unmount the ISO, switch back to CrownPanel, Select the "CD-ROM" tab and click on "Unmount".
Next, switch back to the VNC Window, and press ENTER to reboot the VPS,
The VPS will then reboot into your installation of Ubuntu 23.04
This completes the installation of Ubuntu 23.04
You can now log in to the server using the credentials that were set earlier (under the "Profile setup" part of this guide)
Check the Hostname using the below command,
hostnamectlSample Output:
crown@crown:~$ hostnamectl
 Static hostname: crown
       Icon name: computer-vm
         Chassis: vm 🖴
      Machine ID: 8d5c7283b2724cdb8c031bc17739b6d3
         Boot ID: ff922f5011ff44aa8670881154321254
  Virtualization: kvm
Operating System: Ubuntu 23.04
          Kernel: Linux 6.2.0-20-generic
    Architecture: x86-64
 Hardware Vendor: Red Hat
  Hardware Model: KVM
Firmware Version: 1.16.0-3.module_el8.7.0+3346+68867adb
We will then update the Ubuntu system with the below commands,
sudo apt update

sudo apt dist-upgrade
Once the updates are installed, we will push the server for a reboot to apply any modifications.
rebootDone! You are now ready to use the Ubuntu 23.04 server as you like.