How to Install Joomla with LAMP Stack on Rocky Linux 9
Joomla is a free and open-source content management system for publishing web content on websites. Web content applications include discussion forums, photo galleries, e-Commerce, user communities, and numerous other web-based applications. In this article, we are going to learn how to install Joomla on Rocky Linux 9. So, let’s get started.
Checkout the Joomla Project Here.
Try this wiki on our VPS. Starting at just $5/month with 24x7 In-house customer support.
Pre-requisites :
-
A system with Rocky Linux 9 installed and running.
-
rootaccess to the system. - LAMP Stack installed and running, for this, you can refer to one of our guides on installing the LAMP Stack (Apache, MariaDB, and PHP).
Once you're all set, we'll proceed with Joomla installation and configuration.
Create Database
Let us begin with creating a Database and a user. We will then grant the required privileges to the user so it can interact with the Database.
mysql -u root

CREATE DATABASE joomla_db;

CREATE USER joomla_user@'localhost' IDENTIFIED BY 'YOUR-PASSWORD-HERE';

GRANT ALL PRIVILEGES ON joomla_db.* TO joomla_user@'localhost';

FLUSH PRIVILEGES;

exit
The above commands will give complete access to the user
joomla_user. ReplaceYOUR-PASSWORD-HEREwith a safe and secure password.
Install Let's Encrypt SSL Certificate
Next, we will install the Let's Encrypt SSL cert so we can have the domain running on HTTPS.
You can refer the following link for instructions on how to Install Let's Encrypt.
Download Joomla
Download Joomla from official website : Click here.
dnf install wget unzip

wget https://downloads.joomla.org/cms/joomla4/4-1-5/Joomla_4-1-5-Stable-Full_Package.zip

unzip Joomla_4-1-5-Stable-Full_Package.zip -d /var/www/html/joomla
Setting up File Permissions
Let's make the folders readable.
chown -R apache:apache /var/www/html/joomla

chmod -R 755 /var/www/html/joomla

chcon -R -t httpd_sys_content_rw_t /var/www/html/joomla
Configuring Apache vHost
Create a new apache configuration file blog.domainhere.info.conf for the domain with the following command:
vi /etc/httpd/conf.d/blog.domainhere.info.confAdd the following codes:
<VirtualHost *:80>

ServerName blog.domainhere.info
DocumentRoot /var/www/html/joomla

<Directory /var/www/html/joomla/>
    Options -Indexes +FollowSymLinks
    AllowOverride All
</Directory>

ErrorLog /var/log/httpd/blog.domainhere.info-error.log
CustomLog /var/log/httpd/blog.domainhere.info-access.log combined

</VirtualHost>
Change
blog.domainhere.infowithYour Domain Name.
Now, press the Esc key, type :wq! and press the Enter key to save and exit the file.
Now, restart & check the apache with the following commands:
systemctl restart httpd

systemctl status httpd
Enable Firewall:
firewall-cmd --permanent --add-service=http

firewall-cmd --permanent --add-service=https

firewall-cmd --reload
Configuring Joomla
Now open the URL from your browser, this will redirect you to configuring the final parts of the Joomla installation.
http://blog.domainhere.info/Replace the
blog.domainhere.infowith the actual IP or domain configured on the server.
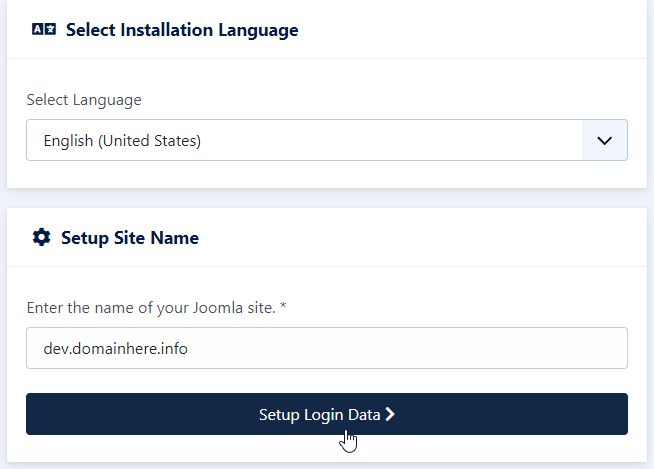
Select the Language and enter the Site name.
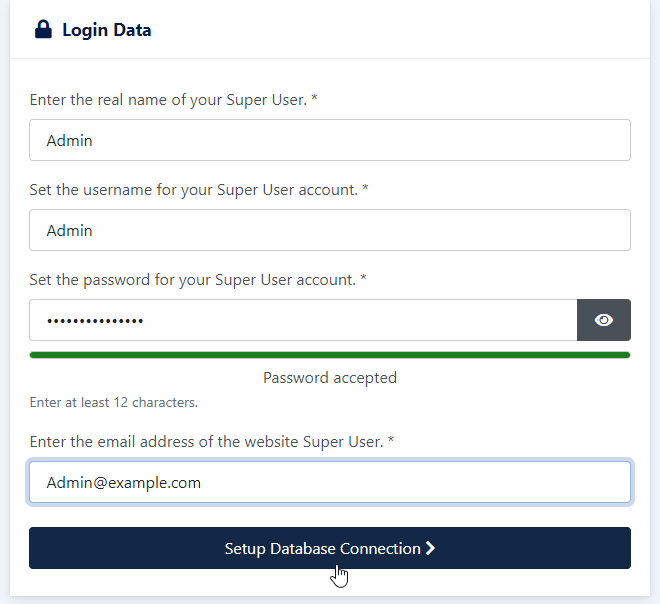
Create a Administrator user to manage the Joomla site.
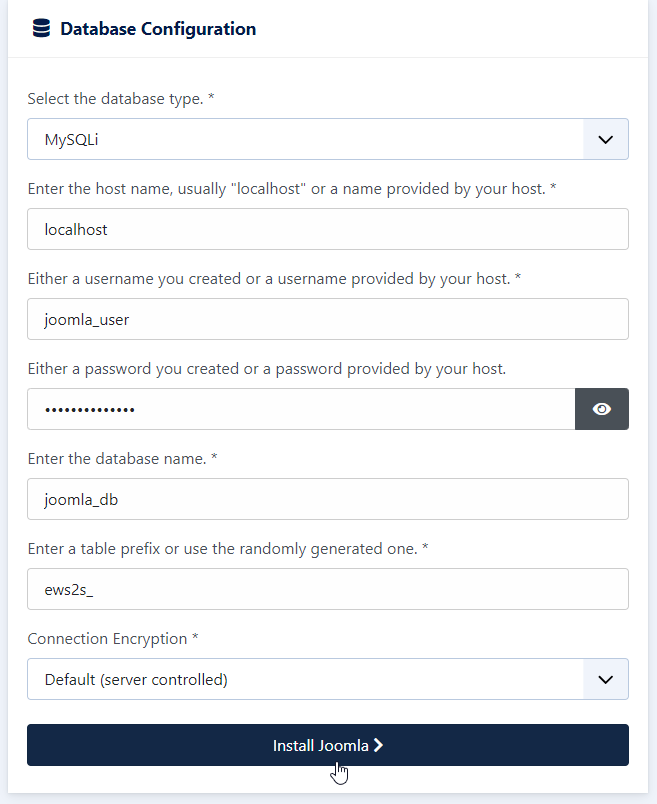
Input the Database details which was configured earlier.
This completes the Joomla configuration. Click on the Open Administrator button to login to the Joomla dashboard.
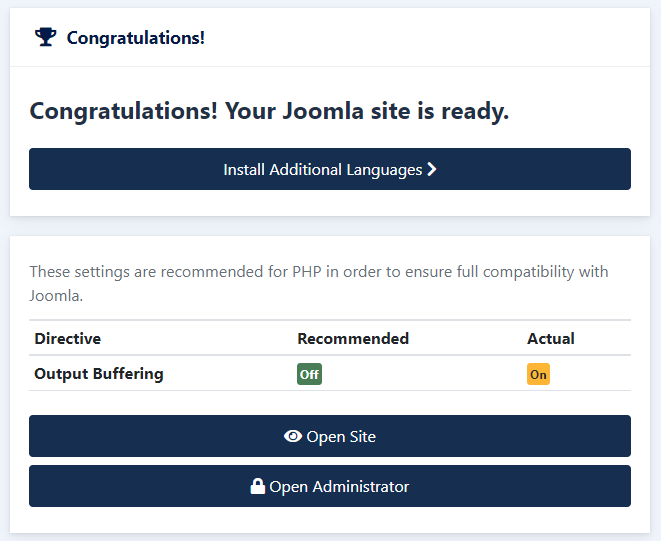
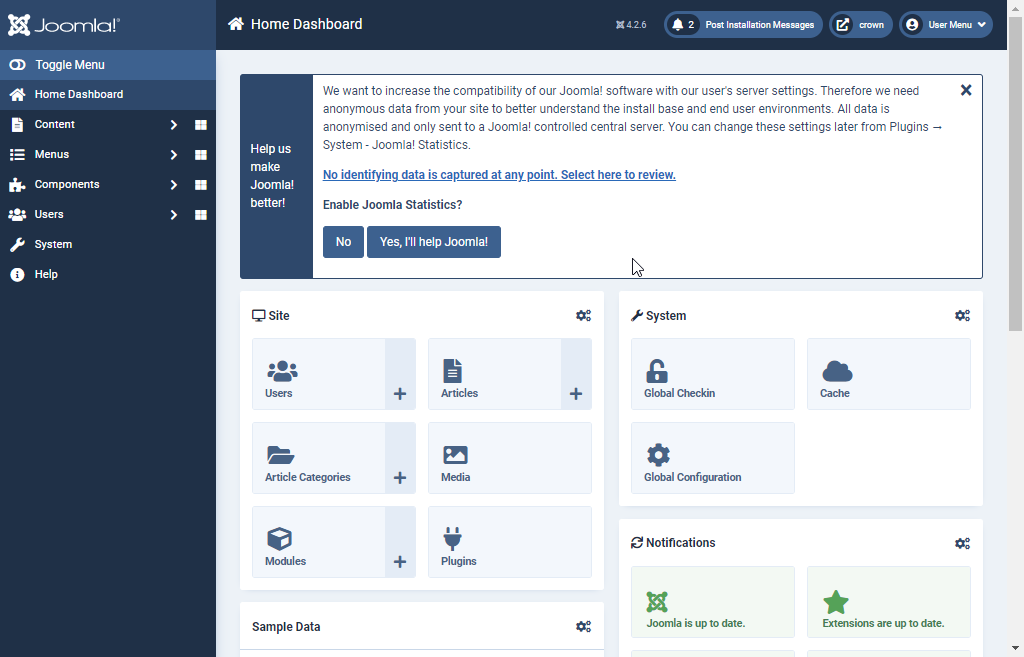
Now you have successfully installed Joomla with LAMP Stack on Rocky Linux 9.
CrownCloud - Get a SSD powered KVM VPS at $4.5/month!
Use the code WELCOME for 10% off!
1 GB RAM / 25 GB SSD / 1 CPU Core / 1 TB Bandwidth per month
Available Locations: LAX | MIA | ATL | FRA | AMS