How to Whitelist your IP Address on Incredible PBX
This guide will walk you through the process of whitelisting your IP address on the Incredible PBX server. Whitelisting allows you to gain access to the server when your IP address has changed or when adding new users. Additionally, if you are unable to connect to the server due to IP restrictions, we will cover how to use VNC for recovery.
Finding Your Public IP Address
Important: It is crucial to verify your IP address regularly, as any changes may require you to update the whitelist to maintain uninterrupted access.
To find your public IP address, visit Whoami or IP-API, which will display it for you.
Common Scenarios for Whitelisting IPs:
- You've lost access to the PBX server, and the web panel no longer loads.
- Your home or office IP address has changed.
- You need to add a new user to the PBX server.
Command to Whitelist an IP Address
In such cases, use the following command to whitelist the IP address.
/root/add-ip username IP_AddressWhere in,
usernameis the name of the new user.
IP_Addressis the new IP address to add.
How to Whitelist a Second User's IP Address
You can whitelist additional IP addresses by running the same command with the corresponding username and IP:
/root/add-ip second_user 192.168.44.22Note: Replace the second_user with actual user name and the IP with actual IP
Whitelist Access via FQDN (Optional)
Additionally, add-fqdn is used to whitelist a fully-qualified domain name in the firewall. Because Incredible PBX blocks all traffic from IP addresses that are not whitelisted, this is what you use to authorize an external user for your PBX, The advantage of an FQDN is that you can use a dynamic DNS service to automatically update the IP address associated with an FQDN so that you never lose connectivity.
root@pbx:~# /root/add-fqdn username myserver.no-ip.netWhere in,
usernameis the name of the new user.
myserver.no-ip.netwith your actual FQDN.
What If You Can't Access the Server?
If you find yourself locked out of the server for any reason, such as IP restrictions or other access issues, you can regain control by using the VNC Feature in CrownPanel.
To Access the VNC Feature follow the below steps,
Log in to CrownPanel.

Use the VNC feature to connect to your server.
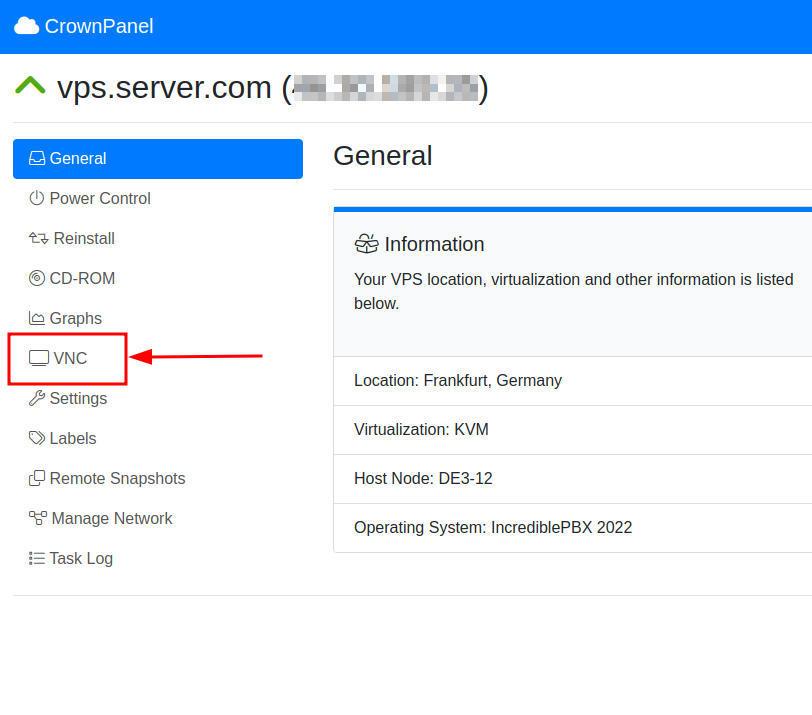

Once connected, use your SSH credentials to log in.
Important: If you changed the root password during installation, use the updated password with the root user when accessing the server via VNC to ensure full access
Once you’ve logged in, verify the current IP address. If the IP has changed, promptly whitelist the new address to restore access and avoid further connectivity issues.
For example, after gaining access, you can whitelist your IP with the following command:
/root/add-ip admin your_public_ipNote: Change the admin and your_public_ip with actual values
Troubleshooting and Support
If you encounter any issues or technical difficulties, please open a Support Ticket for assistance.
This guide covers:
- Whitelisting IP addresses for both new and existing users.
- How to use the VNC feature for recovery.
- Whitelisting an FQDN for automatic IP updates.
Ensure that all the whitelisted IPs and FQDNs are correct to maintain secure access to your PBX server.
CrownCloud - Get a SSD powered KVM VPS at $4.5/month!
Use the code WELCOME for 10% off!
1 GB RAM / 25 GB SSD / 1 CPU Core / 1 TB Bandwidth per month
Available Locations: LAX | MIA | ATL | FRA | AMS