Disk resize with gParted
Mount the gParted ISO
To begin, mount the gParted ISO via your CrownPanel account,
To know how to mount ISO, please refer this guide here to mount the ISO from CrownPanel.
Once the ISO is mounted, open the VNC viewer and you can refer this guide to access the VNC available in CrownPanel.
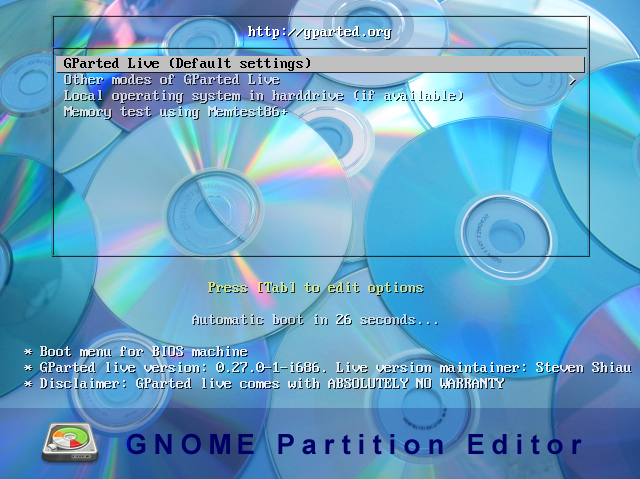
After mounting the gParted ISO and rebooting, you should see the gParted boot screen. Press Enter here.
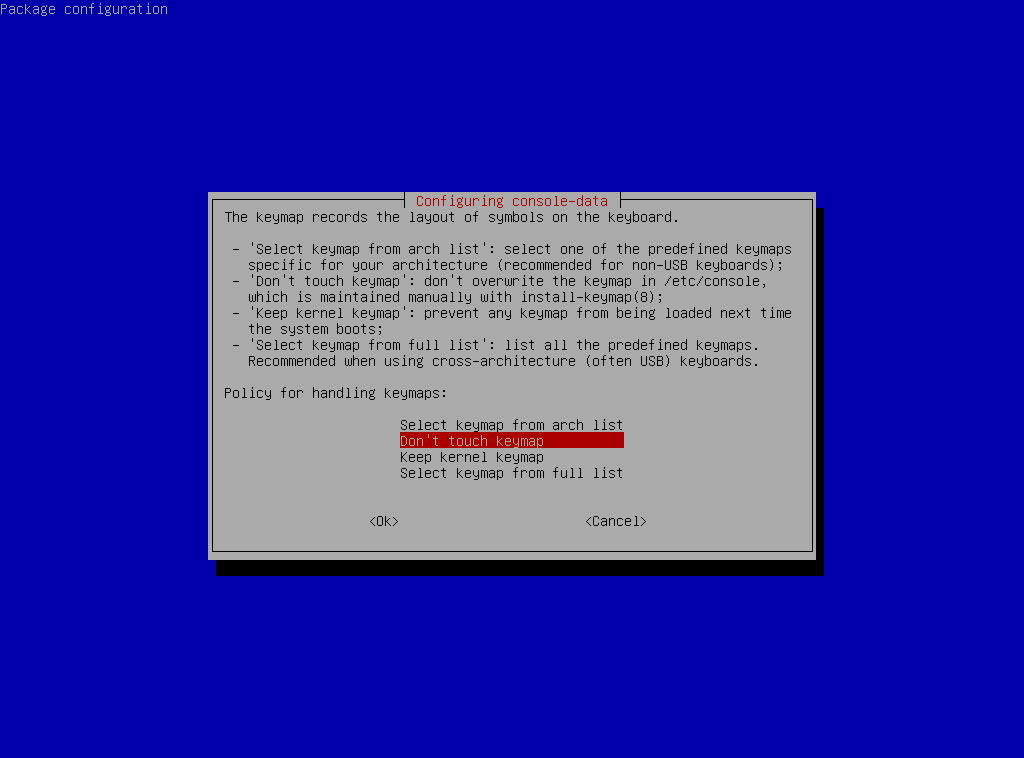
Next, you should see the keymap selection, press Enter here as well.
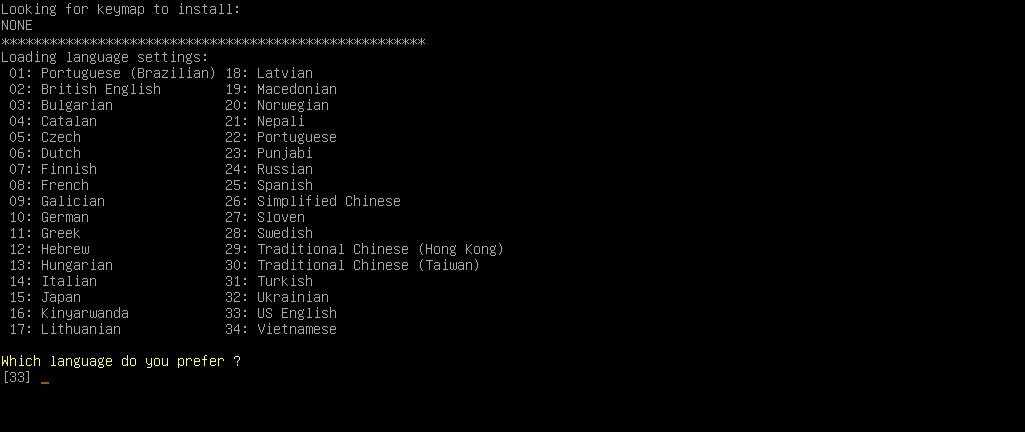
Select your preferred language, and enter corrosponding number. If you would like US English press Enter here as it is the default.
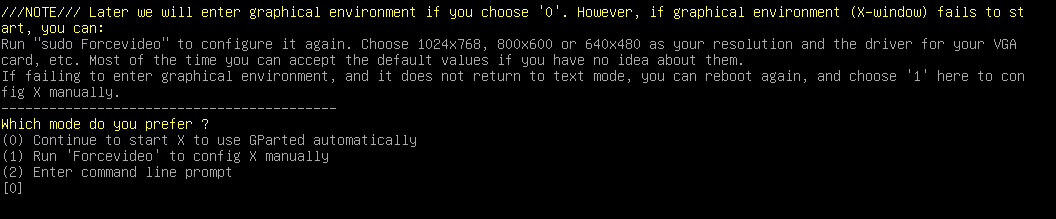
Enter which graphic mode you would like to enter into, 0 is the default, and can be used in most cases. Press Enter.
Starting the disk resize
The gParted application should now open. You should see an unallocated partition if you have unused space.
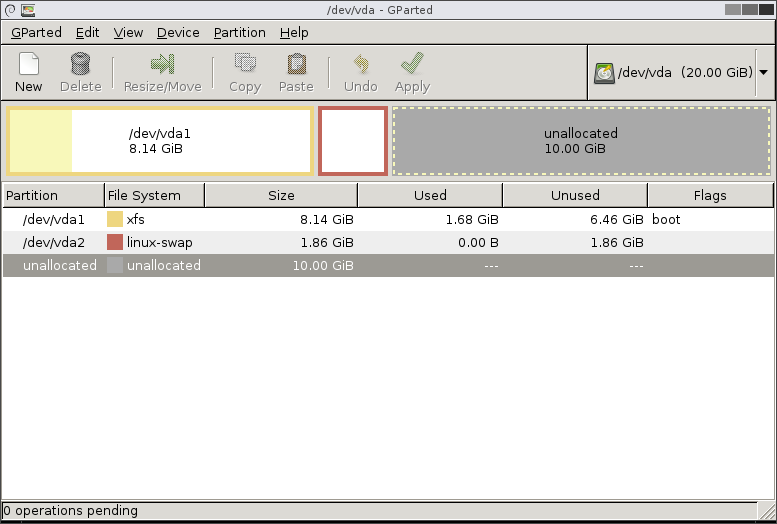
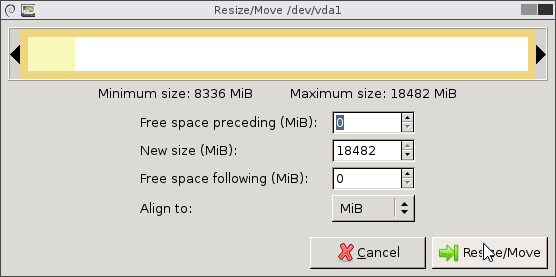
We now need to resize the swap partition to add this unused space to the primary partition. Take note of the size of the swap partition. Select the swap partition and then resize.
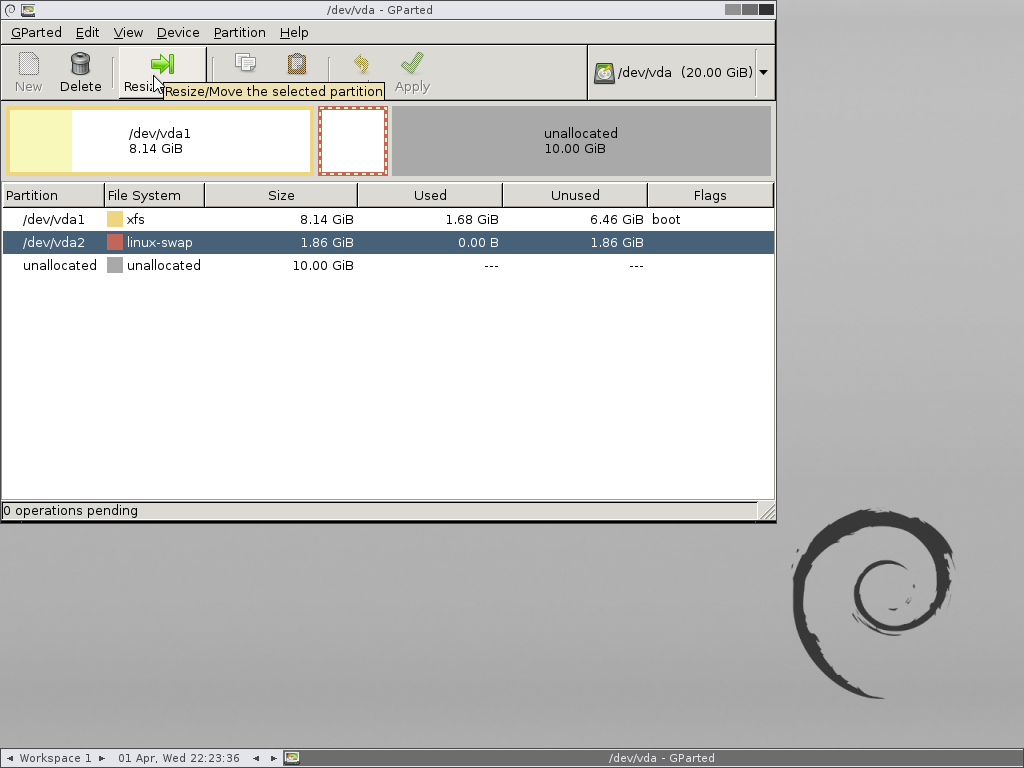
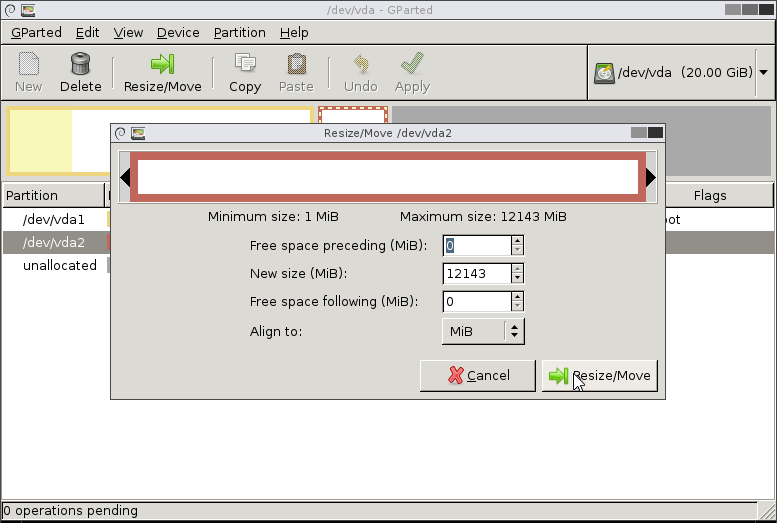
This should bring up the resize window. Drag the right arrow all the way to the right and click the resize button
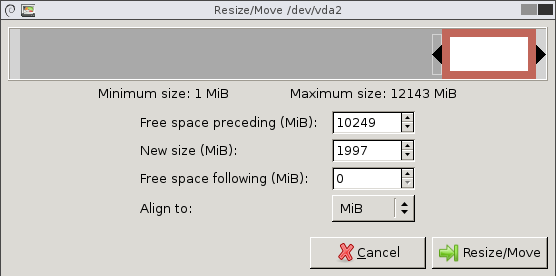
This has added out unallocated partition space to the swap partition. We now need to resize the swap partition again to turn this back in to unallocated space. Select the swap partition and resize.
Bring the slider to the left back to the original size of the swap partition. Our swap partition was 1.86GiB which is 1997 MiB. Click the resize button once done.
You are now able to select the first partition, and click on resize to add the extra space to your system.
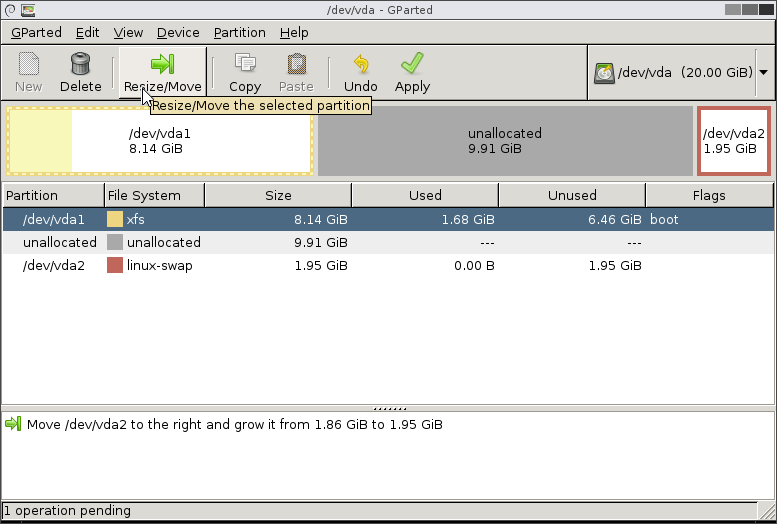
Drag the right arrow slider all the way to the right to add the unallocated disk space to this partition.
Click the Apply button, and wait until changes have been made. Close the gParted window.
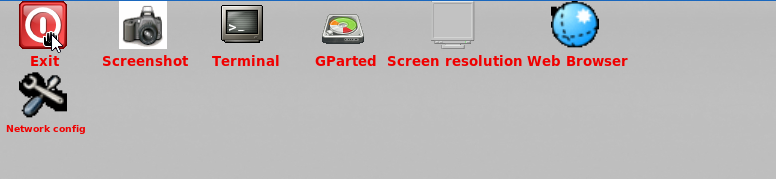
Doble click on EXIT icon and then reboot it.
Press enter
-
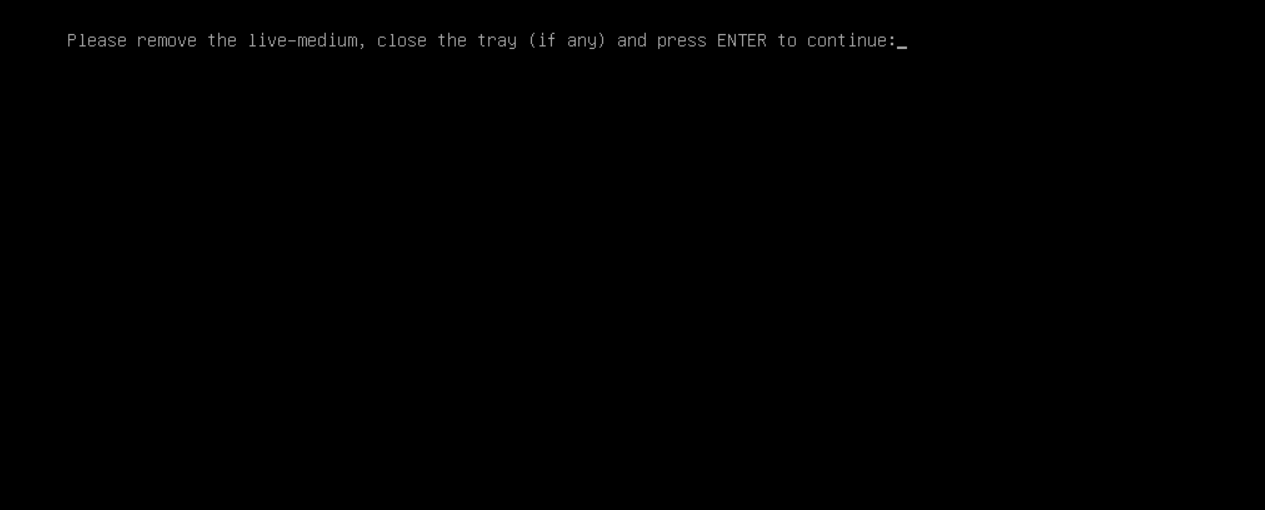
Unmount ISO
-
(wait for unmount to complete)
-
Hit any key
- Done! Disk Resize complete
CrownCloud - Get a SSD powered KVM VPS at $4.5/month!
Use the code WELCOME for 10% off!
1 GB RAM / 25 GB SSD / 1 CPU Core / 1 TB Bandwidth per month
Available Locations: LAX | MIA | ATL | FRA | AMS