How to Install Beszel Monitoring Tool on Debian 11
Beszel is a lightweight server monitoring platform that includes Docker statistics, historical data, and alert functions.
It has a friendly web interface, a simple configuration, and is ready to use out of the box. It supports automatic backup, multi-user, OAuth authentication, and API access.
Prerequisites
Before installing Beszel, ensure you meet the following requirements:
-
A system running Debian 11.
-
A user account with sudo privileges.
- A stable internet connection.
Update the System
First, update the package lists and upgrade installed packages to ensure the system is up-to-date,
apt update -y && sudo apt upgrade -y
apt-get update -y && sudo apt-get upgrade -y
apt autoremove -y
Remove Conflicting Packages
To avoid potential conflicts, remove any pre-existing Docker-related packages:
for pkg in docker.io docker-doc docker-compose docker-compose-v2 podman-docker containerd runc; do sudo apt-get remove $pkg; doneInstall Required Tools
Install the necessary tools for the installation process,
apt-get update
apt-get install -y ca-certificates curl
Add Docker’s Official GPG Key
Create a directory for storing the GPG key, download the key, and set the appropriate permissions,
install -m 0755 -d /etc/apt/keyrings
curl -fsSL https://download.docker.com/linux/ubuntu/gpg -o /etc/apt/keyrings/docker.asc
chmod a+r /etc/apt/keyrings/docker.asc
Set Up Docker Repository
Add the Docker repository to your system’s source list,
echo   "deb [arch=$(dpkg --print-architecture) signed-by=/etc/apt/keyrings/docker.asc] https://download.docker.com/linux/ubuntu \
$(. /etc/os-release && echo "$VERSION_CODENAME") stable" |   sudo tee /etc/apt/sources.list.d/docker.list > /dev/null
Update the package lists,
apt-get updateInstall Docker
Install Docker and its associated plugins,
apt-get install -y docker-ce docker-ce-cli containerd.io docker-buildx-plugin docker-compose-pluginVerify the installation by running a test container,
docker run hello-world Set Up Beszel
Create a directory for Beszel,
mkdir beszel && cd beszelCreate a docker-compose.yml file,
nano docker-compose.ymlAdd the below content,
services:
  beszel:
    image: henrygd/beszel:latest
    container_name: beszel
    restart: unless-stopped
    extra_hosts:
      - host.docker.internal:host-gateway
    ports:
      - 8090:8090
    volumes:
      - ./beszel_data:/beszel_data

  beszel-agent:
    image: henrygd/beszel-agent:latest
    container_name: beszel-agent
    restart: unless-stopped
    network_mode: host
    volumes:
      - /var/run/docker.sock:/var/run/docker.sock:ro
    environment:
      PORT: 45876
      # Do not remove quotes around the key
      KEY: 'UPDATE WITH YOUR PUBLIC KEY (copy from "Add system" dialog)'
Save and close the file.
Start Beszel
Run the following command to start Beszel,
docker compose up -dThis command will pull the necessary images and start the Beszel and Beszel Agent containers.
Output:
root@vps:~/beszel# docker compose up -d
[+] Running 5/5
 ✔ beszel-agent Pulled                                                                                                            2.0s
   ✔ 1d6277e752eb Pull complete                                                                                                   0.5s
 ✔ beszel Pulled                                                                                                                  2.3s
   ✔ e3fcf6752923 Pull complete                                                                                                   0.7s
   ✔ a37714f3f0ed Pull complete                                                                                                   0.7s
[+] Running 3/3
 ✔ Network beszel_default  Created                                                                                                0.1s
 ✔ Container beszel-agent  Started                                                                                                0.7s
 ✔ Container beszel        Started                                                                                                0.8s
root@vps:~/beszel#
Access the Beszel
Access the Beszel interface by opening a web browser and navigating to,
http://Your_Server_IP:8090Note: Replace Your_Server_IP with actual IP Address
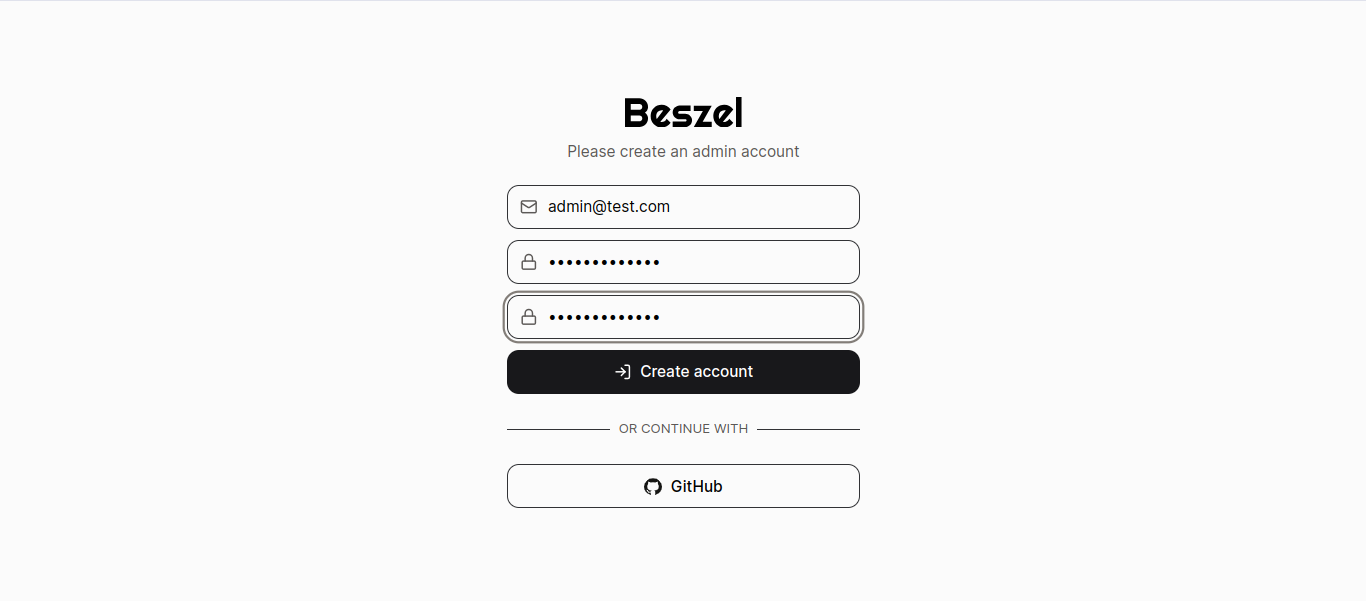
Create an Admin Account
When you first access Beszel, you will be prompted to create an admin account. Enter your email address and password, then proceed to complete the setup.
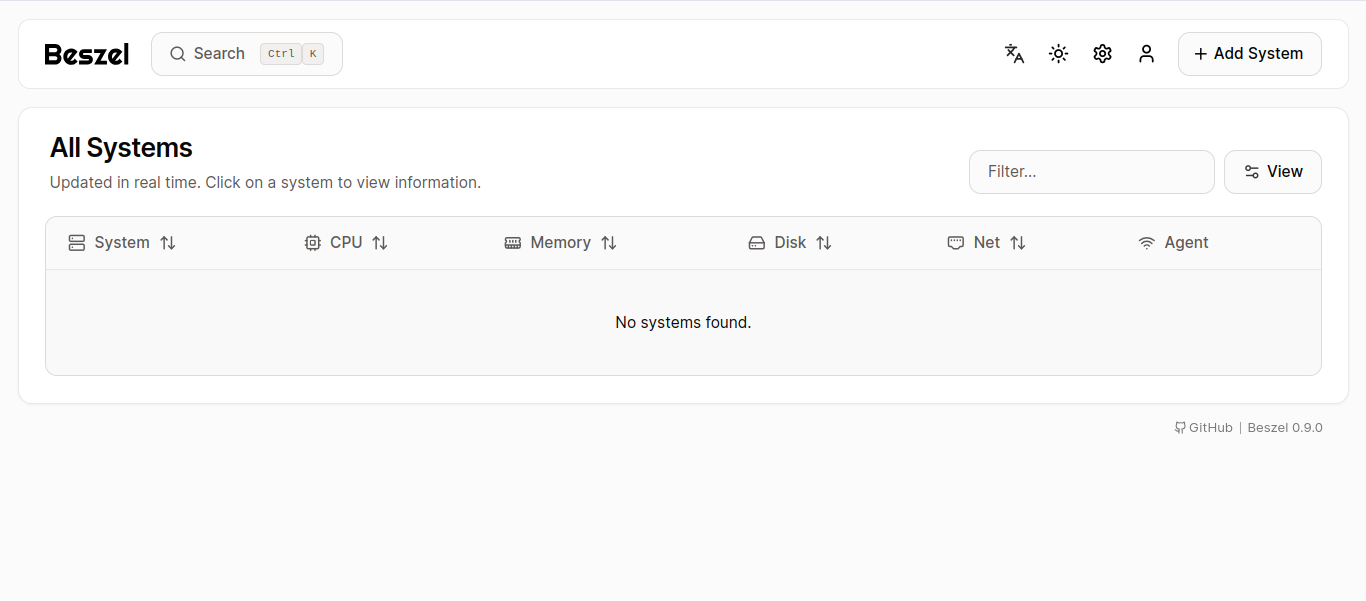
Access the Dashboard
Once the admin account is created, you will be directed to the Beszel dashboard, where you can monitor and manage your infrastructure.
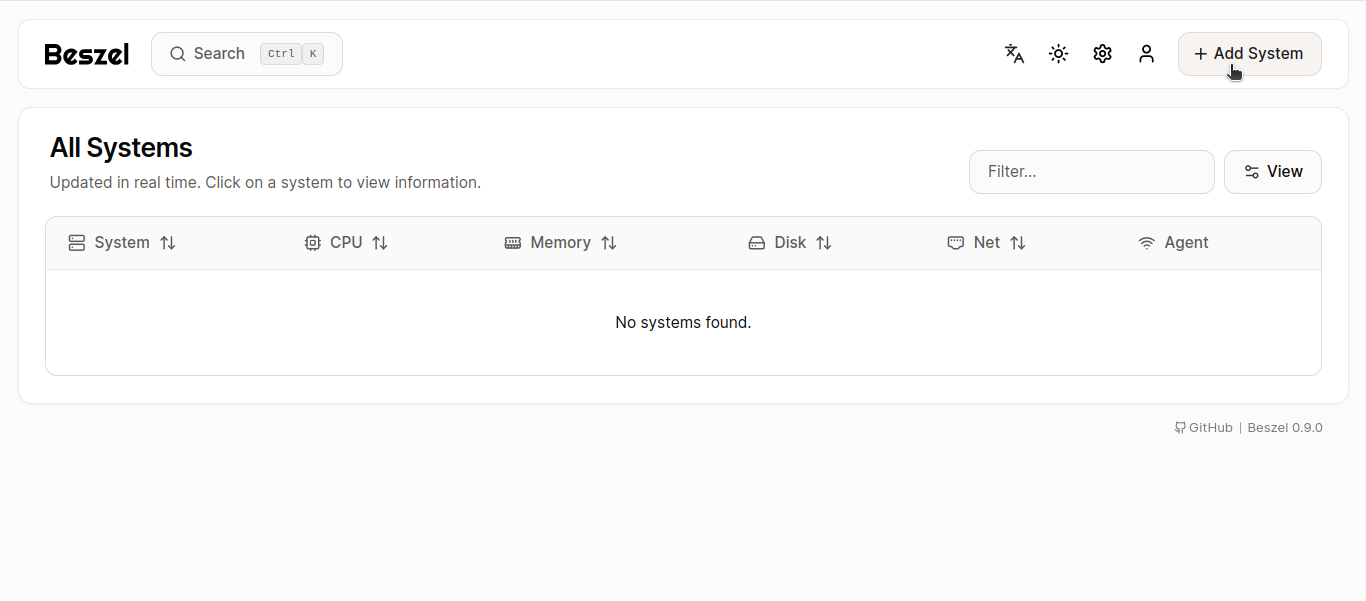
Add a System
To add an Agent/Client to the system for monitoring: Click Here to know how.
- Click on the Add System button.
- Enter the agent/client required details:
- Name of the site.
- Host or IP address.
- Port number
- Public key (copy this from the "Add System" dialog in Beszel).
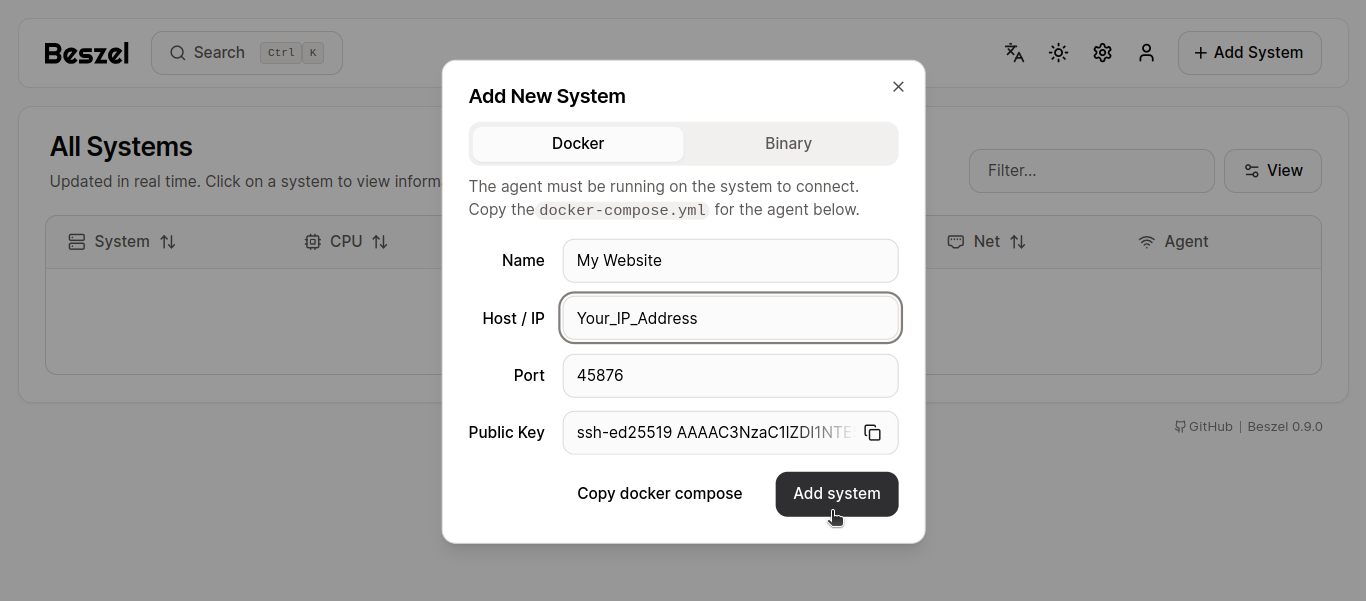
Save the configuration.
Once the system is added, it will appear with the server name you’ve configured.
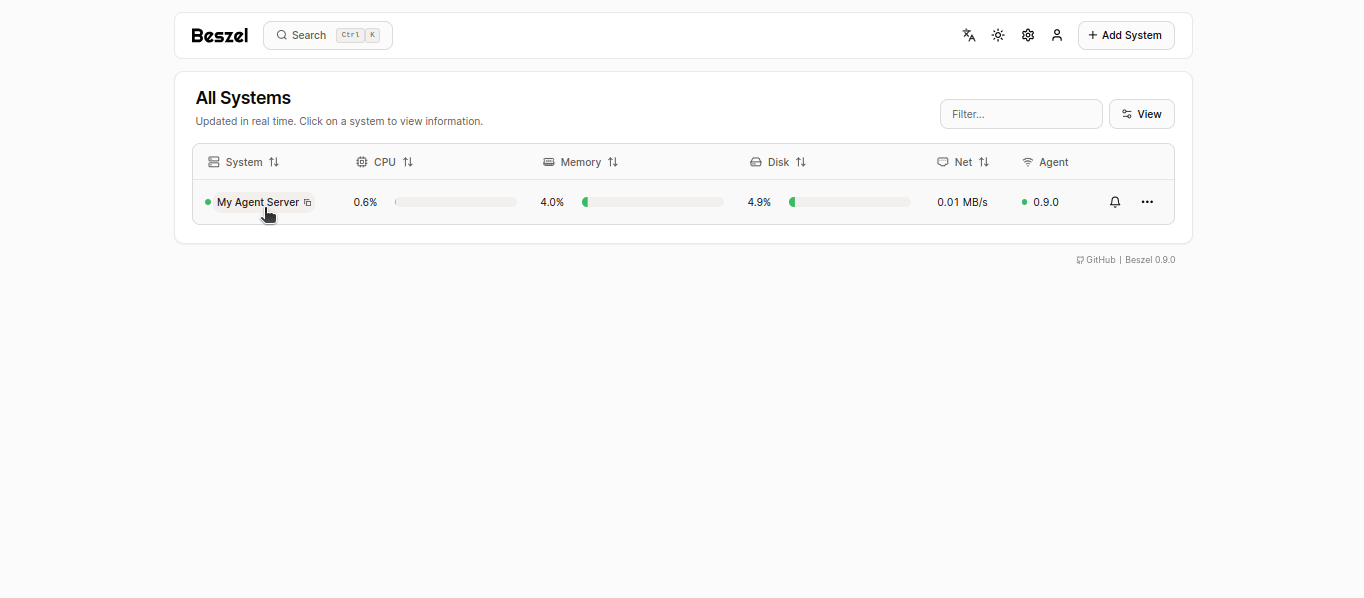
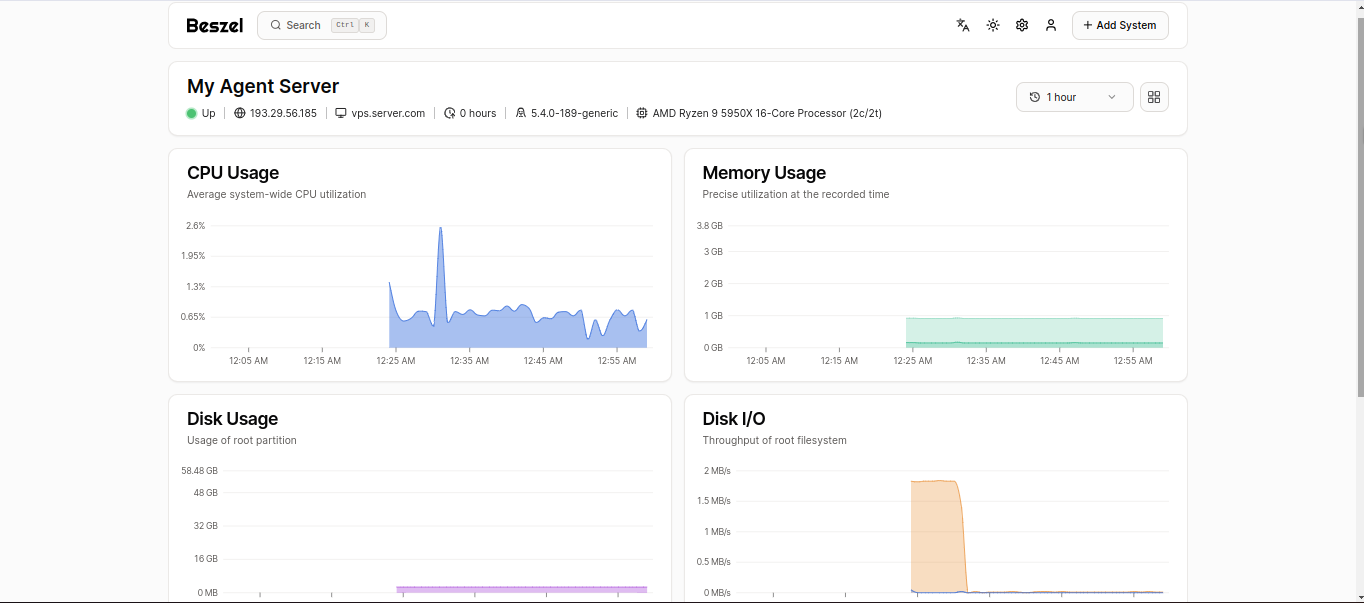
Click to open the created or added server, and you will be directed to the dashboard, where you can view graphs for Memory, CPU, Disk Usage, Disk I/O, and Bandwidth.
Install Agent/Client
You can copy a preconfigured command in the hub's web UI when adding a new system, so in most cases, you do not need to run this command manually.
This command downloads and runs the install-agent.sh script. The script installs the latest binary and creates a systemd service to ensure it runs after a reboot. Optionally, you can enable automatic daily updates.
curl -sL https://raw.githubusercontent.com/henrygd/beszel/main/supplemental/scripts/install-agent.sh -o install-agent.sh && chmod +x install-agent.sh && ./install-agent.shReplace Port_Number with the desired port and Public_Key with the actual public key (you can find the public key in the "Add System" section of the UI).
Note: Once the installation is complete, your system name will appear on the monitoring server, and you'll be able to monitor it from there.
Manual Download and Start
If you choose to manually download the agent, follow the steps below, Download the binary, Download the latest binary from the releases that match your server’s OS/architecture.
curl -sL "https://github.com/henrygd/beszel/releases/latest/download/beszel-agent_$(uname -s)_$(uname -m | sed 's/x86_64/amd64/' | sed 's/armv7l/arm/' | sed 's/aarch64/arm64/').tar.gz" | tar -xz -O beszel-agent | tee ./beszel-agent >/dev/null && chmod +x beszel-agentStart the agent
Use the following command to start the agent,
PORT=45876 KEY="<public key>" ./beszel-agentNote: Replace the
<public key>with the original Publick Key which is displayed on the Admin Dashboard
Update the agent
To update the agent, run,
./beszel-agent updateDone. You have successfully installed Beszel and Beszel Agent/Client. Enjoy seamless infrastructure management with Beszel!
CrownCloud - Get a SSD powered KVM VPS at $4.5/month!
Use the code WELCOME for 10% off!
1 GB RAM / 25 GB SSD / 1 CPU Core / 1 TB Bandwidth per month
Available Locations: LAX | MIA | ATL | FRA | AMS